M6 X 15mm Socket Head
Screw (pre-installed)
2-Ft Rail
Rail Coupling
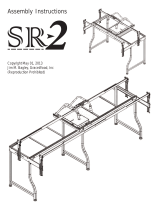
Step 9: Rail Assembly
Parts Needed:
4-Rail coupling
4-2-Ft Rail
4-Rail Assembly
Fig. 9-1
9-1: Loosen(2)screwsintheslots,ontheleftrail,ofeachrailassembly.PulltheRailsapartleaving
coupling still attached to right side of rail assembly.
Note: Don’t thread the M6 X 15mm Socket Head Screws out all the way.
9-2: Slide a Rail Coupling into the Left Rail and 2-Ft Rail. Align the slots on each rail with the slots in
the Rail Coupling. Tighten the (4) pre-installed screws in the coupling.
Note:ItmightbeatighttinsertingtheRailCouplingintotherailstoinsurequality.
9-3:Slidetheotherendofthe2-FtRailovertheRailCouplingontheRightRailassemblyand
tighten the screws, as shown in Fig 9-1.
9-4: Once your sewing machine is in place on the frame, insert the Take Up Rail through the throat
of your sewing machine and into the ratchet housings.
9-5: Insert the (2) Rail Assemblies into the ratchet housing.
9-6: Insert The Fourth Rail Assembly into the Right and Left Side Leg Brace.
Pg.8
M4 Allen
Wrench
Congratulations! Assembly of your 12-Ft Quilting Frame is now complete.
• You can now enjoy quilting on your new quilting Frame
• For questions on installing your fabric or for further questions, on assembly, of your quilting
frame, please refer to your Majestic Quilting Frame instruction booklet.
• For any further questions please contact your dealer or The Grace Company directly at
1-800-264-0644 or info@graceframe.com.