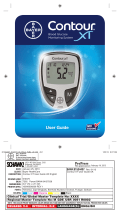
Important Things to Know
Your Ascensia CONTOUR Blood Glucose Meter is
specifi c for glucose and has been referenced
to plasma/serum values. Methods calibrated to
plasma/serum can be 9 to 15% higher than the
results of whole blood glucose assay methods.
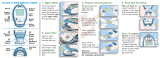
Always keep the test strips in the original
bottle. Tightly close the bottle immediately
after removing a test strip. The bottle is especially
designed to provide a dry environment for the test
strips. Extended exposure to room humidity from
leaving the bottle open or not storing the test strips in
the original bottle will damage your test strips.
Avoid excessive “milking” of your fi nger when forming a
drop of blood and test immediately after forming the
blood drop.
DO NOT drop blood directly on the fl at surface of
the test strip. Your test strip is designed to easily
“sip” the blood into the sample tip.
DO NOT press the test strip against your fi nger.
This may block the sample tip.
DO NOT use a test strip that appears damaged or
has been used. Test strips are for single use only.
IMPORTANT NOTE: Your meter has been preset and
locked to display results in mmol/L (millimoles of glu-
cose per liter). Results in mmol/L will always have
a decimal point (e.g., ); results in mg/dL
(milligrams of glucose per deciliter) will never have
a decimal point (e.g., ). Check your display to
ensure that results are being displayed in the expected
units; if they are not, contact Bayer Customer Service at the
number below.
Important Things to Know