Page is loading ...

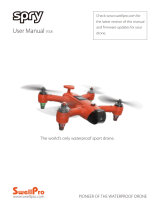
SwellPro Fisherman
User Manual
Visit www.swellpro.com for the latest version of this manual and firmware updates for
your drone and accessories.
v1.4.0 – August 2022

2 ©2022 SwellPro All Rights Reserved
Thank You
Thank you for purchasing the SwellPro Fisherman (FD1). We have designed and
manufactured the SwellPro Fisherman to the highest quality standards.
Like any precision electronic device, long and trouble-free operations rely on proper care
and maintenance. With proper care and maintenance, you should enjoy your drone for
many years to come.
It is important to familiarize yourself with the features of this unique drone by carefully
studying this manual.
Visit www.SwellPro.com for the latest manuals, firmware. Refer to the Version
Information section at the end of this manual, which details additions and corrections
to this manual.
Using this Manual
This document is designed to be printed or viewed on a computer or mobile device. If
used electronically, you can search directly for terms like “Propeller” to find references.
Additionally, you can click on any topic in the Table of Contents to navigate directly to
that topic.
Video Tutorials
Visit and subscribe to the SwellPro YouTube channel for tutorial videos and product
information. Scan this QR code with your camera phone to go to our channel.

©2022 SwellPro All Rights Reserved 3
Social Media
Join our SwellPro Facebook page to meet other users who share their adventures with
SwellPro. www.facebook.com/SwellPro/
Register Product Warranty
Please register your product as soon as possible to ensure warranty coverage.
https://www.SwellPro.com/info/register.html

4 ©2022 SwellPro All Rights Reserved
Contents
Thank You 2
Using this Manual 2
Video Tutorials 2
Social Media 3
Register Product Warranty 3
Contents 4
Product Overview 7
Aircraft Diagram 8
Remote Controller Diagram 9
Remote Controller Screen 10
Install the Aircraft 11
Install Propellers 12
Install/Removal of GPS Cover 13
Flight Battery 13
Charge 13
Install the Battery 14
Aircraft 16
Aircraft Status Indicator 16
Low Battery Warning 17
Waterproof Barometric Membrane 18
Remote Controller 20
Using the Remote Controller 20
Power On/OFF 20
Flight Mode Switch 20
Return to Home (RTH) 20
Payload Release 21
Control the Aircraft 21

©2022 SwellPro All Rights Reserved 5
Controller Pairing 23
Flight 23
Flight Safety and Environment 24
Flight Restrictions 25
Pre-Flight Checklist 25
Compass Calibration 26
Gyroscope Calibration 27
IMU Calibration 28
Basic Flight Steps 29
Starting/Stopping Motors (Arming the Drone) 29
Water Takeoff and Landing 31
Boat Takeoff and Landing 31
Power Flip 32
Flight Mode 32
Return to Home (RTH) 32
Low Battery Auto Return to Home 33
Low Battery Auto Payload Release 33
Payload Module 34
Payload Release 34
FPV Camera 34
SwellPro Goggle (GL1) 35
TrollSafe (Optional) 36
Appendix 37
Specification 37
Flying Guide 38
Image Transmitter Settings 39
Set Frequency Channel 40
Set Transmitted Power 40


©2022 SwellPro All Rights Reserved 7
Product Overview
SwellPro Fisherman (FD1) is specifically designed by SwellPro for fishing enthusiasts
and the drone fishing community. SwellPro has been focusing on the making of the
world’s first and the best waterproof drones since 2015. Now, we put our focus on the
making of the best fishing drone. FD1 was designed solely for drone fishing from day
one. We simplify the design for an easy operation and maintenance of the drone yet
remain the powerful propulsion system for swift flying and great payload capacity.
Together with the FPV camera, payload release, and TrollSafe modules, SwellPro
Fisherman is going to be your best fishing partner.

8 ©2022 SwellPro All Rights Reserved
Aircraft Diagram
[01] Barometric Membrane Cover
[06] Antenna
[11] Aircraft Head
[02] GPS Cover Lock
[07] Rubber Foot
[12] Power Button
[03] Propeller
[08] Landing Gear
[13] Payload Release
[04] Motor
[09] GPS Cover
[05] Aircraft Status Indicator
[10] Flight Control LED Indicator
(see-through)

©2022 SwellPro All Rights Reserved 9
Remote Controller Diagram
⚠ SwellPro Fisherman’s remote controller is NOT waterproof. Please stay out of water
when using it.
[01] Antenna
[07] Display Page Up
[13] Pitch Calibration
Adjustment
[02] Payload Release
Toggle
[08] Pairing Button
[14] Flight Mode Toggle
[03] Throttle Rudder
Adjustment
[09] Power Slider
[15] Return-to-Home
Toggle
[04] Left Joystick
(Throttle/Yaw)
[10] Display Page Down
[16] Handle
[05] Yaw Calibration
Adjustment
[11] Roll Calibration
Adjustment
[06] Display
[12] Right Joystick
(Pitch/Roll)
Drone GPS Location Accuracy ranges from 1-10 with 10 being the highest accuracy.

10 ©2022 SwellPro All Rights Reserved
A rating of 10 indicates a drone location accuracy <1m. 9=1.1 meters; 8=1.2 meters,
7=1.3 meters, 6=1.4 meters, 5=1.5 meters. In GPS mode, it is recommended to take
off with at least 5.
To reconfigure throttle modes:
1. Hold the left and right throttle to the lower left, then turn on the remote control to
enter the factory setting page.
2. Press [10] to select “Def sticks mode”. Then turn [5] to the left to enter.
3. Press [7] or [10] to switch throttle mode. The default throttle mode is Model 2.
4. After switch to the desired throttle mode, turn [11] to the right to exit the page. Restart
the remote control to finish the reconfiguration.
Note: Changing the throttle modes changes the lock/unlock gestures accordingly.
Mode 1 & Mode 2: Use inward gesture to unlock the aircraft, outward gesture to lock the
aircraft.
Mode 3 & Mode 4: Use outward gesture to lock the aircraft, inward gesture to unlock the
aircraft.
Remote Controller Screen
[01] Drone Height
[02] Drone Distance
[03] Vertical Speed
[04] Horizontal Speed
[05] Satellite Signal
[06] Drone Battery
Voltage
[07] Flight Mode
(G: GPS/ H: Headless/ A:
ATTI)
[08] Remote Controller
Signal
[09] Remote Controller
Battery Voltage

©2022 SwellPro All Rights Reserved 11
[10] Pitch Angle
[11] Yaw Angle
[12] Latitude
[13] Longitude
[14] Flight Time
[15] Roll Angle
[16] Roll Channel
[17] Pitch Channel
[18] Throttle Channel
[19] Pan Channel
If Ch1-Ch4 shows any
volume (indicate by the
black bar) when you are
not controlling the
joystick. You need to
calibrate the channel
accordingly. Use the
calibration adjustment
slider by the joystick to
calibrate the joystick
input.
[20] Firmware Version
[21] Hardware Version
Install the Aircraft
The SwellPro Fisherman has two pairs of propellers - two clockwise propellers and two
counter-clockwise propellers. The hub of each motor shows the type of propeller used
for that motor. Propellers should not be attached to the wrong motors.

12 ©2022 SwellPro All Rights Reserved
Install Propellers
To install or remove propellers:
1. Check the propeller’s marking (CW/CCW) to see if it
matches the motor. CCW propellers to CCW motors,
same for CW.
2. Place the propeller on the motor, rotate the propeller in
the hub for 1/8th of a turn until it engages.
3. Hold the arm of the aircraft tight with one of your
hands.
4. Rotate the propellers in the direction indicated by the
lock signs with your other hand.
5. To remove the propeller, repeat steps 3&4.
Always place one hand under the motor to support it when installing or removing
propellers. Failure to provide this support could result in bending or breaking the landing
gear.
The propellers are sharp, please be careful to avoid injury.
Before each flight, please check that the propellers are smooth all over and are
correctly installed and securely fastened.
Spin each propeller by hand to check that the motors are free of sand or salt and
spin freely.

©2022 SwellPro All Rights Reserved 13
Install/Removal of GPS Cover
Ensure to align the FRONT arrow to the front of the aircraft. Failure to do so may
result in aircraft out-of-control and crashing.
When installing the GPS cover, ensure the sealing is clean and free of sand.
Otherwise, it might lead to water ingress.
When installing the GPS cover, tighten the knobs properly. Don’t tighten it too much.
Otherwise, the GPS cover might be distorted and affect the ingress protection.
Flight Battery
Ensure to fully charge the battery before flying.
Charge
Connect the balance charger to a power outlet. Then connect the battery’s balance
charging cable (white plug) to the balance charger.

14 ©2022 SwellPro All Rights Reserved
Charging Status
If 4 LED starts flashing while charging the battery, the balance charger might be
malfunctioning. Stop charging the battery right away.
ONLY charge the 4S LiHV battery with the balance charger. DO NOT charge any other types of
batteries using the balance charger. *Fisherman flight battery is 4S LiHV battery.
Install the Battery

©2022 SwellPro All Rights Reserved 15
To install the battery:
1. Fold the cables to the right side of the battery.
2. Insert the battery into the aircraft chamber at an angle as shown above.
3. Tightly strap the battery with the Velcro strap.
4. Plug the yellow plug into the power port.
Always strap the battery tightly to prevent the battery from moving or falling out.

16 ©2022 SwellPro All Rights Reserved
Aircraft
Aircraft Status Indicator
There are two types of aircraft status indicators:
1. Aircraft status indicators (red), which are on the front arms.
2. GPS signal status indicators (green), which are on the rear arms.
The red LED indicators are used to identify the head of the drone.

©2022 SwellPro All Rights Reserved 17
All the status indicator messages are going to prompt on the remote controller
screen.
Low Battery Warning
The FD1 has two low battery warnings to help the pilot manage the drone’s battery life.
Each time a battery level alarm is activated, the remote controller will beep and vibrate to
alert the pilot.
Level 1 alarm: The drone battery level has
reached 14.6V. The remote controller
screen will prompt “LOW BATTERY; Return
Aircraft”. Front drone status indicators will
flash a pattern of 3 red lights. The aircraft
is going to proceed auto payload release,
then proceed to auto return-to-home.
Level 2 alarm: The drone battery level has
reached 14.2 V. The battery icon on the
remote controller screen will flash. The
battery level is now below 10% and you
should plan to land the drone safely. The
remote controller screen will prompt “Low
battery – Auto Landing”.

18 ©2022 SwellPro All Rights Reserved
After 10 seconds, the drone will initiate an
in-place auto-landing to protect the drone
and battery. The front aircraft status
indicators are going to flash red
constantly.
During auto-landing, you can control the joystick to overwrite the auto-landing and regain
control of the drone. However, flying the drone below 14.2 V is highly dangerous since
the battery will not be able to maintain the flight and will result in the aircraft crashing.
During the flight, it is important to constantly monitor the battery level as flying in the
conditions like strong wind and rapid movements and heavy load can deplete the battery
more rapidly.
It is dangerous to continue flying the drone below 14.2 V. This could result in damage
to the battery and the risk of the drone crashing.
Waterproof Barometric Membrane
The waterproof barometric membrane is SwellPro’s featured technology. It allows air to
pass through the internal chamber of the aircraft to ensure the barometer’s proper
functioning yet keeps the water from getting in to ensure the Fisherman’s all waterproof
design. The waterproof barometric membrane is delicate yet an extremely important
part for proper flying and waterproofing. Therefore, you should pay special attention to
the proper use of waterproof barometric membrane during your operation.
• Rinse the waterproof barometric membrane thoroughly with freshwater every time
after flying.
If the aircraft is not flying stably during hovering, or the aircraft is not flying normally
during ascend or descend, the waterproof barometric membrane might be damage.
Please take off the top barometric membrane cover and replace the waterproof
barometric membrane.
To replace the waterproof barometric membrane:

©2022 SwellPro All Rights Reserved 19
1. Use a sharp tool (such as a knife) to remove the adhesive, then take off the top
cover.
2. Peel off the old waterproof barometric membrane. Clean the surface barometric
vent and make sure there is no residue on the surface.
3. Remove the 3M paper from the waterproof barometric membrane and press it
firmly on the barometric vent to ensure a tight seal.
4. Attach the adhesive to the top cover and press it down over the waterproof
barometric membrane.

20 ©2022 SwellPro All Rights Reserved
Remote Controller
⚠ SwellPro Fisherman’s remote controller is NOT waterproof. Please stay out of water
when using it.
Using the Remote Controller
Power On/OFF
Power On: Slide up
Power Off: Slide down
Flight Mode Switch
G: GPS mode
H: Headless mode
A: ATTI mode
Return to Home (RTH)
Normal: RTH is off
Return Home: turn on RTH
/