Page is loading ...

4MP POE PTZ AI Dome Camera
User Manual
Version 1.0.0
April 19th, 2023

2
Contents
Installation Guide .................................................................................................................3
Camera Access Setup ...........................................................................................................4
App Setup ............................................................................................................................5
Desktop Access Setup...........................................................................................................9
Live ......................................................................................................................................9
Playback .............................................................................................................................11
Setup..................................................................................................................................13
Camera ..............................................................................................................................13
Network .............................................................................................................................20
Event ..................................................................................................................................24
Storage...............................................................................................................................30
Destination.........................................................................................................................33
System ...............................................................................................................................35
Information ........................................................................................................................37
Alarm .................................................................................................................................37

3
Welcome
Thank you for purchasing an Amcrest camera!
This user manual is designed to be a reference tool for the installation and operation of your AI camera.
Here you can find information about the camera’s features, functions, and information to aid in troubleshooting.
Many of the setup and installation sections below have corresponding videos on YouTube
To access the setup videos, please go to http://amcrest.com/videos
For access to the quick start guide and other support information, go to http://amcrest.com/support
To contact Amcrest support, please do one of the following:
Visit http://amcrest.com/contact
Important Security Warning
To keep your Amcrest camera secure and prevent unauthorized access, please make sure to follow the steps
below:
• Always make sure that your camera has the latest firmware as listed on
www.amcrest.com/firmware
• Never use the default password for your camera. Always ensure that your
password is at least 810 characters long and
contains a combination of lowercase characters, uppercase characters as well as
numbers.
Overview
This 4MP PTZ outdoor security camera delivers stunning ultra-high-definition video in 4-megapixel resolution, at 30
frames per second. It features a super wide 2.7 – 13.5mm lens and PTZ functionality which allows it to detect
objects from up to 678ft away. The camera provides 4 IR LEDs which allow the camera to see at night from up to
98ft away.
The camera also features a built-in microphone and speaker, on-board motion detection, built-in AI features, such
as IVS, which can be used for enhanced perimeter protection, and smart motion detection which allows the
camera to detect only human and vehicles in the area. The camera also features flexible storage options to store
recordings to a microSD card (up to 256GB), FTP, NVR, or using the Amcrest Cloud. All these features can be
accessed and customized using a web browser or even using the Amcrest View Pro app using a mobile device.
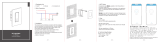
Installation Guide
Before physically installing your camera, please make sure the installation surface can support at least 3x the
weight of the camera. The camera will already come attached with its recommended mounting bracket, wall
anchors, mounting screws, as well as an installation template sticker. Before installing your camera and using a
microSD card to store footage, please make sure the microSD card (sold separately) is installed first before
mounting your camera.

4
MicroSD Card Installation
A microSD card can be used to store and view local recordings/snapshots. This camera requires a class 10 or above
microSD card formatted to FAT32 to function. The camera can handle a max of 256GB of microSD card storage.
1. Remove the hatch on the back of the camera using a Phillips head screwdriver.
2. Locate the provided microSD card slot and insert the microSD card into the slot and secure.
3. Place the hatch back onto the camera and hand tighten to secure it to the camera.
Physical Installation
Please make sure the installation surface can support at least 3x the weight of the camera. A drill and Phillips head
screwdriver may be required to physically install your camera.
1. Peel the sticker of the installation sticker off and place it onto the mounting surface. Use a drill to drill the
installation holes and insert the included wall anchors into the holes.
2. Align the holes in the installation bracket with the wall anchors. Insert the installation screws into the holes and
use a Phillips head screwdriver to secure the installation bracket to the mounting surface.
Camera Access Setup
This section will provide information on how to setup and access your camera through the following methods:
Local PC (Web User Interface (Web UI), Amcrest Surveillance Pro, etc.)
Amcrest View Pro app
Amcrest Cloud
Note: The default username and password for the camera is admin.

5
App Setup
Amcrest cameras can be used on your mobile device using the following apps:
Amcrest Cloud
Amcrest View Pro
Both apps are free and available in the App Store and Google Play store. Please note, each app requires an iOS 6.0
or later version. Android will require a 3.0 or later version OS to run these apps.
For purposes of this guide, we will use iOS, though both apps. The App Interface may differ slightly from the
screenshots below as updates are released. Below, you will find instructions on how to set up your camera up on
the Amcrest cloud app as well as the Amcrest View Pro app.
Amcrest Cloud App Setup
Amcrest Cloud allows you to access your device from anywhere in the world. Please note, you will need an
Amcrest Cloud account to proceed with Amcrest Cloud app setup. You can register for a cloud account in the
Amcrest Cloud app or from the Amcrest Cloud website at amcrestcloud.com
Please make sure your camera is plugged into a power source and your Ethernet cable is connected from the
camera to your router.
Make sure your camera and mobile device are on the same network during setup.
To ensure the camera connects to the cloud, a reboot of your camera is recommended. To add your camera onto
the Amcrest Cloud app, follow these steps:
1. Download and open the Amcrest Cloud app from the App Store or Play Store.
Note: Connect your mobile device to the same network that your camera is on.
2. Register for an Amcrest Cloud account. To register click on Sign Up and fill out the form to complete registration.

6
3. Tap on Add Camera
4. Give your camera a name (Ex. Garage, Living Room,
Kitchen, etc.) and tap Next to continue.
5. Scan the QR code on the back/side/bottom of
the camera or manually enter the camera’s serial
number into the Enter camera S/N (serial number)
field. Press Next to continue.
6. If you are adding a new camera that does not have
a set password the app will automatically detect that
a new camera is being added. Tap OK to proceed.

7
7. Set a new password for your camera. The password
must be between 8 to 32 characters long and contain
only letters and numbers. When you have finished
setting the password for your camera, enter the
password again in the Confirm Camera Password
section. Tap Next to continue.
8. Confirm and adjust any needed settings for your
camera. When all settings have been confirmed, tap
Finish.
For more information about the Amcrest Cloud app and its features, visit amcrest.com/support
Amcrest View Pro Setup
To add your PoE camera to the Amcrest View Pro app follow these steps:
The following steps will continue the app setup process for an Android phone and, though the iPhone version of
the app has slightly different steps, most of this process is identical and easy.
Download and install the Amcrest View Pro app for the App Store or Google Play Store.
Open the app on your mobile device and allow the app to load.
3. Tap “Start”.
4. Tap “POE Camera”.

8
5. Tap “P2P Connection”.
Note: IP/Domain/DDNS can be used to establish a
DDNS connection. For more information on how to
setup a DDNS connection, visit amcrest.com/support
6. Scan the QR code. The QR code can be found on
the serial tag along with a scannable barcode.
7. Create a name for the device and enter a username
and password. The default username and password
will be admin.
Tap “Start Live View”.
8. Update the default password for the device and
tap “Start Live View” to view the device.

9
For more information about Amcrest View Pro and its functionalities visit amcrest.com/support
Desktop Access Setup
After the camera has been successfully connected to your network the web UI can now be accessed. This camera
features the latest in Javascript technology which allows you to access your camera using a wide variety of web
browsers including Google Chrome, Firefox, Safari, or other mainstream web browsers using your PC or Mac.
To access your camera from your computer you will need to first locate the camera’s IP address. To locate the
camera’s IP address is it highly recommended to download our free Amcrest IP Config Tool software. The Amcrest
IP Config Tool can be downloaded at the following web page: amcrest.com/downloads
In the All-Downloads menu, click on IP Config Software to begin the free download. Once the download has
completed installing, locate the IP address associated with the device you would like to view in the browser. Open
the web browser and enter this IP address into the browser. Press Enter to access the web user interface. Enter
the username and password for your camera and click Login to access the web UI.
Live
By default, the interface opens on the Live tab. The live view tab allows the user to see a live video feed from the
camera. Use the Live, Playback, and Cloud Storage options to access these features. For more information on the
features provided in this menu, please refer to the details provided below.
Mainstream: Displays the mainstream feed of the camera.
Sub stream: Displays the sub stream of the camera (704*480(D1) resolution).
Setup: Access and customize the camera’s features and sub menus.
Alarm: View specific alarm types detected by the camera.
Logout: Log the user out of the interface.
Button
Function Name
Function Description
Water Removal
Use this option to remove condensation or water droplets from the lens
of the camera.
Warning Light
Click this option to manually activate the built-in red/blue LEDs.
Siren Activation
Click this option to manually activate the built-in siren.
Snapshot
Click this button to manually take a snapshot of the live view.
Audio
Click this button to enable or disable audio output from the camera. This
feature allows the user to listen in on the audio the camera’s microphone
is picking up.
The PTZ tab allows the user to pan, tilt, zoom and focus the camera. Below is a screenshot of the PTZ Control
menu.

10
The PTZ control panel allows the user to position the camera in different ways.
The arrows on the PTZ control panel allow the user to move the camera’s position in a specific direction. The
button in the middle of the direction arrow allows the user to select an area in the live view to zoom in on. The
speed dropdown box allows the user to control the speed at which the camera moves. The values range from 1 to
8, 8 being the fastest.
The zoom, focus, and iris buttons allow the user to digitally zoom in and out, focus, and just the camera’s image on
the live screen.
The dropdown box under PTZ Function allows the user to configure presets, scans, tours, etc. Preset allows the
user to designate specific PTZ positions for the camera. To create and manage presets, follow the steps below:
Configure the camera positioning as needed.
Input the preset number, and then click the + Add button.
Click - Del to delete the current preset.
Click Go To access a preset.
Tour allows the user to string multiple presets together. To create and manage tours, follow the steps below:
Ensure you have more than 1 preset configured already.
Input the tour value and click Start.
Input the preset value and then click the Add Preset button to add a preset.
Continue adding presets as needed.
Click Del Preset to remove a preset from the tour.
Click - Del to delete the entire tour.
Pattern allows the user to set specific PTZ patterns. The set patterns allow the camera to move specifically or focus
on specific areas automatically. To create a pattern, follow these steps:
From the PTZ Function dropdown box, select Pattern.

11
Ensure you have a preset initial setup for the camera.
Input the preset value and click Start.
To stop the pattern, click Stop.
Pan allows the user to set pan presets. The set pan preset allows the camera to pan to specific areas automatically.
To create a pan, follow these steps:
From the PTZ Function dropdown box, select Pan.
Ensure you have a preset initial setup for the camera.
Input the preset value and click Start.
To stop the pattern, click Stop.
Assistant allows the use to set assigned presets via an auxiliary device. This function may vary from model to model
and may not be available in every model camera. To establish an assistant preset, follow the steps provided below:
From the PTZ Function dropdown box, select Assistant.
Ensure you have a preset initial setup for the camera.
Input the preset value and click Aux On.
To stop the pattern, Aux Off.
Position ABS allows the user to set horizontal, vertical, and zoom values. Once set, the camera will zoom to the
indicated input values. To set a position ABS preset follow the steps provided below:
From the PTZ Function dropdown box, select position ABS.
Type in the horizontal angle value, this can range from 0 ~ 3600.
Type in the vertical angle value, this can range from 150 ~ 900.
Type in the zoom value, this can range from 1 ~ 128.
Click Go To to have to have the camera position itself to the entered values.
Note: To remove the PTZ control options from the live view menu, click the PTZ icon located at the bottom of the
interface.
Playback
The Playback tab allows the user to playback the camera’s recorded video. Below is a screenshot of the Playback
tab:

12
This is the interface for the playback menu. There are 5 main sections:
Section 1: Allows the user to filter between video (.mp4) or snapshots (.jpg).
Section 2: Allows the user to playback events based on calendar dates. If events are detected via the microSD card
the days will be highlighted indicating recordings are available for that day.
Section 3: The File List option provides a list of all recorded file types reported on a specific day. The files
represented in the file list can be played back and downloaded from this menu.
Section 4: Once a recording is selected from the file list, use the play, and stop button to play or stop the
recording. An additional slider option will be displayed by hovering the mouse pointer over the playback interface.
Section 5: These options allow the user to filter between recording types such as, General, Motion, Alarm, or
Manual events. The “All” option will select all recording types in the interface.
Cloud Storage
The Cloud Storage tab allows the user quick access to the Amcrest Cloud website.
At this website (amcrestcloud.com) users can register for new accounts as well as view or modify existing accounts.
For more information on Amcrest Cloud visit: amcrest.com/cloud

13
Setup
The Setup tab allows the user to change different camera settings including configuration, network, PTZ, AI events,
profile management, etc.
Camera
This menu tab allows the user to change different camera settings for video, audio, and encode settings.
Configuration
The Configuration menu allows the user to configure image profiles for normal, day, and night usage. Use the PTZ
control options provided to pan/tilt or zoom the feed while configuring the camera. Below is an explanation for
each of the fields on the Configuration tab in the Configuration menu item:
Picture
Profile: This dropdown box allows the user to select which profile to modify. The 3 options are Day, Night, and
General.
Brightness: This slider is used to adjust playback and record video window brightness. The value ranges from 0 to
100. The default value is 50. The larger the number, the brighter the video is. When you input the value here, the
bright section and the dark section of the video will be adjusted accordingly. You can use this function when the
whole video is too dark or too bright. Please note the video may become hazy if the value is too high. The
recommended value ranges from 40 to 60.
Contrast: This slider is used to adjust playback and recorded video window contrast. The value ranges from 0 to
100. The default value is 50. The larger the number is, the higher the contrast is. You can use this function when
the whole video’s brightness is accurate but the contrast is not correct. Please note the video may become hazy if
the value is too low. If this value is too high, the dark section may lack brightness while the bright section may
overexpose. The recommended value ranges from 40 to 60.
Saturation: This slider is used to adjust playback and recorded video window saturation. The value ranges from 0
to 100. The default value is 50. The larger the number, the stronger the color is. This value has no effect on the
general brightness of the whole video. The video color may become too strong if the value is too high. For the grey
part of the video, distortion may occur if the white balance is not accurate. Please note the video may not be clear
if the value is too low. The recommended value ranges from 40 to 60.
Chroma CNT: This slider is used to adjust how pure or monochromatic the image will be compared to a white
surface. The value ranges from 0 to 100. The default value is 50. The larger the number, the stronger the purity of
the color. The value has no effect on general brightness or clarity of the video stream however, if the values are
too high it could cause stream issues. It is recommended to keep this value at the default setting of 50 to avoid
streaming issues.
Sharpness: This slider is used to adjust the sharpness of the video. The value ranges from 0 to 100. The larger the
value is, the clearer the edges are and vice versa. Note: The higher the value, the higher likelihood of picture noise
occurring. The default value is 50 and the recommended value ranges from 40 to 60.
Sharpness CNT: This slider is used to adjust how pure or monochromatic the sharpness of the image will be
compared to a white surface. The default value is 50. The larger the number, the stronger the purity of the
sharpness. The value has no effect on general brightness or clarity of the video stream however, if the values are
too high it could cause stream issues. It is recommended to keep this value at the default setting of 50 to avoid
streaming issues.
Gamma: This slider is used to adjust the gamma of the video. The larger the number, the brighter the video is.
The default value is 50 and the recommended value ranges from 40 to 60.

14
Flip: This dropdown box allows the user to flip the video feed picture. Flipping the picture is recommended only if
the camera is mounted upside down.
To reset to default settings, click the Reset Defaults button. To refresh the screen, click on Refresh. To save the
settings, click the Save button.
Exposure
This menu allows the user to adjust exposure settings. Below is an explanation of the features listed in this menu.
Profile: This dropdown box allows the user to select which profile to modify. The 3 options are Day, Night, and
General.
Anti-Flicker: These options allow the user to select what type of anti-flicker technology will be used for the video
feed. The three options are 50 Hz, 60 Hz, and Outdoor. The desired option should offset any flickering effect
caused by the electrical current used in the specific area.
Mode: This dropdown menu allows the user to modify certain exposure settings related to the device such as, gain
priority, shutter priority or setting a manual gain setting.
Auto: This setting allows the camera to automatically adjust exposure settings while in use.
Shutter Priority: This setting will maximize the fastest shutter speed and will sacrifice the gain in return.
gain First: This setting will maximize the gain for the ideal exposure. Low Noise Basically turns up the ISO
to the best setting without sacrificing exposure timing.
Manual - This setting lets you select your shutter speed and have the gain adjust automatically. Selecting
customized range will let you both the shutter speed an adjust the gain manually.
Exposure Comp: Use this slider to adjust the exposure compensation. The values range from 0 – 100, 50 is default.
2D NR: This radio button allows the user to turn the 2D Noise Reduction feature on or off.
Grade: This slider allows the user to specify the level of 2D noise reduction level. The value ranges from 1 -50.
3D NR: This radio button allows the user to turn the 3D Noise Reduction feature on or off.
3D NR Level: This slider allows the user to specify the 3D Noise Reduction level. The value ranges from 1-50.
To reset to default settings, click the Reset Defaults button. To refresh the screen, click on Refresh. To save the
settings, click the Save button.
BLC Mode
This menu allows the user to adjust back light compensation settings. Below is an explanation of the features
provided in this menu.
Profile: This dropdown box allows the user to select which profile to modify. The 3 options are Day, Night, and
General.
Mode: This dropdown menu allows the user to select different backlight compensation modes:
OFF: Disables BLC mode.
BLC: Backlight compensation: Default will use the whole image to balance the lighting settings, and
Customized will allow you to balance the lighting settings from the target area.
HLC: Highlight compensation is a feature that came out of necessity due to overexposure from strong light
sources like headlights or spotlights.
WDR: Wide Dynamic Range makes multiple scans of a scene to provide one balanced and unwashed
image that is clear for the user.
To reset to default settings, click the Reset Defaults button. To refresh the screen, click on Refresh. To save the
settings, click the Save button.

15
WB
This menu allows the user to adjust white balance settings. Below is an explanation of the features provided in this
menu.
Profile: This dropdown box allows the user to select which profile to modify. The 3 options are Day, Night, and
General.
Mode: This option allows the user to choose between different white balance modes.
Auto: Allows the camera to automatically adjust white balance settings while in use.
Indoor: Allows the camera to automatically adjust white balance settings while indoors (Indoor lights)
Outdoor: Allows the camera to automatically adjust white balance settings while outdoors. (Natural light).
ATW: Stands for auto tracing white balance. This setting allows the user to allow the camera to
automatically detect white balance values based on the surrounding environment of the camera. This can
be set for indoor or outdoor use.
Customized: Displays options that will allow the user to manually adjust specific red or blue values related
to white balance.
Sunny: Allows the camera to automatically adjust white balance settings in sunny or bright conditions.
Sodium Lamp: Allows the white balance of the video stream to be adjusted according to light and dark
environments. The overall effect is based on the concept of a sodium lamp which adjusts different light
spectrums of the video stream based on its surrounding environment.
To reset to default settings, click the Reset Defaults button. To refresh the screen, click on Refresh. To save the
settings, click the Save button.
Day & Night
This menu allows the user to adjust day and nighttime settings. Below is an explanation of the features provided in
this menu.
Profile: This dropdown box allows the user to select which profile to modify. The 3 options are Day, Night, and
General.
Type: These radio buttons are used to process and filter day & night transitions. ICR will be enabled
by default.
Electrical: This option uses an image processing method for day & night transition.
ICR: This option uses an IR filter for day and night transitions.
Mode: This menu allows user to select day & night presets based on the surrounding environment of the camera.
For more information on the items listed in this field, refer to the information provided below:
Auto: Uses day and night sensitivity settings to change between color mode, infrared, and black& white
modes.
Color - Always represents picture in color, does not use IR or black and white mode. Performs poorly in
dimly lit areas unless you are using the Starlight series cameras.
B&W - Allows the user to set the video stream to black and white, however, if the illuminated image is too
dark it will switch to IR mode.
Sensitivity: This option allows the user to change the Day/Night Sensitivity of the camera. The three options are
Low, Middle, and High. The higher the sensitivity, the quicker the camera will change into another mode
depending on the light levels.
Delay: This dropdown box allows the user to set a delay in seconds for how long it takes to switch between Day
and Night modes. The values range from 2 seconds to 10 seconds.

16
To reset to default settings, click the Reset Defaults button. To refresh the screen, click on Refresh. To save the
settings, click the Save button.
Focus & Zoom
This menu allows the user to adjust digital focus and zoom settings.
Profile: This dropdown box allows the user to select which profile to modify. The 3 options are Day, Night, and
Normal.
Digital Zoom: These radios buttons allow the user to turn digital zoom on and off.
Zoom Speed: This slider allows the user to adjust the zoom speed of the lens. The default should be 100, but it can
range from 0 ~ 100.
Focus Mode: This dropdown menu is used to set focus settings for the camera. The items listed in this menu are as
follows:
Auto: Allows the user to set auto focus settings for the camera.
Semi Auto: Allows the user to set focus settings as well as having the camera automatically detect optimal
focus settings.
Manual: Allows the user to have full manual control of focus control settings.
Focus Limit: Allows the user to set focus limits (in cm) within the camera. The default is set to auto, which
automatically will control focus limits, however, the settings can range from 5cm ~ 10cm.
Sensitivity: This menu allows the user to set sensitivity settings for focus limits. The camera is
usually set to Default which allows the focus limits to be adjusted automatically, however, they can
also be set to high or low.
Lens Initialization: This option allows the user to reset their focus & zoom settings to default.
To reset to default settings, click the Reset Defaults button. To refresh the screen, click on Refresh. To save the
settings, click the Save button.
Night Vision
This menu allows the user to set night vision settings. The IR light on your camera allows the device to activate
night vision. Below is an explanation of the features provided in this menu.
Profile: This dropdown box allows the user to select which profile to modify. The 3 options are Day, Night, and
General.
Mode: This dropdown box allows the user to select whether to turn the IR light on or off.
SmartIR – Sets the IRs to automatically turn on or off based on Day & Night conditions.
Manual – Manually turns the IRs on.
OFF – Manually turns the IR LEDs off. Please note, IR LEDs will not turn on at all when this option is
selected.
Profile Management
The profile management menu allows the user to manage global profile settings. Below is an explanation for each
of the fields on the Profile Management tab:
Profile Management: This set of radio buttons allow the user to set what basis the profile management settings
run on. There are 3 options: General, Full Time, and Schedule.

17
General: The system can automatically alternate between night and day based on the profiles for each.
Full Time: The system sticks to one profile the entire time it is running.
Schedule: allows the user to dictate which times of the day are designated for the day profile and the night profile.
To reset to default settings, click the Reset Defaults button. To refresh the screen, click on Refresh. To save the
settings, click the Save button.
Video
The video menu allows the user to view and adjust encode, snapshot, overlay, and path settings. Below is an
explanation for each of the fields on the Video tab in the Video menu item:
Encode Mode: This dropdown box allows the user to select a compression protocol.
Smart Codec: This option allows the user to enable or disable the smart codec. Smart codec is a function in most
Amcrest cameras which aim to reduce bandwidth consumption without losing visible image quality by intelligently
increasing compression where it will not make a visible difference in the scene.
Resolution: This dropdown box allows the user to set the resolution. The system supports various resolutions, and
they can be selected from this dropdown list.
Frame Rate (FPS): This dropdown box allows the user to select a frame rate. Frame rate settings are measured in
frames per second (FPS) and can range from 1f/s to 25f/s in PAL mode and 1f/s to 30f/s in NTSC mode.
Bit Rate Type: This dropdown box allows the user to select a bit rate type. The system supports two-bit rate types:
CBR and VBR. In VBR mode, video quality can be set.
Reference Bit Rate: This is the recommended bit rate value according to the resolution and frame rate selected.
Bit Rate: This dropdown box allows the user to select a bit rate.
Frame Interval: This field allows the user to set the P frame amount between two I frames. The value ranges from
1 to 150 seconds. Default value is 50. Recommended value is frame rate *2.
Watermark Settings: This function allows the user to verify if the video has been tampered with.
Watermark Character: This field allows the user to set the watermark’s text. The default string is Digital CCTV. The
maximum length is 85 characters. This string can only include numbers, characters, and underscores.
Sub Stream is a lower quality stream that allows the feed to take up less resources and bandwidth when
streaming. The Mainstream and the Sub Stream have the same fields. Sub Stream can be enabled by checking the
box next to Enable.
To reset to default settings, click the Reset Defaults button. To refresh the screen, click on Refresh. To save the
settings, click the Save button.
Snapshot
The snapshot tab allows the user to adjust all snapshot settings sent by the camera. This includes the type, size,
quality and intervals. Below is an explanation of the features provided in this menu.
Snapshot Type: This dropdown box allows the user to select a snapshot mode. There are two snapshot modes:
General: Snapshots are taken as scheduled.
Event: Snapshots occur when a motion detection alarm or tampering alarm is triggered
Image Size: By default, the screenshot size is the same size as the video feed’s resolution.
Quality: Allows the user to select image quality. Quality is adjusted on a scale of 1-6 (Best).
Interval: This is to set snapshot frequency. The value ranges from 1 to 7 seconds. The maximum setting for a
customized interval is 50000s/picture.

18
To reset to default settings, click the Reset Defaults button. To refresh the screen, click on Refresh. To save the
settings, click the Save button.
Overlay
The overlay tab allows the user to customize channel titles, time, OSD information, and/or custom titles. This menu
also allows the user to enable or disable the Amcrest overlay on the live view screen. Please note, due to certain
limitations within the camera, it does not offer features such as privacy masking. Below is an explanation of the
features in this menu.
Channel Title
The Channel Title menu allows the user to enable, disable, and customize channel titles in the interface.
Enable – This radio button allows the user to enable the channel title. The channel title can be placed in different
areas of the interface by clicking the title on the interface and moving it with your mouse to a desired area.
Disable – This radio button is used to disable the channel title feature.
Input Channel Title: This field allows the user to customize the text in the channel title.
To reset to default settings, click the Reset Defaults button. To refresh the screen, click on Refresh. To save the
settings, click the Save button.
Time
The time menu allows the user to enable or disable the date & time overlay on the live view screen. Enable the
Display Day of the Week option to display the day of the week as well in the overlay.
Enable – This radio button allows the user to enable the time overlay. The time overlay can be placed in different
areas of the interface by clicking the overlay on the interface and moving it with your mouse to a desired area.
Disable – This radio button is used to disable the time overlay.
Display Day of the Week: This checkbox is used to allow the day of the week to be displayed in the time overlay.
To reset to default settings, click the Reset Defaults button. To refresh the screen, click on Refresh. To save the
settings, click the Save button.
OSD Info
The OSD info menu allows the user to enable certain OSD overlay options such as presets, temperature, PTZ Life
Warning, Coordinates, Zoom, North, Pattern, Text Overlays, and Input Texts. Below is a description of the features
provided in this menu.
Preset: Displays an overlay of a preset on the live view screen when a preset is activated.
Temperature: Displays the current temperature of the internal components of the device.
Coordinates: Displays the latitude and longitude coordinates of the device.
Zoom: Displays the current optical zoom distance while zooming. The camera can zoom up to 25x.
Text Overlay: Allows the user to customize and display a text overlay on the live view screen. To use this feature,
enter customized text into the Input Text boxes and click Save to set the overlay. Use the Text Align dropdown
menu to align the text. Click Save to set the overlay.
Text Align: Align the OSD text to the right or left of the overlay box.

19
To reset to default settings, click the Reset Defaults button. To refresh the page, click the Refresh button. To save
the settings, click the Save button.
Logo Overlay
The logo overlay menu allows the user to enable or disable the Amcrest overlay logo in the interface.
Enable – This radio button allows the user to enable the Amcrest Overlay. The logo can be placed in different areas
of the interface by clicking the overlay on the interface and moving it with your mouse to a desired area.
Disable – This radio button allows the user to disable the Amcrest Overlay.
To reset to default settings, click the Reset Defaults button. To refresh the screen, click on Refresh. To save the
settings, click the Save button.
Custom Overlay
This menu allows the user to enable or disable a customized logo on the live view interface.
To set a custom overlay, click on the enable radio button. Enter the custom text into the Input Custom OSD box
and use the Text Align dropdown box to align the text. To enter multiple custom overlays, click on the (+) option
and enter the texts into the appropriate boxes. Use the text align menu to align the text left or right.
To reset to default settings, click the Reset Defaults button. To refresh the screen, click on Refresh. To save the
settings, click the Save button.
Path
The path menu allows the user to designate a file path on the computer for downloading recordings. Please note,
if you are using a browser that does not support a plugin, such as Google Chrome, Firefox, Safari, etc. the default
file path will be set as the browser’s default download folder. However, this can be updated if accessing the
camera in IE mode on Edge, for more information please visit amcrest.com/support
Audio
This menu allows the user to modify audio settings for the camera. This device has a built-in microphone and
speaker. Below is an explanation for each of the fields on the Audio menu:
Main Stream: Sets the audio settings for the main stream:
Enable: This checkbox allows the user to enable audio recording.
Encode Mode: This dropdown box allows the user to select an audio format. By default, the camera will
be set to AAC encoding.
Sampling Frequency: This dropdown box allows the user to select a sampling frequency for the audio.
Sub Stream: Sets the audio settings for the sub stream:
Enable: This checkbox allows the user to enable audio recording.
Encode Mode: This dropdown box allows the user to select an audio format. By default, the camera will
be set to AAC encoding.
Sampling Frequency: This dropdown box allows the user to select a sampling frequency for the audio.
Audio in Device: This field allows the user to select what source to get audio from. The default is the camera’s
built-in mic. Alternatively, the line in mic can be selected.
Noise Filter: This dropdown box allows the user to enable or disable the audio noise filter function. This function
provides cleaner audio quality when enabled.
Microphone Volume: This slider allows the user to select the microphone volume. The value ranges from 0 to 100.

20
Speaker Volume: This slider allows the user to select the speaker volume. The value ranges from 0 to 100.
To reset to default settings, click the Reset Defaults button. To refresh the page, click the Refresh button. To save
the settings, click the Save button.
Network
This menu section allows the user to change network settings for the camera.
TCP/IP
TCP/IP stands for Transmission Control Protocol/Internet Protocol and it is the language/protocol that allows
communication between an internet-connected device, whether on a local network and the Internet. This screen
allows for TCP/IP settings to be modified for the camera to establish a connection to the network.
Below is an explanation of the fields on the TCP/IP settings tab:
Host Name: This text field allows the user to change the host device name for the camera. This field supports a
maximum of 15 characters.
Ethernet Card: This dropdown box allows the user to select which internet access device to use. If the device is
connected to a wired connection and a wireless one at the same time, then this box will have options to pick either
of the connections. The Set as Default button allows the user to select one of the connection methods as the
default one.
Mode: Static vs DHCP: This radio button allows the user to choose between a static IP address, and a dynamic IP
address. DHCP stands for Dynamic Host Configuration Protocol, and this enables the camera to automatically
obtain an IP address from another network device such as a server or more commonly, a router. When the DHCP
function is enabled, the user cannot modify the IP address, Subnet Mask, or Default Gateway, as these values are
obtained from the DHCP function. To view the current IP address, DHCP needs to be disabled.
MAC Address: This field shows the camera’s MAC address, which is unique to this device. This number is read only
and is used to access a local area network (LAN).
IP Version: This dropdown allows the user to select the IP version. The two options are IPV4 and IPV6.
IP Address: This field allows the user to enter a custom IP address.
Subnet Mask: This field allows the user to enter a custom subnet mask.
Default Gateway: This field allows the user to enter a custom default gateway.
Preferred DNS Server: This field allows the user to enter the preferred DNS server IP address.
Alternate DNS Server: This field allows the user to enter the alternate DNS server IP address.
Enable ARP/Ping to set IP Address Service: This checkbox allows the user to enable the ARP/Ping service to change
the IP address service. For more information on this feature, click the help button while on the TCP/IP settings tab.
To reset to default settings, click the Reset Defaults button. To refresh the page, click the Refresh button. To save
the settings, click the Save button.
P2P
The P2P settings screen is where users can use a QR code to connect their smartphone or tablet to the camera.
This feature needs to be enabled for use with the Amcrest View app, or other software that requires P2P.
Below is an explanation of the fields on the P2P settings tab:
/