Page is loading ...

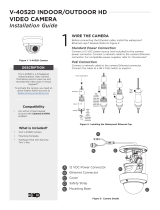
IP4M-1083EW-AI / IP4M-1083EB-AI
4MP Outdoor POE+ PTZ AI Speed Dome Camera
User Manual
Version: 1.0.0
November 20th, 2020

2
Contents
Welcome ...................................................................................................................................................................................................................... 3
Features and Specifications ........................................................................................................................................................................................ 4
Device Overview .......................................................................................................................................................................................................... 5
Connection & Installation ........................................................................................................................................................................................... 6
Camera Installation ..................................................................................................................................................................................................... 6
Camera Access Setup .................................................................................................................................................................................................. 8
App Setup..................................................................................................................................................................................................................... 9
Desktop Access Setup ............................................................................................................................................................................................... 13
Live ............................................................................................................................................................................................................................. 15
AI Live ......................................................................................................................................................................................................................... 18
Playback ..................................................................................................................................................................................................................... 19
Cloud Storage ............................................................................................................................................................................................................ 20
Setup .......................................................................................................................................................................................................................... 20
Camera ....................................................................................................................................................................................................................... 21
Configuration ............................................................................................................................................................................................................. 21
Video .......................................................................................................................................................................................................................... 26
Audio .......................................................................................................................................................................................................................... 34
Network ..................................................................................................................................................................................................................... 35
TCP/IP ......................................................................................................................................................................................................................... 35
Connection ................................................................................................................................................................................................................. 38
DDNS .......................................................................................................................................................................................................................... 39
SMTP (Email) .............................................................................................................................................................................................................. 39
UPnP ........................................................................................................................................................................................................................... 41
HTTPS ......................................................................................................................................................................................................................... 42
PTZ .............................................................................................................................................................................................................................. 42
Event .......................................................................................................................................................................................................................... 45
Video Detection ......................................................................................................................................................................................................... 45
Smart Motion Detection ........................................................................................................................................................................................... 49
Audio Detection......................................................................................................................................................................................................... 49
Smart Plan .................................................................................................................................................................................................................. 51
Deep IVS ..................................................................................................................................................................................................................... 53
Face Detection ........................................................................................................................................................................................................... 63
Video Metadata ......................................................................................................................................................................................................... 66
Alarm .......................................................................................................................................................................................................................... 69
Abnormality ............................................................................................................................................................................................................... 71
Storage ....................................................................................................................................................................................................................... 73
Schedule ..................................................................................................................................................................................................................... 73
Destination................................................................................................................................................................................................................. 76
Record Control........................................................................................................................................................................................................... 78
System ........................................................................................................................................................................................................................ 79
General ....................................................................................................................................................................................................................... 79
Manage Users ............................................................................................................................................................................................................ 81
Safety.......................................................................................................................................................................................................................... 81
Default Settings ......................................................................................................................................................................................................... 82
Import/Export ............................................................................................................................................................................................................ 82
Auto Maintain ............................................................................................................................................................................................................ 83
Upgrade...................................................................................................................................................................................................................... 83
Information ................................................................................................................................................................................................................ 84
Version ....................................................................................................................................................................................................................... 84
Log .............................................................................................................................................................................................................................. 84
Online Users............................................................................................................................................................................................................... 84
Life Statistics .............................................................................................................................................................................................................. 85
Alarm .............................................................................................................................................................................85
Logout ............................................................................................................................................................................86

3
Welcome
Thank you for purchasing an Amcrest camera!
This user manual is designed to be a reference tool for the installation and operation of your AI camera.
Here you can find information about the camera’s features, functions, and information to aid in troubleshooting.
Many of the setup and installation sections below have corresponding videos on YouTube
To access the setup videos, please go to http://amcrest.com/videos
For access to the quick start guide and other support information visit: http://amcrest.com/support
To contact Amcrest support, please do one of the following: visit http://amcrest.com/contacts
Important Security Warning
To keep your Amcrest camera secure and prevent unauthorized access, please make sure to follow the steps
below:
• Always make sure that your camera has the latest firmware as listed on
www.amcrest.com/firmware
• Never use the default password for your camera. Always ensure that your
password is at least 810 characters long and
contains a combination of lowercase characters, uppercase characters as well as
numbers.
Important Safeguards and Warnings
1.Electrical Safety
All installation and operation should conform to your local electrical safety codes.
The product must be grounded to reduce the risk of electric shock.
We assume no liability or responsibility for any fires or electrical shock caused by improper handling or installation.
2.Transportation Security
Heavy stress, violent vibrations, and excess moisture should not occur during transportation, storage, and
installation of the device.
3.Installation
Handle the device with care. The camera requires a PoE+ connection (802.3at) or a DC 12V/3A power adapter can
be used to power the device.
Note: This is a POE+ powered device. Make sure to use the proper POE+ switch when operating. For more
information on POE+ please go to http://amcrest.com/poeplus
Please ensure the installation surface can handle up to 3x the weight of the camera (6.61lbs.) before installation.
4.Repair Professionals
All the examination and repair work should be done by qualified service engineers. We are not liable for any
problems caused by unauthorized modifications or user-attempted repair.

4
5.Environment
The camera should be kept in a cool, dry place away from direct sunlight, flammable materials, explosive
substances, etc. This product should be transported, stored, and used only in the specified environments as stated
above. Do not aim the camera at a strong light source, as it may cause overexposure of the picture, and may affect
the longevity of the camera’s sensors. Ensure that the camera is in a well-ventilated area to prevent overheating.
6. Operation and Maintenance
Do not touch the camera sensor or lens directly. To clean dust or dirt from the lens, use an air blower or a
microfiber cloth.
7. Accessories
Be sure to use only the accessories recommended by manufacturer. Before installation, please open the package
and check to ensure that all the components are present. Contact the retailer that you purchased from, or Amcrest
directly if anything is broken or missing in the package.
Features and Specifications
Overview
Amcrest provides an excellent digital surveillance product that can be useful to a wide variety of users. This camera
connects uses an internet connection to allow the user to access all its features. It is easy to use and can be viewed
on a computer via the built-in web user interface or on your smartphone using the Amcrest View Pro app.
This camera adopts a high-quality design to achieve high levels of reliability and security. It can be configured to
work locally, as well as on a network. This camera works using a POE connection and interfaces with most
networks through the Ethernet port of your router, POE injector or POE switch.
Features
This camera has the following features:
Network Access
The camera can be accessed remotely from a wide variety of internet connected devices, including PCs, Mac, iOS,
and Android devices.
Cloud Storage Functionality
Amcrest offers premium cloud storage options to enable long-term storage. Amcrest Cloud also allows the user to
easily locate and view recordings for playback from any internet connected computer or smartphone
(iOS/Android).
Advanced Network Protocol Support
This camera is UPnP compatible, and includes functionality for use with DDNS, and other protocols to allow remote
and local connection with a large variety of network hardware.
AI Features
This camera includes advanced IVS features such as tripwire, intrusion, etc. which help to increase the overall
efficiency and accuracy of the camera. The camera also includes face detection as well as the ability to detect and
retain video metadata types such as motor vehicles, non-motor vehicles, or people.

5
Device Overview
The diagram below shows the camera’s rear panel. Remove the rear panel of the camera using the included hex
wrench to access the factory reset button and microSD card slot.
The camera can support up to a 256GB microSD card to store recordings and events. To install the microSD card,
locate the microSD card slot on the board and insert the card into the slot. Be sure to secure the rear panel back
onto the camera before physically installing the camera.

6
Connection & Installation
This section provides information about the connection and installation of the Amcrest Smart PTZ camera.
Note: This is a POE+ device and requires a POE+ compatible router/switch to function. For more information on
POE+ visit: http://amcrest.com/poeplus
Installation Guide
Wiring Overview
The camera will come attached with several dongle wire connections. These wires are used to power the device as
well as provide the ability to connect an external microphone, speaker, or alarm. Please refer to the information
provided below for more details.
Wire
Purpose
Power Connection
Use these wires to splice the included DC24V, 2.5A switching adapter to camera.
Please do not use this connection if you are powering your device using a PoE+
connection.
Ethernet Connection
Use this port to power your device and transmit data using PoE+.
Audio In/Out Connection
Use these wires to splice an external audio device, such as a microphone or
speaker to the device.
Alarm Connection
Use these wires to splice an external alarm to the device.
Please refer to the tags specified on the dongle wire connections for more details.
Camera Installation
Overview
Included with your camera you will notice a large wall mount bracket. This wall mount bracket will be used to
secure your camera in place as well as to the mounting surface. Also included with your wall mount bracket will be
three stainless steel locking screws, and mounting screws (expansion bolts). These will be used to secure the
camera to the mount bracket as well as the mounting surface.

7
Note: Additionally, a 2 carabiners link will be included with the camera. This piece will be used to provide
additional support to the camera after installation.
When installing the camera, do not pull the cable to lift the camera when moving the device as it may cause
internal damage to the camera.
Installation Steps
Before installation, please ensure the installation surface is close to a network and power connection. Please
refer to the steps below to being installation.

8
Step 1: Using the mounting holes on the wall-mounted bracket bottom as a template (align the bottom of the
bracket with the circular hole on the wall) and using a marker or pen draw the installation holes on the mounting
surface.
Step 2: Drill the holes. Remove the nut and 2 washers from the expansion bolt and insert the sleeve of the
expansion bolt and the bolt into the drilled holes. Do not lose the nuts and washers.
Step 3: Take the dongle wire connections and run them through the arm of the wall-mounted bracket. Align the
top of the camera with the arm of the wall-mounted bracket and place the bracket flush with the camera.
Connect any wires necessary to its applicable dongle wire connection.
Using the Switching Adapter to Power the Camera
The camera can be powered using a PoE+ connection which will provided data and power to your camera,
however, if PoE+ is not an option the camera can be powered using the included DC24V, 2.5A switching adapter.
If you are using this method to power your camera, please ensure that a wall outlet is close by. DO NOT APPLY
POWER TO THE ADAPTER UNTIL THE CONNECTION HAS BEEN SECURED.
It is recommended to use gloves during this process. To begin, splice the ground wire (black) to the marked
ground wire of the switching adapter and splice the DC24V (+) (red) wire to the power in wire of the switching
adapter. Use electrical tape to ensure the connection is secured. Then, connect the power cable to the switching
adapter and connect it to a wall outlet. The device will begin to boot.
Note: Ensure that an Ethernet cable is attached to the camera and your network before installing the camera and
bracket to the mounting surface.
Step 4: Insert an included rubber washer into the back of the wall-mounted bracket and secure the camera to the
wall-mounted bracket using the 3 stainless steel locking screws. Insert the screws into the respective holes on the
arm of the wall-mounted bracket and use the included allen wrench to tighten the screws to secure the camera
to the arm.
Step 5: Feed any wiring back into the installation surface and place the installation holes on the bottom of the
mounting bracket into the 4 expansion bolts located on the mounting surface. Insert the split washer and solid
washer onto the expansion bolt and hand tighten the nut to the bolt. Repeat the process for the other 3
expansion bolts. Then, using a socket wrench or similar tool, secure the nuts to the expansion bolts. The camera
is now successfully installed. For more information on using your camera, please refer to the included quick start
guide, or for more details visit amcrest.com/support
Camera Access Setup
This section of the guide will provide the user with information on how to setup access to the camera through any
of the following methods.
Default Username and Password
To login to the system for the first time, use one of the following default username/password combinations. Once
you have successfully logged in, it is highly recommended to change the password for security reasons.
Username: admin
Password: admin
Note: Logging in for the first time will prompt the user to change the password to the admin account.

9
How to Setup the Camera
To make your experience with your Amcrest camera easy and simple, we have provided multiple ways to set up,
view, and operate your camera depending on your needs. Please follow the instructions on this page to set up your
camera in the way that works best for you.
App Setup
Amcrest cameras can be used on your mobile device using the following apps:
• Amcrest Cloud
• Amcrest View Pro
Both apps are free and available in the App Store and Google Play store. Please note, each app requires an iOS 6.0
or later version. Android will require a 3.0 or later version OS to run these apps.
For purposes of this guide, we will use iOS, though both apps. The App Interface may differ slightly from the
screenshots below as updates are released. Below, you will find instructions on how to set up your camera up on
the Amcrest cloud app as well as the Amcrest View Pro app.
Amcrest Cloud App Setup
Amcrest Cloud allows you to access your device from anywhere in the world. Please note, you will need an
Amcrest Cloud account to proceed with Amcrest Cloud app setup. You can register for a cloud account in the
Amcrest Cloud app or from the Amcrest Cloud website at https://amcrest.com/cloud/
• Please make sure your camera is plugged into a power source and your Ethernet cable is connected from the
camera to your router.
• Make sure your camera and mobile device are on the same network during setup.
• To ensure the camera connects to the cloud, a reboot of your camera is recommended. To add your camera
onto the Amcrest Cloud app, follow these steps:
1. Download and open the Amcrest Cloud app from the App Store or Play Store.
Note: Connect your mobile device to the same network that your camera is on.
2. Register for an Amcrest Cloud account. To register click on Sign Up and fill out the form to complete registration.

10
3. Tap on Add Camera
4. Give your camera a name (Ex. Garage, Living Room,
Kitchen, etc.) and tap Next to continue.
5. Scan the QR code on the back/side/bottom of
the camera or manually enter the camera’s serial
number into the Enter camera S/N (serial number)
field. Press Next to continue.
6. If you are adding a new camera that does not have
a set password the app will automatically detect that
a new camera is being added. Tap OK to proceed.

11
7. Set a new password for your camera. The password
must be between 8 to 32 characters long and contain
only letters and numbers. When you have finished
setting the password for your camera, enter the
password again in the Confirm Camera Password
section. Tap Next to continue.
8. Confirm and adjust any needed settings for your
camera. When all settings have been confirmed, tap
Finish.
For more information about the Amcrest Cloud app and its features, visit amcrest.com/support
Amcrest View Pro Setup
To add your PoE camera to the Amcrest View Pro app follow these steps:
The following steps will continue the app setup process for an Android phone and, though the iPhone version of
the app has slightly different steps, most of this process is identical and easy.
Download and install the Amcrest View Pro app for the App Store or Google Play Store.
Open the app on your mobile device and allow the app to load.

12
3. Tap “Start”.
4. Tap “POE Camera”.
5. Tap “P2P Connection”.
Note: IP/Domain/DDNS can be used to establish a
DDNS connection. For more information on how to
setup a DDNS connection, visit amcrest.com/support
6. Scan the QR code. The QR code can be found on
the serial tag along with a scannable barcode.

13
7. Create a name for the device and enter a username
and password. The default username and password
will be admin.
Tap “Start Live View”.
8. Update the default password for the device and
tap “Start Live View” to view the device.
For more information about Amcrest View Pro and its functionalities visit amcrest.com/support
Desktop Access Setup
The AI features associated with your camera are only accessible and customizable using the built-in web user
interface via a web browser.
This camera features the latest in JS technology which allows you to access your camera via a wide variety of web
browsers including, Google Chrome, Firefox, Safari and other mainstream web browsers via your PC or Mac
computer. For more information on how to access your camera from your computer please refer to the
information below.
To access your camera from your computer you will need to first locate the camera’s IP address. To locate the
camera’s IP address is it highly recommended to download our free Amcrest IP Config Tool software. The Amcrest
IP Config Tool can be downloaded at the following web page: amcerest.com/downloads
In the All Downloads menu, click on IP Config Software to begin the free download. Once the download has
completed installing, locate the IP address associated with the device you would like to view in the browser.

14
Open a web browser and enter this IP address for your camera into browser and press Enter.
In the web user interface, enter the login credentials for your device. If this is the first time accessing the device,
the username and password will both be admin. Click on Login.
If this is the first-time logging into your device, you will be prompted to modify the password for your device. To
modify the password, enter the new password you would like to use in the New Password field and confirm. The
password used should be between 8 and 32 characters long with a combination of letters and numbers.
Click OK when and allow the stream to load.

15
Live
This section of the manual details the camera’s live interface, as well as all the operations the camera can perform.
The live view tab allows the user to see a live video feed from the camera. The live view tab has five main sections:
Section 1: This bar allows the user to select which stream type and which protocol they want to choose.
Section 2: The functions bar allows the user to perform different camera functions while in live mode. See the
table below for an explanation of the different functions available:
Button
Function Name
Function Description
Regional Focus
This option allows the user to select a region on the live view interface
which can be automatically focused by the camera.
Alarm Output
This option is used to generate an alarm output signal. This button
becomes red/grey depending on alarm output activation or cancellation.
Digital Zoom
This option allows the user to select a region on the live view interface
which can be digitally zoomed in or out.
Snapshot
Click this button to take a screenshot of the live feed. The picture is saved
at the path specified in Setup -> Camera -> Video -> Path.
Triple Snapshot
Click this button to take 1 screenshot per second for 3 seconds. The
pictures are saved at the path specified in Setup -> Camera -> Video ->
Path.
Manual Record
Click this button to manually record video. The video is saved at the path
specified in Setup -> Camera -> Video -> Path.
Manual Track
This option allows the user to select a region on the live view interface
which can be manually tracked by the camera.
Audio
Click this button to enable or disable audio output from the camera. This
feature allows the user to listen in on the audio the camera’s microphone
is picking up.

16
Bidirectional Talk
Click and hold this button to enable bidirectional talk. This feature allows
the user to broadcast audio from their computer to the camera. While
this is active, the camera’s speaker is shut off to keep audio quality high.
Section 3: These options are used to access camera setup options (Setup), configure alarms (Alarm), or logout of
the web user interface (Logout).
Section 4: These options are used to access the live view interface (Live), access video metadata using the AI Live
menu, access playback, as well as a shortcut to cloud storage. For more information about Amcrest Cloud storage,
please visit https://amcrest.com/cloud
Section 5: This bar allows the user to change video settings for the live playback screen. See the below table for an
explanation of the video settings:
Button
Function Name
Function Description
Image Adjustment
This button opens the image adjustment toolbar, which allows the user to
adjust brightness, contrast, saturation, and hue for the live feed’s picture.
Adapt/Original Size
This button allows the user to switch between displaying the original size of the
stream in its set resolution, or to adapt to the size of the monitor display the
feed is being viewed on.
Full Screen
This button allows the user to make the live feed go into full screen mode.
Double click the mouse or click the ESC button to exit full screen mode.
Width/Height Ratio
This button allows the user to change the width/height ratio for the live feed.
The options are Original and Adaptive. Original uses the aspect ratio of the
stream’s set resolution, and adaptive fits the feed to the aspect ratio of the
monitor display the feed is being viewed on.
Stream Fluency
This button allows the user to change the stream fluency. There are 3 options.
Realtime reduces delay and decreases fluency, and Fluency has a larger delay,
but the video stream becomes more fluid.
IVS Overlay
This button allows the user to enable or disable IVS overlays on the live view
screen.
Pan Tilt Zoom
This button allows the user to show or hide the pan tilt zoom control panel on
the live view screen.
Section 6: This section of the Live tab shows the picture that the camera is broadcasting. The bitrate is shown in
the top left corner, the native resolution is shown in the top right corner, the time stamp is shown below the
native resolution, and the camera type is shown in the bottom left corner.
Section 7: This section of the Live tab shows the PTZ functionality of the camera, zoom, focus, as well as other PTZ
functions such as tour presets, etc.
PTZ Control
The PTZ tab allows the user to pan, tilt, zoom and focus the camera. Below is a screenshot of the PTZ Control
menu.

17
The PTZ control panel allows the user to position the camera in different ways
The arrows on the PTZ control panel allow the user to move the camera’s position in a specific direction. The
button in the middle of the direction arrow allows the user to select an area in the live view to zoom in on. The
speed dropdown box allows the user to control the speed at which the camera moves. The values range from 1 to
8, 8 being the fastest.
The zoom, focus, and iris buttons allow the user to digitally zoom in and out, focus, and just the camera’s image on
the live screen.
The dropdown box under PTZ Function allows the user to configure presets, scans, tours, etc. Preset allows the
user to designate specific PTZ positions for the camera. To create and manage presets, follow the steps below:
Configure the camera positioning as needed.
Input the preset number, and then click the + Add button
Click - Del to delete the current preset.
Click Go To access a preset.
Tour allows the user to string multiple presets together. To create and manage tours, follow the steps below:
Ensure you have more than 1 preset configured already.
Input the tour value and click Start.
Input the preset value and then click the Add Preset button to add a preset.
Continue adding presets as needed.
Click Del Preset to remove a preset from the tour.
Click - Del to delete the entire tour.
Pattern allows the user to set specific PTZ patterns. The set patterns allow the camera to move in specific or focus
on specific areas automatically. To create a pattern, follow these steps:
From the PTZ Function dropdown box, select Pattern
Ensure you have a preset initially setup for the camera.

18
Input the preset value and click Start.
To stop the pattern, click Stop.
Pan allows the user to set pan presets. The set pan preset allows the camera to pan to specific areas automatically.
To create a pan, follow these steps:
From the PTZ Function dropdown box, select Pan.
Ensure you have a preset initially setup for the camera.
Input the preset value and click Start.
To stop the pattern, click Stop.
Assistant allows the use to set assigned presets via an auxiliary device. This function may vary model to model and
may not be available in every model camera. To establish an assistant preset, follow the steps provided below:
From the PTZ Function dropdown box, select Assistant.
Ensure you have a preset initially setup for the camera.
Input the preset value and click Aux On.
To stop the pattern, Aux Off.
Position ABS allows the user to set horizontal, vertical, and zoom values. Once set, the camera will zoom to the
indicated input values. To set a position ABS preset follow the steps provided below:
From the PTZ Function dropdown box, select position ABS.
Type in the horizontal angle value, this can range from 0 ~ 3600.
Type in the vertical angle value, this can range from 150 ~ 900.
Type in the zoom value, this can range from 1 ~ 128.
Click Go To to have to have the camera position itself to the entered values.
AI Live
The AI Live tab allows the user to access video metadata such as detected people, faces, motor vehicle, and non-
motor vehicles such as, bikes, mopeds, etc. in real time. Please note, a video metadata preset must be set for this
feature to function, for more information on using video metadata, please refer to section, “Video Metadata”.
Below is a screenshot of the AI Live menu.

19
Below is a description of the features in this menu:
Section 1: Provides a live view of the camera.
Section 2: Allows the user to view human figures detected by the camera as well as facial images if a face is
detected.
Section 3: Allows the user to change video settings related to the AI Live interface.
Full Screen
This button allows the user to make the live feed go into full screen mode. Double
click the mouse or click the ESC button to exit full screen mode.
Stream Fluency
This button allows the user to change the stream fluency. There are 3 options.
Realtime reduces delay and decreases fluency, and Fluency has a larger delay, but
the video stream becomes more fluid.
IVS Overlay
This button allows the user to enable or disable IVS overlays on the live view
screen.
Section 4: The area in which snapshots of video metadata, such as motor vehicle, non-motor vehicle, facial and
people images will be shown. Please note, the images in this menu will only be visible based on how often the
interface is refreshed.
Section 5: These options provide a tally of how many facial images, people, non-motor vehicle, and vehicles were
detected by the camera. Please note, click the gear wheel option to select between viewing a Smart Plan such as
Face Detection or Video Metadata.
Playback
The Playback tab allows the user to playback the camera’s recorded video. Please note, for a better experience it is
recommended to use a plugin-based browser such as Internet Explorer.
Below is a screenshot of the Playback tab:

20
This is the interface for the playback menu. There are 8 main sections:
Section 1: Allows the user to filter between video (.mp4) or snapshots (.jpg).
Section 2: Allows the user to playback events based on calendar dates. If events are detected via the microSD card
the days will be highlighted indicating recordings are available for that day.
Section 3: The File List option provides a list of all recorded file types reported on a specific day. The files
represented in the file list can be played back and downloaded from this menu.
Section 4: Use the play option to play all recordings provided in the time bar. To stop a recording press the Stop
button. Click the Next Frame button to view the recording frame by frame. Click the Slow button to play the
recording in slow motion. Click the Fast button to fast forward the recording. Use the volume bar to increase or
decrease the audio of the recording.
Section 5: These options allow the user to filter between recording types such as, General, Motion, Alarm, or
Manual events. The “All” option will select all recording types in the interface.
Section 6: Provides a timeline of each recording detected for a selected day. Use your mouse to scroll back and
forth on the timeline to view a recording at a specific time.
Section 7: Use these options to cut and download a specific recording from the timeline. Enter a start and end time
and click the cut (scissors) icon. Once the recording has been cut, click the download icon to download the cut
recordings.
Section 8: Use these options to select between a 24-hour, 2-hour, 1 hour, or 30-minute intervals on the timeline.
Cloud Storage
The Cloud Storage tab allows the user quick access to the Amcrest Cloud website. On this website users can
register for new accounts as well as view or modify existing accounts. For more information on Amcrest Cloud visit:
amcrest.com/cloud
Setup
The Setup tab allows the user to change different camera settings Below is a screenshot of the setup tab:
/