Page is loading ...

Amcrest IP2M-858W / IP2M-858B
2MP Outdoor WiFi PTZ Speed Dome Camera
User Manual
Version: 1.0.3
Revised October 19
th
, 2018

2
Contents
Welcome .............................................................................................................. 4
Important Security Warning ................................................................................ 4
Important Safeguards and Warnings ................................................................... 5
1. Features and Specifications ............................................................................ 6
1.1 Overview..................................................................................................... 6
1.2 Features ...................................................................................................... 6
2. Device Overview .............................................................................................. 7
3. Connection & Installation ................................................................................ 8
3.1 Connection Guide ....................................................................................... 8
3.2. Installation Guide ...................................................................................... 8
3.3 MicroSD card Installation ........................................................................... 9
3.4 Physical Installation Guide ....................................................................... 10
4. Camera Access Setup ..................................................................................... 13
4.1 Default Username and Password ............................................................. 13
4.2 Camera setup methods ............................................................................ 13
4.3. App Setup ................................................................................................ 14
4.4 Desktop Access Setup ............................................................................... 23
4.5 Amcrest Cloud Desktop Setup .................................................................. 25
4.6 Web Access Setup (AmcrestView.com) ................................................... 25
4.7 Remote Web Access Setup ....................................................................... 34
5. Web Operation and Interface ........................................................................ 38
5.1. Live ........................................................................................................... 38
5.3 Playback .................................................................................................... 43
5.4. Cloud Storage .......................................................................................... 44
5.5.1 Camera .................................................................................................. 45
5.5.1.2. Profile Management ......................................................................... 52
5.5.2 Video...................................................................................................... 53
5.5.3. Audio .................................................................................................... 58

3
5.6. Network ................................................................................................... 59
5.6.4. DDNS ..................................................................................................... 63
5.7. PTZ ........................................................................................................... 73
5.8. Event ........................................................................................................ 75
5.9. Storage .................................................................................................... 86
5.9.2 Destination ............................................................................................ 88
5.10. System ................................................................................................... 92
5.11. Information ........................................................................................... 98
5.5 Alarm .......................................................................................................... 101
5.6 Logout ........................................................................................................ 101
6. FAQs/Troubleshooting ................................................................................. 102
Glossary of Terms ............................................................................................ 104
FCC Statement ................................................................................................. 106
IC Warning Statement ..................................................................................... 107
Appendix A: Toxic or Hazardous Materials or Elements ................................. 107

4
Welcome
Thank you for purchasing an Amcrest Speed Dome PTZ camera!
This user manual is designed to be a reference tool for the installation
and operation of your IP camera.
Here you can find information about the camera’s features and
functions, as well as information to aid in troubleshooting.
Many of the setup and installation sections below have
corresponding videos on YouTube
To access the setup videos, please go to http://amcrest.com/videos
For access to the quick start guide and other support information, go
to http://amcrest.com/support To contact Amcrest support, please
do one of the following:
Visit http://amcrest.com/contacts and use the email form
Call Amcrest Support using one of the following numbers
Toll Free: (888)212-7538
International Callers (Outside of US): +1-713-8938956
USA: +1-713-893-8956
Canada: 437-888-0177
UK: 203-769-2757
Email Amcrest Customer Support [email protected]
Important Security Warning
To keep your Amcrest camera secure and prevent unauthorized access,
please make sure to follow the steps below:
• Always make sure that your camera has
the latest firmware as listed on
www.amcrest.com/firmware
• Never use the default password for your camera. Always ensure
that your password is at least 8-10 characters long and contains
a combination of lowercase characters, uppercase characters as
well as numbers.

5
Important Safeguards and Warnings
1.Electrical Safety
All installation and operation should conform to your local
electrical safety codes.
The product must be grounded to reduce the risk of
electric shock. We assume no liability or responsibility
for any fires or electrical shock caused by improper
handling or installation.
2.Transportation Security
Heavy stress, violent vibrations, and excess moisture should not
occur during transportation, storage, and installation of the
device.
3.Installation
Handle the device with care. Do not apply power to the camera
before completing installation. Do not place objects on top of
the camera.
4.Repair Professionals
All the examination and repair work should be done by qualified
service engineers.
We are not liable for any problems caused by unauthorized
modifications or user-attempted repair.
5.Environment
The camera should be kept in a cool, dry place away from direct
sunlight, flammable materials, explosive substances, etc.
This product should be transported, stored, and used only
in the specified environments as stated above. Do not aim
the camera at a strong light source, as it may cause
overexposure of the picture, and may affect the longevity
of the camera’s sensors.
Ensure that the camera is in a well-ventilated area to prevent
overheating.
6. Operation and Maintenance
Do not touch the camera sensor or lens directly.
To clean dust or dirt off the lens, use an air blower or a
microfiber cloth.
7. Accessories

6
Be sure to use only the accessories recommended by
manufacturer. Before installation, please open the package
and check to ensure that all the components are present.
Contact the retailer that you purchased from, or Amcrest directly
if anything is broken or missing in the package.
1. Features and Specifications
1.1 Overview
The Amcrest Outdoor Speed Dome PTZ camera is an
excellent tool for digital surveillance that can be useful to a
wide variety of users. The camera connects to any router
and uses an internet connection to allow the user to access
all of its functionality from many internet connected
devices. It’s easy to use and can be set up in a relatively
small amount of time. It has various functions such as
recording, playback, and monitoring functionality and it
synchronizes audio and video by default.
This Outdoor Speed Dome PTZ camera adopts a high-quality
design to achieve high levels of reliability and security. It can
be configured to work locally, as well as remotely over the
internet.
1.2 Features
The Amcrest Outdoor Speed Dome PTZ camera has the following
features:
Network Access
The Outdoor Speed Dome PTZ camera connects to a wide
variety of routers to connect to the internet, using a wired
PoE connection. Once setup, the camera can be accessed
remotely from a wide variety of internet connected devices,
including PCs, iPhones, iPads, Android tablets, and Android
phones.
Cloud Storage Functionality
The Outdoor Speed Dome PTZ camera can record video and
audio streams to the Amcrest Cloud service to enable long-
term storage for recordings. Amcrest Cloud also allows the
user to easily find and download recorded video for
playback from any internet connected PC or Mac computer.

7
Advanced Playback Function
This device supports real-time recording and supports
searching through recorded footage, fast forward playback,
and downloading of videos and screenshots. The Outdoor
Speed Dome PTZ camera can also playback in slow motion,
backwards, and frame by frame as needed. When recording,
the Outdoor Speed Dome PTZ network camera shows a
date/time overlay to ensure accurate viewing of events
when they occurred. Lastly, the Outdoor PTZ camera can
support video enlargement of certain zones within a stream.
Advanced Network Protocol Support
The Outdoor Speed Dome PTZ camera is UPnP compatible,
and includes functionality for use with PPPoE, DDNS, and
other protocols to allow remote and local connection with a
large variety of network hardware. Note: There may be
slight differences in functionality due to the existence of
different product series.
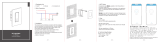
2. Device Overview
The diagram below shows the camera’s rear panel.
The images below show the microSD card slot for the camera.
The microSD card slot can be found on the board behind the
reset switch:

8
3. Connection & Installation
This section provides information about the connection and
installation of the Amcrest Outdoor PTZ camera.
Note: This is a POE+ device and requires a POE+ compatible
router/switch to function.
3.1 Connection Guide
The camera initially should be connected via the following
method:
3.2. Installation Guide
Important Notice: Prior to installation ensure that the
installation environment can support at least 3 times the weight
of the camera.
When accessing your camera, you will notice a few additional
wiring connections associated with the device. These
connections contain a power connection and ground, an
Ethernet connection, audio wires, and alarm wiring.
POWER - This connection is optional for this device since the
device will draw power via an Ethernet cable (PoE) however,
the option is there. The camera will require a basic 12V DC
power adapter. This wire also has a optional grounding
(EARTH) wire for additional grounding of the unit.

9
Ethernet Connection - This connection is used to transmit data and transmit
PoE power to the unit. The unit is PoE + (802.3at) compatible.
AUDIO - This connection provides two-way audio to the unit. The red
wire is for AUDIO OUT, the white wire is for AUDIO IN, and the black
wire is there to ground the audio.
ALARM - This connection provides alarm in and alarm out features to an
external alarm or security system. The basic overview of these wires are
as follows:
Blue
Alarm OUT1
Green
Alarm COM1 (Communication
Port)
Yellow & Green
Alarm Ground
Red
Alarm IN1
Brown
Alarm IN2
3.3 MicroSD card Installation
To install a microSD card into your camera, please refer to the
step by step guide below.
Note: Please refer to section 2, Device Overview, for more
details on how to access the microSD card slot.
1. Locate the microSD card slot can be found on the board
behind the reset switch.
2. Slide the microSD card into the SD card slot, gold pins down.

10
3. Gently press the card into place within the slot to click and lock the
microSD card into place.
3.4 Physical Installation Guide
This installation guide will highlight how to properly install and mount your camera in several different
environments. These environments included; wood, masonry (brick /block walls), and cement. Prior to installation,
please ensure that the installation environment can support at least three times the weight of the camera and the
installation bracket.
Note: There are 3 carabiners included with the camera. These carabiners will be used to provide additional support
to the camera after installation. To install, link one carabiner to the mounting bracket then link the third carabiner
to the camera.
The camera will come with proper installation materials such as screws and anchors already, however, if
replacements are needed a 9/16 lag bolt, masonry anchor, cement anchor will be required.
Please ensure the following tools are available and ready for use:
o Power Drill/impact Drill
o 9/16 Drill Bit (Masonry)
o 9/16 Hex Head Drill Bit
o Marker or Sharpie
o Hammer/Impact
o Safety Glasses
o 3/16 Allen wrench
o 1” Paddle Bit (In-wall Installation)
Note: In-wall installation is when the cables run hidden inside the ceiling
or wall.

11
3.4.1 Wood Installation
1. Using a 3/16 Allen wrench, remove the three security screws from
the mounting bracket of the camera to remove the unit from its base.
2. Using the mounting bracket, mark holes in the appropriate areas you
would like to mount the camera.
3. Remove the mounting bracket and using a 1” paddle bit, drill a hole
into the center of the surface area.
4. Run the camera wiring through the mounting bracket and to the
applied 1” hole created for in-wall installation.
5. Using a 9/16 drill bit, drill additional holes into each marked area to
insert the appropriate lag bolt screws.
6. Align the mounting bracket to the drilled holes and place a 5/16 lag
bolt into the mounting bracket holes.
7. Using a 9/16 Hex Head drill bit, drill the lag bolts into the applied
holes to secure the camera to the surface area.
8. Secure the camera back to the mounting bracket with the three
provided bolts using a 3/16 Allen wrench.
3.4.2 Masonry Installation (Brick/Block)
1. Using a 3/16 Allen wrench, remove the three security screws from the
mounting bracket of the camera to remove the unit from its base.
2. Using the mounting bracket, mark holes in the appropriate areas you
would like to mount the camera.
3. Remove the mounting bracket and using a 1” masonry paddle bit, drill
a hole into the center of the surface area.
4. Run the camera wiring through the mounting bracket and to the
applied 1” hole created for in-wall installation.
5. Using a 9/16 masonry bit, drill a hole into each marked area to insert
the appropriate sleeve anchors.
6. Align the mounting bracket to the drilled holes and place the 9/16
sleeve anchors to the mounting bracket.
7. Using a hammer, drive the sleeve anchors into the hole, the tightening
torque applied should be roughly 8ft lbs. for each anchor.
8. Tighten the anchors down to secure and lock the sleeve anchors into
the surface area. This should only require about two to three turns to
secure each sleeve anchor into place.
9. Secure the camera back to the mounting bracket with the three
provided bolts using a 3/16 Allen wrench.

12
Note: For a more detailed representation of the process, please
refer to figure 3.4.2 below:
Figure 3.4.2
3.4.3 Cement Installation
1. Using a 3/16 Allen wrench, remove the three security screws from the
mounting bracket to remove the unit from its base.
2. Using the mounting bracket, mark holes in the appropriate areas you
would like to mount the camera.
3. Remove the mounting bracket and using a 1” drill bit, drill a hole into
the center of the surface area.
4. Run the camera wiring through the mounting bracket and to the
applied 1” hole created for in-wall installation.
5. Using a 9/16 drill bit, drill a hole into each marked area to insert the
appropriate concrete anchor screw into the hole.
6. Align the mounting bracket to the drilled holes and place the 9/16
concrete anchor screw to the mounting bracket.
7. Using an impact or manual wrench, drive the concrete anchors into the
appropriate hole to secure the bracket to the surface area.
8. Secure the camera back to the mounting bracket with the three
provided bolts using a 3/16 Allen wrench.
Note: For a more detailed representation of the process, please refer to
figure 3.4.3 below:
Figure 3.4.3

13
4. Camera Access Setup
This section of the guide will provide the user with information on how to
setup access to the camera through any of the following methods.
4.1 Default Username and Password
To login to the system for the first time, use one of the following default
username/password combinations. Once you’ve successfully logged in, it
is highly recommended to change the password for security reasons.
Username: admin
Password: admin
Note: Logging in for the first time will prompt the user to
change the password to the admin account.
4.2 Camera setup methods
To make your experience with the Amcrest camera easy and
simple, we've provided multiple ways to set up, view, and
operate your camera depending on your needs. Please follow
the instructions on this page to set up your camera in the way
that works best for you.
4.2.1. Setting Up Your Camera on a Mobile Device
If setting up your camera for the first time, please follow the instructions
as outlined in section 4.3. App Setup. This section will walk you through
how to setup your camera on the Amcrest Cloud as well as the Amcrest
View Pro app. This will allow you to view your camera from your mobile
device, anywhere, anytime.
4.2.2. Accessing your camera using multiple mobile devices
If you followed the app setup instructions in section 4.3.1 to
initially set up your camera and would like to add the camera to
another smartphone or tablet, follow the instructions as outlined
on section 4.3.3 using your other devices.
4.2.3. Configuring advanced settings on your camera
If you would like to configure your camera to enable advanced features
such as motion detection, e-mail alerts, FTP, image adjustments,
scheduling, and more, please follow the instructions as outlined on
section 4.4 (Desktop access setup).

14
4.2.3. Using Amcrest Cloud for remote viewing.
Amcrest Cloud is our optional cloud storage and playback service which
allows you to access recorded footage from any device. We offer 4
hours of free storage for your first camera. Please follow the
instructions as outlined on section 4.5 (Amcrest Cloud setup) to sign up
for our Amcrest Cloud service and get 4 hours of free storage.
4.2.4. Using plug-and-play for remote web access
AmcrestView.com is a web portal that allows you to view your cameras
and recordings quickly and easily from anywhere in the world using a
web browser. Use AmcrestView.com if you need to simply check-in at
a moment's notice. If you would like to use AmcrestView.com, please
follow the instructions outlined on section 4.7 (Remote web access
setup).
4.3. App Setup
Amcrest cameras can be used on your mobile device using the following apps:
• Amcrest Cloud
• Amcrest View Pro
Both apps are free and available in the App Store and Google Play store. Please note, each app requires an iOS 6.0
or later version. Android will require a 3.0 or later version OS to run these apps.
For purposes of this guide, we will use iOS, though both apps. The App Interface may differ slightly from the
screenshots below as updates are released. Below, you'll find instructions on how to set up your camera up on the
Amcrest cloud app as well as the Amcrest View Pro app.
4.3.1. Amcrest Cloud App Setup
Amcrest Cloud allows you to access your device from anywhere in the world. Please note, you
will need an Amcrest Cloud account to proceed with Amcrest Cloud app setup. You can register
for a cloud account in the Amcrest Cloud app or from the Amcrest Cloud website at
amcrestcloud.com
• Please make sure your camera is plugged into a power source and your Ethernet cable is connected from
the camera to your router.
• Make sure your camera and mobile device are on the same network during setup.
• To ensure the camera connects to the cloud, a reboot of your camera is recommended.
To add your camera onto the Amcrest Cloud app, follow these steps:
1. Download and open the Amcrest Cloud app from the App Store or Play Store

15
Note: Connect your mobile device to the same network that your camera is on.
3. Register for an Amcrest Cloud account. To register click on Sign Up and fill out the form to
complete registration.
4. Tap on Add Camera.
5. Give your camera a name (Ex. Garage, Living Room, Kitchen, etc.) and tap Next to continue.
6. Scan the QR code on the back/side/bottom of the camera or manually enter the camera’s
serial number into the Enter camera S/N (serial number) field. Press Next to continue.

16
7. If you are adding a new camera that does not have a set password the app will automatically
detect that a new camera is being added. Tap OK to proceed.
8. Set a new password for your camera. The password must be between 8 to 32 characters long
and contain only letters and numbers. When you have finished setting the password for your
camera, enter the password again in the Confirm Camera Password section. Tap Next to
continue.

17
9. If you are connecting a WiFi camera to the Amcrest Cloud and would like to enable WiFi via the
Ethernet WiFi Setup method, tap Setup Camera WiFi. Additionally, if you would like to skip the
WiFi process and have your WiFi camera running solely as a wired device, tap on Skip WiFi Setup.
10. If you wish to enable WiFi on your WiFi camera, tap Scan to scan and select your WiFi
network from the WiFi Network List. Enter the password for your WiFi network onto the
Password field. When the WiFi password has been entered, tap Next to continue.
Note: For Android 8.0 and above users, you will have to enable location permissions to be able to
scan for your WiFi network.
11. Confirm and adjust any needed settings for your camera. When all settings have been
confirmed, tap Finish.


19
4.3.2. Amcrest View Pro Setup
To add your WiFi camera to the Amcrest View Pro app follow these steps:
• Make sure your camera is plugged into a power source and your Ethernet cable is
connected from the camera to your router.
• Make sure your camera and mobile device are on the same network during setup.
1. Download and open the Amcrest View Pro app from the App Store or Play Store.
2. Open the app and tap on the + symbol in the middle of the screen to begin adding your PoE device.
3. Tap on Add Device to add a new device to your app.
4. Tap on WiFi Camera.

20
5. Select your connection type, in this case, select the left tab Set Up A New Camera On WiFi or Connect New
Device (on Android) to begin adding the device to the app. Tap Ethernet WiFi Setup to continue.
6. Ensure an Ethernet cable is connected from the router to the camera and the included power
adapter is connected to the device. Allow the device to initialize (if applicable) and press Next to
continue.
7. Ensure your smartphone or tablet is connected to the same WiFi network as your camera. Tap Next
to continue.
/