2018-Current Jeep Wrangler JL/Gladiator JT
Stealth Fighter™ Front Bumper Installation Instructions
Addictive Desert Designs® | Page 1
ADDICTIVE DESERT DESIGNS®
Preparation:
• Disconnect the negative battery terminal. Park the vehicle on level ground and set the emergency brake.
• We recommend reading through the installation instructions in whole before performing the work.
• Estimated Installation Time: 2 Hours for OEM Removal/Bumper Installation
1 Additional Hour to Wire Center Lights
1 Additional Hour to Wire Outer Lights (if applicable)
**is installation requires 2 people for best results**
You will need the following tools:
- Ratchet - 13mm Socket -16mm Socket
- 18mm Socket - 3/4" Wrench - 9/16" Socket
- Reciprocating Saw - Black Paint - Drill
- 1/2" Drill Bit
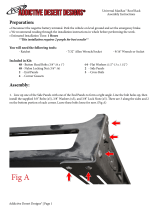
Included in Kit:
6 - Hex Head Bolts
(3/8-16 x 1")
6 - Flat Washers
(3/8")
6 - U-Nuts
(3/8"-16)
2 - Button Head Bolts
(1/2"-13 x 1 1/2")
2 - Flat Washers
(1/2")
2 - Nylon Lock Nuts
(1/2"-13)
1 - Universal Light Mount Kit
Removal:
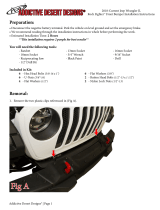
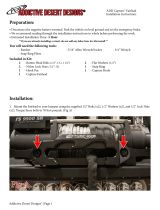
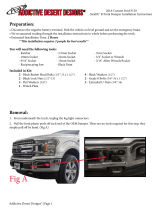
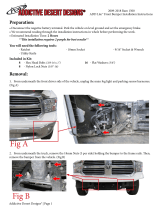
1. Remove the two plastic clips referenced in (Fig A).
Fig A

2018-Current Jeep Wrangler JL/Gladiator JT
Stealth Fighter™ Front Bumper Installation Instructions
Addictive Desert Designs® | Page 2
ADDICTIVE DESERT DESIGNS®
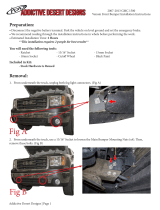
3. Unplug the front bumper harness located along the passenger side frame rail. (Fig C)
Fig C
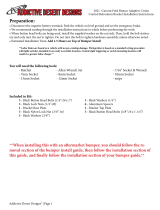
2. If your Jeep has 6 additional clips on the front lip of the plastic bumper cover, remove those clips now. Once
those clips are removed, you may pull the plastic cover o the vehicle. (Fig B)
Fig B

2018-Current Jeep Wrangler JL/Gladiator JT
Stealth Fighter™ Front Bumper Installation Instructions
Addictive Desert Designs® | Page 3
ADDICTIVE DESERT DESIGNS®
5. Using an 18mm Socket, remove the bumper mounting bolts (4 per side). en, remove the bumper from the
vehicle. (Fig E)
**e other two mounting bolts are
on the other side of the frame rail**
Fig E
4. Use a 13mm Socket to remove both lower skid plate bolts. (Fig D)
Fig D

2018-Current Jeep Wrangler JL/Gladiator JT
Stealth Fighter™ Front Bumper Installation Instructions
Addictive Desert Designs® | Page 4
ADDICTIVE DESERT DESIGNS®
6. **THIS STEP IS OPTIONAL** Cut the frame stilts just below the sway bar mounts. Follow the line shown in
(Fig G). Make sure to paint over any bare metal when you are nished cutting.
Before Aer
Fig G
7. Using a 16mm Socket, remove the bolts referenced in (Fig F). en, remove the skid mounting plate. If your
Jeep does not have this plate, skip this step.
Fig F

2018-Current Jeep Wrangler JL/Gladiator JT
Stealth Fighter™ Front Bumper Installation Instructions
Addictive Desert Designs® | Page 5
ADDICTIVE DESERT DESIGNS®
Installation:
8. If you have any lights or a winch to install on your bumper, now is a good time to do so. Please follow the
light/winch manufacturer's guide for mounting/wiring information.
Use the supplied Light Mount Kit that came with the bumper to mount your lights. Installation instructions
for our light mount kit can be found here: https://www.addictivedesertdesigns.com/les/install/ADD-Univer-
sal-Light-Mount-Kit-Installation-Instructions.pdf
9. Set the supplied U-Nuts (x6) in place on your new bumper. (Fig H)
Fig H
10. Drill the lower/outer bumper mounting holes to 1/2". Make sure to paint over any bare metal once you are
nished. (Fig I)
Fig I

2018-Current Jeep Wrangler JL/Gladiator JT
Stealth Fighter™ Front Bumper Installation Instructions
Addictive Desert Designs® | Page 6
ADDICTIVE DESERT DESIGNS®
11. Set the bumper into place on the vehicle. Install the supplied 3/8" Bolts (x6) and 3/8" Washers (x6) from the
backside of the frame horns. en, install the supplied 1/2" Bolts (x2), 1/2" Washers (x2), and 1/2" Lock Nuts
(x2) into the outer/lower mounting holes. Leave these bolts loose for now. (Fig J)
Only use washers on the nut side of the supplied 1/2" Button Head Bolts. Hold bolt stationary and only tun
the nut to tighten. Do not turn bolt to tighten hardware assembly.
Use 1/2" Bolts on these holes. Install 3/8" Bolts from the
back side of the frame horn for the rest of the bolts.
Fig J
12. Adjust the bumper so that it is straight in relation to the vehicle's grille. en, torque the 3/8" mounting
bolts to 20 foot pounds and torque the 1/2" mounting bolts to 70 foot pounds.
13. Stand back and enjoy your new ADD Stealth Fighter Front Bumper.
14. Check and re-tighten, if needed, all mounting bolts aer 100 miles and periodically thereaer.

2018-Current Jeep Wrangler JL/Gladiator JT
Stealth Fighter™ Front Bumper Installation Instructions
Addictive Desert Designs® | Page 7
ADDICTIVE DESERT DESIGNS®
For Additional Support or Technical Questions,
Please Call 480-671-0820 or
Email Info@AddictiveDesertDesigns.com
is product is protected by one or more U.S. patents
www.addictivedesertdesigns.com/patents
/
