Page is loading ...

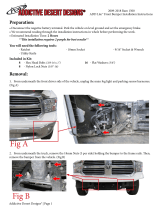
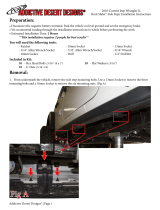
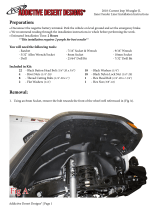
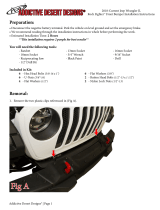
2005-Current Toyota Tacoma ADD-Lander™
Overland Rack Installation Instructions
Addictive Desert Designs® | Page 1
ADDICTIVE DESERT DESIGNSADDICTIVE DESERT DESIGNS®®
®
Preparation:
• Disconnect the negative battery terminal. Park the vehicle on level ground and set the emergency brake.
• We recommend reading through the installation instructions in whole before performing the work.
• When button head bolts are being used, install the supplied washer on the nut side. en, hold the bolt station-
ary and only turn the nut to tighten. Do not turn the bolt to tighten hardware assembly, unless otherwise noted.
• Estimated Installation Time: 2 Hours for Assembly/Installation
Additional Time Required to Install any Accessories
**This installation requires 2 people for best results**
**Labor Rates are based on a vehicle with no pre-existing damage. Wiring labor is based on a standard wiring procedure
with light switches installed in an easily accessible location. Custom light triggering or switch mounting location will
result in a greater labor charge.**
You will need the following tools:
- Ratchet - 7/32" Allen Wrench/Socket - 9/16" Socket or Wrench
- 5/16" Allen Wrench/Socket - T30 Torx Socket
Included in Kit:
48 - Button Head Bolts
(3/8”-16 x 1")
48 - Flat Washers
(3/8”)
48 - Nylon Lock Nuts
(3/8”-16)
12 - Button Head Bolts
(1/2”-13 x 1")
12 - Flat Washers
(1/2”)
12 - Square Rack Mount Nuts
(1/2”-13)
3 - Chase Rack Cross Members 2 - Chase Rack Side Pieces

2005-Current Toyota Tacoma ADD-Lander™
Overland Rack Installation Instructions
Addictive Desert Designs® | Page 2
ADDICTIVE DESERT DESIGNSADDICTIVE DESERT DESIGNS®®
®
Installation:
1. Set both of the side pieces on the ground or a work bench and set the rst cross member in place as shown in
(Fig A). Use the supplied 3/8" Bolts (x16), 3/8" Washers (x16), and 3/8" Lock Nuts (x16) to secure the cross mem-
ber. Leave these bolts loose for now.
Fig AFig A

2005-Current Toyota Tacoma ADD-Lander™
Overland Rack Installation Instructions
Addictive Desert Designs® | Page 3
ADDICTIVE DESERT DESIGNSADDICTIVE DESERT DESIGNS®®
®
2. Repeat the rst step with the remaining two cross members so your rack looks like the one in (Fig B). Leave
these bolts loose still.
Fig BFig B
3. Using a T30 Torx Socket, remove the three rear rail bolts (Fig C).
Fig CFig C

2005-Current Toyota Tacoma ADD-Lander™
Overland Rack Installation Instructions
Addictive Desert Designs® | Page 4
ADDICTIVE DESERT DESIGNSADDICTIVE DESERT DESIGNS®®
®
4. Slide the Square Rack Nuts (6 per side) into their approximate positions in the rail as shown in (Fig D). en,
reinstall the bolts from the previous step.
Fig DFig D
5. Set the rack in place on the vehicle. Position the rack so there is a 3 inch gap between the back of the cab and
the front face of the rack. (Fig E)
3"3"
Fig EFig E

2005-Current Toyota Tacoma ADD-Lander™
Overland Rack Installation Instructions
Addictive Desert Designs® | Page 5
ADDICTIVE DESERT DESIGNSADDICTIVE DESERT DESIGNS®®
®
6. Install the supplied 1/2" Button Head Bolts (6 per side) and 1/2" Washers (6 per side). Once all the bolts are
loosely installed, tighten them to 57 foot pounds. (Fig F)
Fig FFig F
7. Center the cross members, so that the gap between the cross member and side tubes is even on both sides.
(Fig G)
Make these gaps
even.
Fig GFig G

2005-Current Toyota Tacoma ADD-Lander™
Overland Rack Installation Instructions
Addictive Desert Designs® | Page 6
ADDICTIVE DESERT DESIGNSADDICTIVE DESERT DESIGNS®®
®
8. Go back and tighten the 3/8" Bolts (from Steps 1 & 2) to 30 foot pounds.
9. Stand back and enjoy your new ADD-Lander™ Overland Rack.
10. Check and re-tighten, if needed, all mounting bolts aer 100 miles and periodically thereaer.
For Additional Support or Technical Questions,
Please Call 480-671-0820 or
Email I[email protected]
is product is protected by one or more U.S. patents
www.addictivedesertdesigns.com/patents
/
