Page is loading ...

2018-Current Jeep JL
Stealth Fighter™ Rear Bumper Installation Instructions
Addictive Desert Designs® | Page 1
ADDICTIVE DESERT DESIGNS®
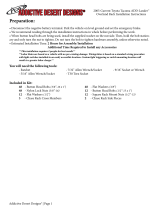
Preparation:
• Disconnect the negative battery terminal. Park the vehicle on level ground and set the emergency brake.
• We recommend reading through the installation instructions in whole before performing the work.
• Estimated Installation Time: 2 Hours for OEM Removal/Bumper Installation
1 Additional Hour to Wire Cube Lights
**is installation requires 2 people for best results**
**Labor Rates are based on a vehicle with no pre-existing damage. Wiring labor is based on a standard wiring procedure
with light switches installed in an easily accessible location. Custom light triggering or switch mounting location will
result in a greater labor charge.**
You will need the following tools:
- Ratchet - 8mm Socket - 16mm Socket
- 17mm Socket - 18mm Socket - 21mm Socket
- 3/16" Allen Wrench/Socket - 1/2" Wrench - Wire Crimpers
- 7/32" Allen Wrench/Socket - 9/16" Socket & Wrench - Butt Connectors (x2)
- Electrical Tape - Zip Ties - 3/4" Wrench
- Drill - 9/16" Drill Bit - Putty Knife/Scraper
- Epoxy
Included in Kit:
4 - Hex Head Bolts
(M14-1.5 x 40mm)
4 - Flat Washers
(M14)
3 - Button Head Bolts
(5/16"-18 x 1")
3 - Flat Washers
(5/16)
3 - Nylon Lock Nuts
(5/16"-18)
1 - License Plate Bracket
2 - Hex Head Bolts
(3/8"-16 x 1")
2 - Flat Washers
(3/8")
2 - Knurled Rivet Nuts
(3/8"-16)
1 - Grade 8 Bolt
(3/8"-16 x 1")
2 - Grade 8 Washers
(3/8")
1 - Hex Nut
(1/2"-13)
1 - LED License Plate Light Kit
Removal:
1. Unplug the rear bumper harness connector, then release the two plastic clips holding the bumper end of the
harness to the vehicle. is connector is located under the vehicle on the driver side. Refer to (Fig A).
Release these clips
Fig A

2018-Current Jeep JL
Stealth Fighter™ Rear Bumper Installation Instructions
Addictive Desert Designs® | Page 2
ADDICTIVE DESERT DESIGNS®
2. Remove your OEM spare tire.
3. Using a 16mm Socket, remove the bottom two bumper bolts and the two trailer plug bracket bolts. Save these
bolts for reuse. (Fig B)
Fig B
4. Using a 16mm Socket, remove the bumper side support bolts (2 per side) that are accessible from underneath
the truck on the outer section of the bumper. (Fig C)
Fig C

2018-Current Jeep JL
Stealth Fighter™ Rear Bumper Installation Instructions
Addictive Desert Designs® | Page 3
ADDICTIVE DESERT DESIGNS®
5. Using a 17mm Socket, remove the bumper mounting nuts (2 per side) which are accessible from underneath
the vehicle. en, remove the OEM bumper. (Fig D)
Fig D
6. Using an 8mm Socket, remove the three (per side) inner fender liner bolts referenced in (Fig E). en, re-
move the lower inner fender liner pieces from the vehicle.
Fig E

2018-Current Jeep JL
Stealth Fighter™ Rear Bumper Installation Instructions
Addictive Desert Designs® | Page 4
ADDICTIVE DESERT DESIGNS®
7. Remove the two bolts that hold on each bumper side support bracket. en, remove both brackets from the
vehicle. (Fig F)
Fig F
8. Use an 18mm Socket to remove the driver side tow hook bolts (x4). en, use a 21mm Socket to remove the
passenger side bumper mounting bracket bolts (x2). Remove the tow hook and both bumper mounting brackets
from the vehicle. (Fig G)
Fig G

2018-Current Jeep JL
Stealth Fighter™ Rear Bumper Installation Instructions
Addictive Desert Designs® | Page 5
ADDICTIVE DESERT DESIGNS®
9. IF YOU HAVE A METAL BUMPER, FOLLOW THIS STEP. IF NOT, SKIP TO STEP 10. Remove the parking
sensors from the OEM rear bumper. Do this by rst spreading the tabs on the inner mounting ring and releasing
the sensor out the back side of the bumper. en, spread the tabs on the outer mounting ring to release it from
the inner mounting ring. Finally, press the tabs in on the inner mounting ring to push it out the front side of the
bumper. (Fig H)
Spread these tabs and
release the parking
sensor from the rear
Spread these tabs
and release the outer
mounting ring from
the rear
Fig H

2018-Current Jeep JL
Stealth Fighter™ Rear Bumper Installation Instructions
Addictive Desert Designs® | Page 6
ADDICTIVE DESERT DESIGNS®
10. IF YOU HAVE A PLASTIC BUMPER, FOLLOW THIS STEP. IF NOT, SKIP TO STEP 11. Remove the
parking sensors from the OEM Rear Bumper. Do this by rst spreading the tabs on the mounting ring and
releasing the sensor out the back side of the bumper. en, take a putty knife, scraper, or something similar and
work it between the sensor ring mounting plate and the rear bumper. Use the scraper to cut through the plas-
tic welds holding that plate to the OEM bumper. Once the plastic welds have been broken, the plate will be free
from the bumper. Make sure to keep track of the order/orientation of the sensors on the OEM bumper as you
will need to install them in the same order/orientation on your new bumper. (Fig I)
Spread
these tabs
to release
the sensor
Use a scraper
to separate
the mounting
plate from
the bumper
is is what
it looks like
once its
separated
Fig I

2018-Current Jeep JL
Stealth Fighter™ Rear Bumper Installation Instructions
Addictive Desert Designs® | Page 7
ADDICTIVE DESERT DESIGNS®
11. Release the series of plastic clips holding the OEM Bumper Harness in the OEM Bumper. en, remove the
harness from the OEM Bumper. (Fig J)
Fig J
Installation:
12. If you have any lights to install on your new bumper, now is a good time to do so. Please follow the light
manufacturer's installation guide for mounting/wiring information.
13. Install the supplied license plate bracket. Do this by lining the mounting holes on the bracket up with the
mounting holes on the bumper. en, use the supplied 5/16" Bolts (x3), 5/16" Washers (x3), and 5/16" Lock
Nuts (x3) to secure the bracket to the bumper. Install all bolts loosely, then go back and torque them to 13 foot
pounds. (Fig K)
Fig K

2018-Current Jeep JL
Stealth Fighter™ Rear Bumper Installation Instructions
Addictive Desert Designs® | Page 8
ADDICTIVE DESERT DESIGNS®
14. IF YOUR PARKING SENSORS LOOK LIKE THE SENSORS IN STEP 9, FOLLOW THIS STEP. IF NOT,
SKIP TO STEP 16. Install the two outer OEM Parking Sensors on your new bumper by pressing the inner
mounting ring in from the front until it clicks into place. en, press the outer ring onto the inner ring from the
backside. Finally, press the sensor into place from the back side. For the two outer sensors, install the sensors
180 degrees from the OEM orientation (with the raised portion of the mounting ring towards the center of
the bumper). (Fig L)
Fig L
Install this backing ring
with the slimmer part faced
towards the center of the
bumper.
Install this ring with the fatter part faced towards
the center of the bumper.

2018-Current Jeep JL
Stealth Fighter™ Rear Bumper Installation Instructions
Addictive Desert Designs® | Page 9
ADDICTIVE DESERT DESIGNS®
15. For the two middle sensors, you will have to face the sensor mounting rings so that the fatter part is towards
the top of the bumper as shown in (Fig M). You will also have to switch the backing rings, so that the backing
ring that originally went on the le side will now go on the right side and the backing ring that went on the right
side will now go on the le side. (Fig N)
Install the outer ring with the fatter
part towards the top of the bumper
Fig N
Install the backing rings with the
slimmer part facing upwards.
Install the le backing ring on the
right side of the bumper and the right
backing ring on the le side of the
bumper.
Fig M

2018-Current Jeep JL
Stealth Fighter™ Rear Bumper Installation Instructions
Addictive Desert Designs® | Page 10
ADDICTIVE DESERT DESIGNS®
16. IF YOUR PARKING SENSORS LOOK LIKE THE SENSORS IN STEP 10, FOLLOW THIS STEP. IF NOT,
SKIP TO STEP 18. Before installing the parking sensor mounting plates, you will have to trim both outer plates.
Do this by setting them in place in their precut holes (push them in place from the back side keeping the same
orientation as on the OEM bumper). en, mark out where you will have to make your cuts. We cut them so that
none of the mounting plate is visible from the front side of the bumper. Refer to (Fig O & Fig P)
Before Aer
Fig P
Before Aer
Fig O

2018-Current Jeep JL
Stealth Fighter™ Rear Bumper Installation Instructions
Addictive Desert Designs® | Page 11
ADDICTIVE DESERT DESIGNS®
Apply epoxy on these faces
17. IF YOUR PARKING SENSORS LOOK LIKE THE SENSORS IN STEP 10, FOLLOW THIS STEP. IF NOT,
SKIP TO STEP 18. Use a strong epoxy to glue the parking mounting plates to your new bumper. Do this by
applying epoxy on the front face of the mounting plate. en, push the sensor mounting ring through the pre-
cut hole in the bumper from the backside of the bumper, so that the front face of the mounting plate gets glued
to the back side of the bumper. Install the sensor rings in the exact position they came o the OEM bumper.
Once the glue has set, push the sensor into the back side of the mounting ring until it clicks into place. (Fig Q)
Fig Q

2018-Current Jeep JL
Stealth Fighter™ Rear Bumper Installation Instructions
Addictive Desert Designs® | Page 12
ADDICTIVE DESERT DESIGNS®
19. Mount your license plate to the license plate bracket using the supplied LED License Plate Lights as your
mounting bolts. Make sure the LED Lights are facing down at your license plate. (Fig S)
Fig S
18. Take the OEM bumper harness and plug it into the newly installed parking sensors. Make sure to leave the
main plug of the harness on the driver side of the bumper. (Fig R)
Fig R

2018-Current Jeep JL
Stealth Fighter™ Rear Bumper Installation Instructions
Addictive Desert Designs® | Page 13
ADDICTIVE DESERT DESIGNS®
21. Cut the license plate light connector o the OEM Harness. Twist both Red Wires from the LED Lights
together and butt connect them to the White/Blue Wire from the OEM Harness. en, twist both Black Wires
from the LED Lights together and butt connect them to the black wire from the OEM Harness. (Fig U)
Fig U
22. Re-cover the now exposed wiring with either electrical tape or wire loom and zip tie the OEM Bumper Har-
ness how you would like it.
20. Locate the license plate light connector on the OEM Bumper Harness. Remove the conduit far enough back
to allow this connector to reach the ends of the LED License Plate Light wires. (Fig T)
Fig T

2018-Current Jeep JL
Stealth Fighter™ Rear Bumper Installation Instructions
Addictive Desert Designs® | Page 14
ADDICTIVE DESERT DESIGNS®
23. IF YOUR OEM BUMPER DID NOT HAVE THE BUMPER MOUNTING BOLTS REFERENCED IN STEP
3, FOLLOW STEPS 23 & 24. OTHERWISE, SKIP TO STEP 25. Find the holes on the bottom of the rear frame
section. ese holes are referenced in (Fig V) and are hexagon shaped. Take a 9/16" Drill Bit and drill them so
they are circular.
Fig V
24. Find the supplied 3/8" Grade 8 Bolt (x1), 3/8" Grade 8 Washers (x2), and 1/2" Nut (x1). Assemble them as
shown in (Fig W) to create a rivet nut installation tool. Once this tool has been assembled, place the supplied
3/8" Rivet Nuts in the newly drilled holes. Loosely thread the rivet nut installation tool into the rivet nuts. en,
while holding the 1/2" Nut steady, thread the rivet nut tool into the rivet nut until it gets tight. Once it is tight,
back the tool out and the rivet nut will be set.
Fig W

2018-Current Jeep JL
Stealth Fighter™ Rear Bumper Installation Instructions
Addictive Desert Designs® | Page 15
ADDICTIVE DESERT DESIGNS®
25. Set your new bumper in place on the vehicle. Secure it to the vehicle using the supplied M14 Bolts (x4) and
M14 Washers (x4). Do not reuse the stock bolts and leave these bolts loose for now. (Fig X)
Fig X
26. Use a 16mm Socket to install the lower bumper bolts that were set aside in Step 3. If your OEM bumper did
not have those bolts, then install the supplied 3/8" Bolts (x2) and 3/8" Washers (x2) through these holes into your
newly installed Rivet Nuts. (Fig Y)
Fig Y

2018-Current Jeep JL
Stealth Fighter™ Rear Bumper Installation Instructions
Addictive Desert Designs® | Page 16
ADDICTIVE DESERT DESIGNS®
27. Position the bumper so that it is straight in relation to the tailgate and is level when viewed from the side.
en, go back and tighten all mounting bolts to OEM torque specs.
28. Plug in the connector from Step 1 and reinstall the plastic clips that hold it in place.
29. Set the trailer plug bracket in place, then reinstall the two trailer plug bracket bolts from Step 3. (Fig Z)
Fig Z
For Additional Support or Technical Questions,
Please Call 480-671-0820 or
Email Info@AddictiveDesertDesigns.com
is product is protected by one or more U.S. patents
www.addictivedesertdesigns.com/patents
30. Stand back and enjoy your new Stealth Fighter™ Rear Bumper.
31. Check and re-tighten, if needed, all mounting bolts aer 100 miles and periodically thereaer.
/