Page is loading ...

2018-Current Jeep Wrangler JL
Inner Fender Liner Installation Instructions
Addictive Desert Designs® | Page 1
ADDICTIVE DESERT DESIGNS®
®
Preparation:
• Disconnect the negative battery terminal. Park the vehicle on level ground and set the emergency brake.
• We recommend reading through the installation instructions in whole before performing the work.
• Estimated Installation Time: 2 Hours
**is installation requires 2 people for best results**
You will need the following tools:
- Ratchet - 7/16" Socket & Wrench - 9/16" Wrench
- 5/32" Allen Wrench/Socket - 8mm Socket - 10mm Socket
- Drill - 25/64" Drill Bit - 7/32" Drill Bit
Included in Kit:
22 - Black Button Head Bolt
(1/4"-20 x 3/4")
18 - Black Washers
(1/4")
4 - Rivet Nuts
(1/4"-20)
18 - Black Nylon Lock Nut
(1/4"-20)
8 - read Cutting Bolts
(1/4"-20 x 1")
1 - Hex Head Bolt
(1/4"-20 x 1 1/4")
2 - Flat Washers
(1/4")
1 - Hex Nut
(3/8"-16)
Removal:
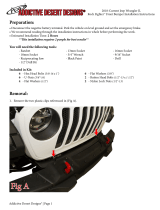
1. Using an 8mm Socket, remove the bolt towards the front of the wheel well referenced in (Fig A).
Fig A

2018-Current Jeep Wrangler JL
Inner Fender Liner Installation Instructions
Addictive Desert Designs® | Page 2
ADDICTIVE DESERT DESIGNS®
®
2. Using a 10mm Socket, remove the two bolts on top/center portion of the wheel well. (Fig B)
Fig B
3. Pull the two plastic clips sitting in the bottom/rear section of the wheel well. (Fig C)
Fig C

2018-Current Jeep Wrangler JL
Inner Fender Liner Installation Instructions
Addictive Desert Designs® | Page 3
ADDICTIVE DESERT DESIGNS®
®
4. Release the series of push rivets that hold the inner liner to the fender on the outer edge of the wheel well.
(Fig D)
Fig D
5. Pull the inner fender liner o of the vehicle.
6. Using a 10mm Socket, remove the two bolts in the front section of the wheel well. (Fig E)
Fig E

2018-Current Jeep Wrangler JL
Inner Fender Liner Installation Instructions
Addictive Desert Designs® | Page 4
ADDICTIVE DESERT DESIGNS®
®
7. Release the series of white clips on the inner portion of the wheel well. en, pull the OEM fender o of the
vehicle. (Fig F)
**ere are more white
clips that are not shown
in this picture**
Fig F

2018-Current Jeep Wrangler JL
Inner Fender Liner Installation Instructions
Addictive Desert Designs® | Page 5
ADDICTIVE DESERT DESIGNS®
®
8. Assemble the Inner Fender Liners as shown in (Fig G). Use the supplied 1/4" Black Bolts (x7), 1/4" Black
Washers (x7), and 1/4" Black Nylon Lock Nuts (x7). Leave bolts loose until they are all installed. en, go back
and torque them to 7 foot pounds. e rear piece ts on top of the middle piece, while the front piece ts under-
neath the middle piece.
Fig G is Piece ts on top
of the Middle Piece
is Piece ts beneath
the Middle Piece
Installation:

2018-Current Jeep Wrangler JL
Inner Fender Liner Installation Instructions
Addictive Desert Designs® | Page 6
ADDICTIVE DESERT DESIGNS®
®
9. Find the holes referenced in (Fig H). en, install the supplied Rivet Nuts (x2) into each of those holes. To do
this, you will have to drill the holes out with a 25/64" Drill Bit. en, use the supplied 1/4"-20 x 1 1/4" Bolt (x1),
1/4" Washers (x2), and 3/8"-16 Nut (x1) to make a rivet nut tool as shown in (Fig H). Push a rivet nut all the way
into each newly drilled hole. While holding onto the 3/8" Nut with a 9/16" Wrench, fully tighten the 1/4" Bolt (on
the Rivet Nut Tool) into the Rivet Nut. Once it is fully tightened, remove the bolt from the rivet nut and move on
to the next.
Drill Hole Assemble Tool Push Rivet
Nut into Hole
Tighten Rivet
Nut as Shown
Fig H

2018-Current Jeep Wrangler JL
Inner Fender Liner Installation Instructions
Addictive Desert Designs® | Page 7
ADDICTIVE DESERT DESIGNS®
®
10. Set the Inner Fender Liner in place on the vehicle. Use the supplied 1/4" Black Bolts (x2) to secure the Liner
to the newly installed Rivet Nuts from Step 9. Leave these bolts loose for now. (Fig I)
Fig I
11. In the bottom/rear of the wheel well, use the supplied 1/4" Black Bolts (x2), 1/4" Black Washers (x2), and
1/4" Black Nuts (x2) to secure the Inner Liner to the vehicle. Leave these bolts loose for now. (Fig J)
Fig J

2018-Current Jeep Wrangler JL
Inner Fender Liner Installation Instructions
Addictive Desert Designs® | Page 8
ADDICTIVE DESERT DESIGNS®
®
12. In the remaining mounting holes on the Inner Fender Liner, you will rst have to drill a hole using a 7/32"
Drill Bit. en, Install one of the supplied 1/4-20 read Cutting Bolts, and move on to the next hole. ere are
four bolts total (per side). (Fig K)
Fig K
13. Go back and torque all Inner Fender Mounting Bolts to 7 foot pounds.
14. Reinstall your OEM Fenders by reversing Steps 7, 6, 2, & 1.
15. Repeat this entire procedure on the other side of the vehicle.
16. Stand back and enjoy your new ADD Rock Fighter™ Fenders.
17. Check and re-tighten, if necessary, all mounting bolts aer 100 miles and periodically thereaer.

2018-Current Jeep Wrangler JL
Inner Fender Liner Installation Instructions
Addictive Desert Designs® | Page 9
ADDICTIVE DESERT DESIGNS®
®
For Additional Support or Technical Questions,
Please Call 480-671-0820 or
Email Info@AddictiveDesertDesigns.com
is product is protected by one or more U.S. patents
www.addictivedesertdesigns.com/patents
/
