Page is loading ...

phoneware aastra user guide version 2014.08.15 page 1 of 12
User Guide for IP Phones
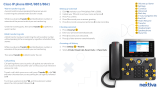
Yealink T4X Series Telephones
1. QUICK REFERENCE INFORMATION
Access Your Phone Web Portal
https://azphoneware.com
Default Comm Portal Password
Default Voicemail PIN
Your Phone Number
Your Extension
Your Administrator
Your Administrators Phone Number
Remote Voicemail Access
602-445-7770
Remote Feature Access
602-445-7771
Customer Support:
602-445-7777 ext 1; or just dial 611
2. INTRODUCTION
Congratulations on your new PHONEWARE Cloud-Based VoIP telephone!
This document describes the features of your phone, including the web management tool,
CommPortal. If after referring to this Guide you’re still having problems with your phone
system then please contact your administrator or customer support.

phoneware aastra user guide version 2014.08.15 page 2 of 12
3. MAKING CALLS
3.1 Internally
To call another person in your business lift the handset and dial the other person’s
extension. This is typically a 3 or 4 digit number.
Note that depending on your phone type and configuration the call may not complete
automatically once you have finished dialing and you may need to hit the # key once you
have dialed the number. You may also extend the delay allowed during dialing by enter the
phone number on your keypad
before
pressing a line button.
If your phone is equipped with Monitored Extension buttons, you may simply press the
button associated to the the extension number of the desired party. This button will
typically be labeled with the party's name.
3.2 Externally
To call a number outside of your business lift the handset and dial the phone number.
Note that depending on your phone type and configuration the call may not complete
automatically once you have finished dialing and you may need to hit the # key once you
have dialed the number. You may also extend the delay allowed during dialing by enter the
phone number on your keypad
before
pressing a line button.
3.3 Emergency Calls
In an emergency lift the handset and dial 911.
Note that depending on your phone type and configuration the call may not complete
automatically once you have finished dialing and you may need to hit the # key once you
have dialed the number.
3.4 Speaker Phone
To make a call using your speaker phone, either press the Speaker key or leave the
handset on-hook and dial the number of the person you want to call, followed by the #
key or the desired LINE button.
3.5 Paging
To make a page announcement over the loudspeakers of the telephones in a paging group,
simply lift your handset, press the associated paging group button (i.e. PAGE ALL), wait for
the announcement tone, and then make your paging announcement. Press the [X] key or
replace the handset in the cradle when finished paging.
3.6 Ending Calls
To end a call replace the handset, or press the [X] key.

phoneware aastra user guide version 2014.08.15 page 3 of 12
4. ANSWERING CALLS
4.1 Using the Handset
To answer an incoming call, lift your handset and you will be connected to the caller. To
answer a call on speakerphone or headset, simply press your SPEAKER button.
4.2 Using Group Pickup Feature
To answer an incoming call that is ringing at a phone in your pickup group, simply press the
PICKUP button on your phone, and you will be connected with the caller.
5. CALL FORWARDING
5.1 Introduction
Your phone system supports a number of different types of Call Forwarding.
Immediate (sometimes called Unconditional) Call Forwarding is where all calls are
forwarded to a number of your choice. This can either be to your voicemail (which is
the default) another extension in your business or an external number.
Busy Call Forwarding forwards all calls that are received when you are already on
the hone.
No Answer (sometimes called Delay) Call Forwarding forwards all calls when you do
ot answer them after a certain delay.
Selective Call Forwarding forwards calls from certain numbers to another number.
The easiest and most flexible way of configuring call forwarding is using CommPortal.
See
Section 8.1 CommPortal
for instructions on doing this. This section provides
instructions on how to set up Call Forwarding using your handset.
5.2 Immediate, Busy and No Answer Call Forwarding using the
Handset
5.2.1 Enabling
To use your handset to enable Immediate, Busy or No Answer Call Forwarding dial the
access code for the type of call forwarding you want to enable followed by the number you
wish to forward calls to.
For example, to use immediate call forwarding to forward all calls to extension 1004, you
would dial *72 1004. Depending on the configuration of your phone system this may set up
a courtesy call to the number you are forwarding calls to. The system will only enable call
forwarding if this courtesy call is answered.
5.2.2 Disabling
To disable call forwarding dial the disable code for that type of call forwarding.

phoneware aastra user guide version 2014.08.15 page 4 of 12
5.2.3 Call Forwarding Access Codes
Type of forwarding
Enable Code
Disable Code
Immediate/Unconditional
*72
*73
Busy
*90
*91
No Answer / Delay
*92
*93
5.3 Selective Call Forwarding using the Handset
The Selective Call Forwarding feature can be configured by dialing *63. This feature
provides voice prompts to help you with setting it up.
5.4 Remote Access to Call Forwarding and Other Features
You phone system also supports setting up Call Forwarding remotely using any phone. To
use this feature, follow these steps:
1. Dial the remote feature access telephone number (602-445-7771, see page 1 of this
document).
2. Enter your full 10-digit phone number followed by #.
3. Enter your remote access to call forwarding PIN followed by #. Note that this PIN is
different from your voicemail PIN.
4. Enter the access code of the feature you wish to activate, i.e. *72 for call
forwarding.
5. If you are enabling call forwarding the system will then provide a broken dialtone.
Enter the number you would like calls forwarded to.
6. ADVANCED CALL HANDLING
6.1 Putting a call on hold
You can put a call on hold by pressing the Hold key. You may now replace the handset
without cutting the caller off. You can also now make another call while the first call is on
hold.
To retrieve the held call, press the line key of the call you want to retrieve.
When you're on a call and another call rings in, you can simply press the second line button
without pressing hold to put the first call automatically on hold and answer the second call.
6.2 Call Waiting
If a second call comes in when you are already on the phone, the phone screen will display
that a caller is ringing in.
To answer this second call you should select or press the line key which is flashing or the
Answer key. Answering the second call will automatically put the first call on hold. You can
toggle between the calls by placing the current one on hold and retrieving the other call.

phoneware aastra user guide version 2014.08.15 page 5 of 12
6.3 Transferring Calls
6.3.1 Transferring a call - Supervised Transfer
To transfer a call and speak with the destination party before connecting the caller, follow
these steps:
1. Press the Transfer key – this places the current call on hold.
2. Dial the number of the person you want to transfer the call to, and press # , or
simply press the associated monitored extension button.
3. Wait until the person has answered so that you may announce the call you are
transferring. Then, complete the transfer by pressing the Transfer key or hanging
up the handset.
6.3.2 Transferring a call - Blind Transfer
To transfer a call quickly without speaking with the destination party before connecting the
caller, follow these steps:
1. Press the Transfer key – this places the current call on hold.
2. Dial the number of the person you want to transfer the call to.
3. Press the Transfer key again and hang up.
Note: If your phone is equipped with a monitored extension button for the
destination extension, simply press the button. No other steps are necessary.
6.3.3 Transferring a call to a user's voicemail box
To transfer a call directly to a user's voicemail box without first ringing their phone, follow
these steps:
1. Press the Transfer key – this places the current call on hold.
2. Dial 8 followed by the user's extension number.
3. Press the Transfer key again and hang up.
6.4 Three Way Conferencing
To conference a third person into a regular two-way phone call, follow these steps.
1. When in a regular call, press the Conference key.
2. Dial the person you want to join you call and press # .
3. Once this person has answered press the Conference key again to set up the three
way call.

phoneware aastra user guide version 2014.08.15 page 6 of 12
6.5 Call Park
6.5.1 Parking a Call
Parking a call places the call on hold in a “park orbit” so that the call can be retrieved from
another phone. Depending on your phone type, there are two ways of parking a call.
1. If you have keys on your phone for parking calls, when in a call press the key of the
park orbit where you want the call parked. The call will now be parked and you may
now replace the handset.
2. If your phone doesn’t have dedicated call park keys, follow these steps:
a. Initiate call transfer by pressing the Transfer key.
b. Dial the Call Park access code *00 and press # .
c. Listen to the park orbit number where the call will be parked.
d. Complete the call transfer by pressing Transfer again.
e. If you have keys on your phone for parking calls these keys will indicate via
a light or icon when a call is parked against that orbit.
6.5.2 Retrieving a Parked Call
Depending on your phone type, there are two ways of retrieving a parked call.
1. If you have keys on your phone for parked calls, pick up the handset and press the
key of the park orbit where the call is parked.
2. If you don’t have dedicated call park keys lift the handset and dial the Call Retrieve
access code * followed by the park orbit number 01 through XX followed by # .
For example, to retrieve a call parked on orbit 01, you should dial *01#.
6.6 Do Not Disturb
If you don’t want any calls to ring your phone, but instead go straight through to your
voicemail, you can enable Do Not Disturb.
If you have a key marked DND then press this to toggle Do Not Disturb on and off.
If you don’t have a DND key then you can dial *78 to turn Do Not Disturb on, and *79 to
turn it off.
6.7 Queue Groups
Queue Groups, also known as Multi-Line Hunt Groups (MLHGs), allow callers to queue for
an available member of a group or department. While queuing, callers hear music and
refresher messages. Calls are delivered to available and logged in queue group members in
the order they were received.
If you are a member of a queue group, membership is assigned to one specific line on your
phone. This line will ONLY receive calls for the queue group. When this line is busy, your
queue group member extension is considered busy and callers will ring to other lines, or
wait in queue.

phoneware aastra user guide version 2014.08.15 page 7 of 12
When you receive calls on the other lines on your phone, i.e. lines 1 through 2, these are
normal calls to your extension and are not calls delivered via the queue group.
If your phone has a line that is a member of a queuing group, you must log in to accept
calls, and you must log out to prevent calls from ringing to your line when you are away
from your desk or otherwise unavailable to take calls.
To log into a group:
1. Press the LogIn/Out button on your phone, or dial access code *96.
2. Enter the queue group number, typically 1, and press #.
To log out of a group:
1. Press the LogIn/Out button on your phone, or dial access code *96.
2. Enter 0 and press #.
7. VOICEMAIL
7.1 Accessing Voicemail
When you have one or more unheard voice messages waiting, your phone will display a
flashing light in the upper right corner. The first time you access your voicemail box you will
be asked to set up your mailbox, and record your name and a greeting to be played by
callers.
To log in Internally - either by dialing the voicemail access code *98, or press the
Messages or Voicemail key if your phone has one.
To log in Externally - Call your personal direct telephone number and wait for your
voicemail greeting to answer. During your greeting, press * and you will be prompted to log
in. Or, you may also dial the voicemail direct access telephone number 602-445-7770 and
follow the instructions for logging in.
7.2 Transferring a Caller Directly to Another User’s Voicemail
If you wish to send a caller directly to another user’s voicemail without ringing their phone,
simply press TRANSFER, 8, the user’s extension number, TRANSFER.
7.3 Using the Voicemail system
The voicemail system is menu driven, so listen to the voice prompts and then press the
keys on your phone to select which option you would like.
Once you become familiar with the system there is no need to wait until the voice prompts
have played before pressing a key – you can interrupt the announcements to speed up your
experience.
For your convenience, voicemail commands are listed at the end of this guide.
7.4 Sending Direct Voicemail Messages
To quickly and easily send a voicemail message to another user, follow these steps:

phoneware aastra user guide version 2014.08.15 page 8 of 12
1. Press 8.
2. Press the user's monitored extension button, or dial the user's extension and press #
or DIAL.
3. You should hear the user's voicemail greeting. Press ### to skip their greeting and
record your message after the tone. Press # after recording, or simply hang up.
8. COMMPORTAL
CommPortal gives you a powerful and easy to use web interface to your phone settings.
8.1 Logging In
To log in, follow these steps:
1. Open an internet browser, visit www.azphoneware.comO, hover over the LOGIN
option and click on "user commportal login".
2. Enter your phone number.
3. Enter your password.
8.1.1 Dashboard
Once you’ve logged into CommPortal you will see the Dashboard page. This displays
whether you have any new voice messages
your most recent received and missed calls
your contacts, along with a quick search facility
any settings you have applied to your phone.
8.1.2 Messages & Calls
The Messages tab displays all of your new and saved voice messages. You can play these
voice messages from within your browser by clicking on them. You can also delete
messages and mark them as heard or unheard.
The Missed Calls, Dialed Calls and Received Calls tab show you details of all the most
recent calls you have missed, dialed and answered.
8.1.3 Contacts
The Contacts page allows you to manage your contacts and their phone numbers. You can
add as many contacts as you wish, and each contact can have up to three numbers: home,
work and cell. An easy search facility is also provided.
8.1.4 Call Manager
The Summary tab of Call Manager gives you an easy to understand description of what will
happen to calls coming to your number.

phoneware aastra user guide version 2014.08.15 page 9 of 12
The other tabs allow you to change the settings of your phone accounts, such as Call
Forwarding and Do Not Disturb, as well as more advanced features such as SimRing, Follow
Me, and Screening.
8.2 Changing your Password
If this is the first time you have accessed CommPortal, you should change your password to
one that only you know. To do this, follow these steps:
1. Select the Settings page, and the Account tab.
2. Enter your new password in the Password box.
3. Re-enter your new password in the Confirm Password box.
4. Click Change Password.
8.3 Programming Telephone Buttons and Features
1. Select the Settings page, and the Account tab.
2. Click on the Set Keys link.
3. An image of your phone is displayed. You can change the features and labels
assigned to buttons. Press Save when complete. Your changes will apply overnight,
or the next time your phone is reset.
8.4 Receiving Voicemail Messages via Email
1. Select the Settings page, and the Messages tab.
2. Check the option to "Forward messages and faxes as emails".
3. Click the "add an email address" link.
4. Enter your email address and click Add.
5. To deliver messages to both your phone and your email, check the "Leave original in
inbox" option. To receive messages ONLY in your email, leave this option
unchecked.
6. Click on Apply.
8.5 Changing Voicemail Access Options
1. Select the Settings page, and the Messages tab.
2. Click the Mailbox Access drop down item.
3. Modify the features as desired. SKIP PIN will bypass the password option when
accessing voicemail from your office telephone.
4. Click on Apply.
8.6 Help
Context sensitive help is always available in CommPortal by clicking on the Help link. This
launches a separate window with a detailed description of the feature you have selected,
and instructions for configuring it.

phoneware aastra user guide version 2014.08.15 page 10 of 12
9. ACCESS CODES
This section lists your phone system’s most commonly used access codes. You may either
dial these codes at your extension, or you may call the remote access feature control center
at 480-302-6979, then log in with your phone number and call services PIN. Your call
services PIN is configured via the User CommPortal.
Feature
Code
Voicemail
*98
Transfer Caller to User’s Voicemail
Transfer + 8 +
user’s extension
+ Transfer
Group Call Pickup
*11
Directed Call Pickup
*12 + extension number
Park Call
*00
Retrieve Parked Call
*01 through *XX
Block Outbound Caller ID
*67 + number
Unblock Outbound Caller ID
*82 + number
Selective Call Rejection
*60
Priority Call
*61
Feature
Activation Code
Deactivation Code
Immediate Call Forward
*72 + number
*73
Busy Call Forward
*90 + number
*91
No Answer Call Forward
*92 + number
*93
Do Not Disturb
*78
*79
Hunt Group Log In/Out
*96 + group number
*96 + 0
Sim Ring *
*99
*399
Find Me Follow Me
*371
*372
Anonymous Call Rejection
*77
*87
* Features must be enabled by administrator and/or set up via User CommPortal

phoneware aastra user guide version 2014.08.15 page 11 of 12
10. Voicemail Reference Guide
Setting Up Your New Voicemail Box
Message Playback Options
The first time you access your voicemail box, you will be
asked to create a PIN, record your name, and record a
greeting. Follow the prompts from the tutorial you will hear.
Change your PIN
First, you will be prompted to create your voicemail PIN. It
can be between 4 and 6 digits long, not sequential numbers
or repeating numbers. After entering your new PIN, you will
be asked to con_rm the PIN by re-entering it.
Record a Name
You will then be prompted to record your name. Once you
have recorded your name, it is played back to you and you
are provided with options to keep it or re-record it.
Press 1 to change your recorded name.
Press # to keep your recorded name.
Record a Greeting
Lastly, you will be prompted to record a personal greeting.
Once you have recorded your greeting, it will be played back
to you and you are provided with options to keep it or re-
record it.
Press 1 to record a personal greeting. Record your
personal greeting.
Press 1 to change your greeting.
Press # to keep your greeting.
Re-record your Greeting After Initialization
1. Access your voicemail box.
2. Press 3 to work with your greetings.
3. Press 1 to set up a personal greeting. You will hear your
current greeting.
1. Press 1 to re-record your personal greeting.
2. 5. Press 3 to save your new greeting.
Options active during playback of a message
1 REPEAT the message from the beginning
11 Return to the previous message
2 SAVE (or mark as new if saved message)
3 DELETE the message
4 REPLY to the message
5 SEND A COPY of the message to another user
6 Increases the volume of a message
66 To hear details (number, timestamp) of a message
7 Slows the playback of a message. Or To HEAR CALLER
INFORMATION (number, timestamp), if pressed after message
playback
77 Skips BACKWARD 5 seconds within the message
8 Pauses & resumes playback of a message up to 20 seconds
9 Speeds the playback of a message
99 Skips FORWARD 5 seconds within the message
* Return to the previous menu
# Skip to the next message during playback of a message
body. Also skips to message body if pressed during the message
header .Message keeps current new/saved status
0 Helpful Hints
Accessing Voicemail
Voicemail Time-Saver Settings
From Your Desk Phone
1. Press the Voicemail or Messages button (alternatively, dial
*98).
2. Enter your voicemail PIN.
From Another Phone
1. Dial your desk phone number.
2. Press * when you hear your personal voicemail greeting.
3. Enter your voicemail PIN.
Accessing the Messaging Service Center
1. Dial (602) 445-7770.
2. Enter your 10-digit phone number followed by the # key.
3. Enter your voicemail PIN followed by the # key.
To Turn ON Autoplay (go directly to NEW messages,
bypasses main menu; New messages will
automatically be saved after you’ve listened to
them)
1. Access your voicemail box, 4, 2, 1.
To Turn ON Skip Pin Feature (do not require
password when checking messages from your office
phone)
1. Access your voicemail box, 4, 3, 3.

phoneware aastra user guide version 2014.08.15 page 12 of 12
11. Voicemail Navigation Map
The following map details the Main Menu of your voicemail system. It shows you the keys you need to
press to navigate to the various sections of the voicemail system. Once you become familiar with the
voicemail system and know which buttons to press, you can save time by making your selection right
away. You do not have to wait for your chosen option to be read out before you select it. If you do not
have a particular service, you will not be offered the options to set up that service and may notice some
differences in the menus described. If you press a key or a combination of keys that is not used on a
menu, you will hear the following error message: “That selection is invalid. Please try again”.
1 →→→
Review Messages
1 Voicemail
3 Faxes
9 Future Delivery
Messages
during playback
of message
1 Repeat
11 Play Previous Message
2 Save (or mark as new)
3 Erase
4 Reply
5 Send a Copy
6 Increase Volume
66 Hear Message Details
7 Slow Playback
77 Rewind 5 Seconds
8 Pause
9 Speed Up Playback
99 Fast Forward 5 Sec
0 Help
* Exit
# Skip to Next Message
2
Send a Message
Enter phone number
or extension number,
then #
1 Review Message
2 Mark as Urgent
3 Mark as Private
4 Re-Record Message
5 Report on Send
6 Report on Read
7 Add Recipient
9 Schedule for Future
Delivery
# Send as is
3
Work with Greetings
1 Personal Greeting
2 Extended Absence
Greeting
3 Sys-Gen Greetings
& Name Recording
4 Group Mailbox Greetings
5 Busy Greeting
6 Out-of-office Hours
Greeting
7 Shared Greetings
9 Forward all Calls to
Voicemail Greeting
* Exit Menu
4
Mailbox Settings
1 Group Lists
2 Handsfree & Time
Saver Options
3 Security Options
4 Group Mailbox Settings
5 Notification Settings
6 Additional Settings
7 Advanced Call Features
Settings
9 Live Message Screening
Settings
* Exit Menu
5
Reminders
1 Reminders Settings
2 Add New Reminder
3 Recurring Reminders
Settings
4 One-Off Reminders
Settings
6 →→→
Review Erased
Messages
1 Voicemail
3 Faxes
during playback
of message
1 Repeat
11 Play Previous Message
2 Restore
3 Permanently Erase
4 Reply
5 Send a Copy
6 Increase Volume
66 Hear Message Details
7 Slow Playback
77 Rewind 5 Seconds
8 Pause
9 Speed Up Playback
99 Fast Forward 5 Sec
0 Help
* Exit
# Skip to Next Message
7
Switch Account
0
Help
# Next Hint
* Return to
Main Menu
1 Replay from Start
of Menu
*
Exit
Common Keys
* Cancel input or move
up a level
# End input or move
forward in a list
0 Helpful Hints
8 Pause / Resume
/