Page is loading ...


©2019InvacareCorporation
Allrightsreserved.Republication,duplicationormodicationinwholeorinpartisprohibitedwithoutpriorwritten
permissionfromInvacare.Trademarksareidentiedby™and®.AlltrademarksareownedbyorlicensedtoInvacare
Corporationoritssubsidiariesunlessotherwisenoted.
Invacarereservestherighttoalterproductspecicationswithoutfurthernotice.

Contents
1General.........................................4
1.1Aboutthismanual..............................4
1.2GeneralInformation............................4
1.3NotesonShipping..............................4
1.4SymbolsinThisManual..........................4
1.5ImagesinThisManual..........................4
2Safety..........................................5
2.1SafetyandFittingInstructions.....................5
3Hygiene.........................................7
3.1HandlingofReturnedUsedProducts................7
4Setup...........................................8
4.1Adjustingseatingposition........................8
4.1.1AdjustingLowerLegLength....................8
4.1.2Adjustingseatdepth.........................8
4.1.3Adjustingcenterofgravityofseat...............8
4.2Moduliteseat.................................9
4.2.1Telescopicseatframe.........................9
4.2.2One-PieceSeatPlate.........................9
4.3Imperialtometricconversionchart.................9
5Testing..........................................11
5.1TestingMotor.................................11
5.2TestingMotorBrake............................11
5.3Raintest.....................................11
5.4FieldLoadT est................................12
5.5CheckingBatteryChargeLevel.....................12
6Service..........................................14
6.1GeneralWarningInformationonInstallationWork......14
6.2Tighteningtorques.............................14
6.3Troubleshooting...............................14
6.3.1OperationalFaults...........................14
6.3.2DriveFaultDiagnosis.........................14
6.3.3Chargingdevicefaultdiagnosis..................18
6.4ServicePlan(OnceaYear)........................19
6.5Overviewmobilitydevice.........................21
6.6Chassis......................................22
6.6.1OverviewofComponents......................22
6.6.2Stabilitylock...............................22
6.6.3TopWalkingBeam...........................24
6.6.4BottomWalkingBeam........................25
6.6.5Steeringheadfront..........................25
6.6.6Removingrearsprings.......................26
6.6.7Installingrearsprings.........................26
6.6.8Replacingbatterytray........................27
6.6.9Replacingbatterybox.........................27
6.6.10ReplacingRubberStopper....................28
6.6.11ReplacingTie-DownAdapter(Low-Rider)..........28
6.7DriveComponents..............................29
6.7.1OverviewMotor/GearboxUnit..................29
6.7.2ReplacingMotor/GearboxUnit..................29
6.7.3Replacingorrotatingmotor/gearboxunitsealing
ring.....................................30
6.7.4Replacingmotor/gearboxclutch.................30
6.7.5Replacingcarbonbrushes......................31
6.7.6RemovingRearSuspension.....................32
6.7.7Removingrearsuspension–alternativemethod.....32
6.7.8Rettingrearsuspension......................32
6.7.9Rettingrearsuspension–alternativemethod......33
6.7.10Replacingcasterfork........................33
6.7.11Adjustingcasterfork........................34
6.8Wheels......................................34
6.8.1RepairInstructions...........................34
6.8.2TyrePressure...............................35
6.8.3TyreTypes.................................35
6.8.4SpecicTighteningTorques....................35
6.8.5OverviewofPowerWheelchairModelsandWheel
Types....................................36
6.8.6Replacingriminsertsindrivewheels.............37
6.8.7ReplacingTyres.............................37
6.8.8ReplacingDriveWheel(5–ScrewInstallation).......38
6.8.9Replacingdrivewheelhub.....................39
6.8.10ReplacingCastorWheelonDouble-SidedFork.....39
6.8.11ReplacingCastorWheelsonSingle-SidedFork......41
6.9Shrouds.....................................41
6.9.1Removingfrontshroud........................41
6.9.2ReplacingRearShroud(WithoutOperatingHour
Counter)..................................41
6.9.3ReplacingRearShroud(WithOperatingHour
Counter)..................................41
6.9.4Removingtopshroud.........................42
6.9.5Replacingfender............................42
6.10Controls....................................42
6.10.1ReplacingPowerModule.....................42
6.10.2ReplacingTiltActuator(“FixedPivot”Tilt).........43
6.10.3ReplacingG-TracSensor......................43
6.10.4Replacingoperatinghourcounter/connecting
cable....................................44
6.10.5UpdatingSoftware..........................45
6.10.6ReplacingUSBcharger.......................45
6.10.7Checkingcable.............................45
6.10.8Cablerouting..............................45
6.11Batteries....................................46
6.11.1GeneralInstructionsonHandlingBatteries........46
6.11.2HandlingDamagedBatteriesCorrectly...........46
6.11.3MakingBatteriesAccessible...................46
6.11.4ReplacingBatteries(60Ah/73Ah).............47
6.11.5ReplacingBatteries(50Ah)....................48
6.11.6ReplacingBatteries/BatteryCables.............48
6.11.7Checkingandreplacingmainfuse...............49
6.12Lightingunit.................................49
6.12.1Replacingfrontbulb(conventionallighting
system)..................................49
6.12.2Replacingheadlightcomplete(conventional
lightingsystem)............................50
6.12.3Replacingheadlightcomplete(LEDlighting
system)..................................50
6.12.4Replacingfrontlampholder(conventionallighting
system)..................................50
6.12.5Replacingfrontlampholder-(conventional
lightingsystem)............................51
6.12.6Replacingfrontlampholder-(LEDlighting
system)..................................51
6.12.7Replacingrearbulb(conventionallighting
system)..................................51
6.12.8Replacingrearlightcomplete-(conventional
lightingsystem)............................51
6.12.9Replacingcompleterearlight-(LEDlighting
system)..................................52
6.12.10Replacingrearlampholder-(conventional
lightingsystem)............................52
6.13Seating.....................................52
6.14MountingDahlDockingSystem...................52

Invacare®TDX®SP2Series
1General
1.1Aboutthismanual
•ThismanualreferstocongurationswithModulite
seatsystem.Olderspecicationshavebeendescribed
inrevision11ofthisservicemanual.
•Forseatsystems,refertothecorrespondingmanual.
•ForShark,DX,DX2,refertorevision11ofthisservice
manual.
•ForLiNXcontrols,refertoLiNXServiceManual.
1.2GeneralInformation
Serviceandmaintenanceworkmustbecarriedouttaking
thisdocumentintoaccount.
Itisimperativethatyouobservesafetyinformation.
Informationaboutoperationoraboutgeneralmaintenance
andcareworkontheproductshouldbetakenfrom
servicemanual.
Assemblyofaccessoriesmightnotbedescribedinthis
document.Refertothemanualdeliveredwiththe
accessory.Additionalmanualscanbeorderedfrom
Invacare.Seeaddressesattheendofthisdocument.
Youcanndinformationaboutorderingsparepartsin
thesparepartscatalogue.
SparepartsmustmatchoriginalInvacareparts.Onlyuse
sparepartswhichhavebeenapprovedbyInvacare.
Theproductmayonlybemaintainedandoverhauledby
qualiedpersonnel.
Theminimumrequirementforservicetechniciansis
suitabletraining,suchasinthecycleororthopedic
mechanicselds,orsufcientlylong-termjobexperience.
Experienceintheuseofelectricalmeasuringequipment
(multimeters)isalsoarequirement.SpecialInvacare
trainingisrecommended.
Alterationstothemobilitydevicewhichoccurasaresult
ofincorrectlyorimproperlyexecutedmaintenanceor
overhaulworkleadtotheexclusionofallliabilityonthe
sideofInvacare.
Ifyouhaveanyproblemsorquestionscontactyour
provider .
1.3NotesonShipping
•Ifthemobilitydevicehastobeshippedbacktothe
manufacturerformajorrepairs,youshouldalways
usetheoriginalpackagingfortransport.
•Pleaseattachaprecisedescriptionofthefault.
1.4SymbolsinThisManual
Symbolsandsignalwordsareusedinthismanualand
applytohazardsorunsafepracticeswhichcouldresultin
personalinjuryorpropertydamage.Seetheinformation
belowfordenitionsofthesignalwords.
WARNING
Indicatesahazardoussituationthatcould
resultinseriousinjuryordeathifitisnot
avoided.
CAUTION
Indicatesahazardoussituationthatcould
resultinminororslightinjuryifitisnot
avoided.
IMPORTANT
Indicatesahazardoussituationthatcould
resultindamagetopropertyifitisnot
avoided.
Tips
Givesusefultips,recommendationsand
informationforefcient,trouble-freeuse.
Tools
Identiesrequiredtools,componentsand
itemswhichareneededtocarryoutcertain
work.
1.5ImagesinThisManual
Thedetailedimagesinthismanualaregivenmarksto
identifyvariouscomponents.Componentmarksintext
andoperationalinstructionsalwaysrelatetotheimage
directlyabove.
4
1532486-N

Safety
2Safety
2.1SafetyandFittingInstructions
Thesesafetyinstructionsareintendedtopreventaccidents
atwork,anditisimperativethattheyareobserved.
Beforeanyinspectionorrepairwork
•Readandobservethisrepairmanualandthe
associatedusermanual.
•Observetheminimumrequirementsforcarryingout
thework(see1.2GeneralInformation,page4).
PersonalSafetyEquipment
Safetyshoes
Themobilitydevice,andsomeofitscomponents,arevery
heavy.Thesepartscanresultininjuriestothefeetifthey
areallowedtodrop.
•Wearstandardizedsafetyshoesduringallwork.
Eyeprotection
Itispossiblethatbatteryacidcanbedischargedwhen
workingondefectivebatteriesorwhenhandlingbatteries
improperly.
•Alwaysweareyeprotectionwhenworkingonany
defectiveorpossiblydefectivebatteries.
Safetygloves
Itispossiblethatbatteryacidcanbedischargedwhen
workingondefectivebatteriesorwhenhandlingbatteries
improperly.
•Alwayswearacid-proofsafetygloveswhenworking
onanydefectiveorpossiblydefectivebatteries.
GeneralSafetyInformationandInformationAboutFitting
/Removal
DANGER!
RiskofDeath,SeriousInjury,orDamage
Lightedcigarettesdroppedontoanupholstered
seatingsystemcancauseareresultingin
death,seriousinjury,ordamage.Mobility
deviceoccupantsareatparticularriskofdeath
orseriousinjuryfromtheseresandresulting
fumesbecausetheymaynothavetheabilityto
moveawayfromthemobilitydevice.
–DONOTsmokewhileusingthismobility
device.
WARNING!
RiskofSeriousInjuryorDamage
Storingorusingthemobilitydevicenearopen
ameorcombustibleproductscanresultin
seriousinjuryordamage.
–Avoidstoringorusingthemobilitydevice
nearopenameorcombustibleproducts.
CAUTION!
Riskofcrushing
Variouscomponentssuchasthedriveunit,
batteries,seatetcareveryheavy.Thisresults
ininjuryhazardstoyourhands.
–Notethehighweightofsomecomponents.
Thisappliesespeciallytotheremovalofdrive
units,batteriesandtheseat.
CAUTION!
Injuryhazardifthemobilitydevicestarts
movingunintentionallyduringrepairwork
–Switchthepowersupplyoff(ON/OFFkey).
–Engagethedrive.
–Beforeliftingup,securethemobilitydevice
byusingchockstoblockthewheels.
CAUTION!
Fireandburnhazardduetoelectrical
short-circuit
–Themobilitydevicemustbecompletely
switchedoffbeforeremovalof
voltage-carryingcomponents!Todo
this,removethebatteries.
–Avoidshort-circuitingthecontacts
whencarryingoutmeasurementson
voltage-carryingcomponents.
CAUTION!
Riskofburnsfromhotsurfacesonthemotor
–Allowthemotorstocooldownbefore
commencingworkonthem.
CAUTION!
Injuryhazardandriskofdamagetomobility
deviceduetoimproperorincomplete
maintenancework
–Useonlyundamagedtoolsingoodcondition.
–Somemovingpartsaremountedinsockets
withPTFEcoating(Teon™).Nevergrease
thesesockets!
–Neveruse"normal"nutsinsteadof
self-lockingnuts.
–Alwaysusecorrectly-dimensionedwashers
andspacers.
–Whenreassembling,alwaysreplaceanycable
tieswhichwerecutduringdismantling.
–Aftercompletingyourwork/beforerenewed
start-upofthemobilitydevice,checkall
connectionsfortighttting.
–Aftercompletingyourwork/beforerenewed
start-upofthemobilitydevice,checkallparts
forcorrectlocking.
–Onlyoperatethemobilitydevicewiththe
approvedtyrepressures(seetechnicaldata).
–Checkallelectricalcomponentsforcorrect
function.Notethatincorrectpolaritycan
resultindamagetothecontrolsystem.
–Alwayscarryoutatrialrunattheendof
yourwork.
CAUTION!
Riskofinjuryanddamagetoproperty,ifthe
maximumspeedreductiononawheelchair
withalifterdoesnotfunctioncorrectly
Thewheelchair’scontrolunitmustreducethe
maximumpossiblespeedassoonasthelifter
israised.
–Testthemaximumspeedreductionfor
correctfunctionafteranymaintenancework
ormodicationstothewheelchair.
1532486-N5

Invacare®TDX®SP2Series
CAUTION!
Anychangestothedriveprogramcanaffect
thedrivingcharacteristicsandthetipping
stabilityofthemobilitydevice
–Changestothedriveprogrammayonlybe
carriedoutbytrainedInvacareproviders.
–Invacaresuppliesallmobilitydeviceswitha
standarddriveprogramex-works.Invacare
canonlygiveawarrantyforsafemobility
devicedrivingbehavior-especiallytipping
stability-forthisstandarddriveprogram.
Markallcurrentsettingsforthemobilitydevice
(seat,armrests,backrestetc.),andtheassociated
cableconnectingplugs,beforedismantling.This
makesreassemblyeasier.Allplugsarettedwith
mechanicallockswhichpreventreleaseofthe
connectingplugsduringoperation.Toreleasethe
connectingplugsthesafetylocksmustbepressed
in.Whenreassemblingensurethatthesesafety
locksarecorrectlyengaged.
61532486-N

Hygiene
3Hygiene
3.1HandlingofReturnedUsedProducts
Whenreconditioningorrepairingreturnedmobilitydevices:
•Takeprecautionsforyourselfandtheproduct.
•Useprotectionequipmentasspeciedlocally.
BeforeTransport(AccordingtoBiologicalAgentsOrdinance)
Treatproductaccordingtofollowingprocesssteps:
ProcessStepComponent
ApplicationConditioning
technique
WorkStation
ManualcleaningSurfaceofuseddeviceBeforerepairor
reconditioning
Usesaturatedtowel
toapplycleaning
detergentandremove
residuesafterimpact.
Cleaningand
disinfection
DisinfectionSurfaceofuseddeviceBeforerepairor
reconditioning
Usesaturated
disinfectantwipes
andclean*thedevice
surface.
Cleaningand
disinfection
*Invacareusesdetergent"Nücoseptspecial"1.5%inwaterml/ml
DisinfectionTools
•Disposablewipes(eece)
•Brushestocleanareasdifculttoaccess
FurtherInformation
FormoreinformationcontactyourInvacareservicedepartment.
1532486-N
7

Invacare®TDX®SP2Series
4Setup
4.1Adjustingseatingposition
Adjustingtheseatingpositioninordertoadaptthe
mobilitydeviceoptimallytotherequirementsoftheuser,
werecommendthatyouaskyourauthorisedInvacare®
dealertoadjustseatdepthindividually.Adaptingtheseat
totheuser'sseatingpositiondependsontheseatthathas
beentted,andshouldbecarriedoutinthefollowing
sequence.
1.Adjustingthelowerleglengthandseatdepth.See
chapter4.1.1AdjustingLowerLegLength,page8.
2.Adjustingthecenterofgravityoftheseatframe.See
chapter4.1.3Adjustingcenterofgravityofseat,page
8.
3.Checkingthattheswivelcastorscanmovefreely.
4.Repetitionofsteps2to4,ifnecessary.
WARNING!
Riskofinjuryaftertiltingofmobility
causedbyblockedsteeringwheels
–Alwayschecktheseatdepthsettingsfor
bothforwardandreversemovement.
Makesurethatsteeringwheelscan
rotatefreelyandhavenotcontacttoany
xedmobilitydevicecomponent.
CAUTION!
Riskoftippingover
Anychangeintheseatingpositioncan
negativelyinuencethestabilityofthe
mobilitydevice.
–Alwaysmakesurethatthemobility
deviceisstableandwillnottipover,
afteradjustingseatingposition.
WARNING!
Anychangestothedriveprogramcan
affectthedrivingcharacteristicsandthe
tippingstabilityofthemobilitydevice
–Changestothedriveprogrammayonly
becarriedoutbytrainedInvacare®
providers.
–Invacare®suppliesallmobilitydevices
withastandarddriveprogramex-works.
Invacare®canonlygiveawarrantyfor
safevehicledrivingbehavior-especially
thetippingstability-forthisstandard
driveprogram.
WARNING!
Riskofcrushing
Theseatisveryheavy.Riskofinjuryto
handsandfeet.
–Payattentiontothehandandfeet.
–Useproperliftingtechniques.
4.1.1AdjustingLowerLegLength
Invacareoffersarangeoflegrestswhichcanbeadjusted
individually.Seeusermanual.
4.1.2Adjustingseatdepth
A:Seatdepth
B:Centerofgravityoftheseat/seatposition
SeatdepthAcanbeadjustedbymovingbackrestin
relationtoseatsurface.
Moduliteseat
Theseatdepthisadjustedbyshiftingthepositionofthe
backrest.SeeUserManual.
Seatsystems
Fordetailson
•Standardseat
•Flexseat
•Contourseat
•Maxseat
refertorevision11ofthisservicemanual.
FordetailsonModuliteseatseebelow.
4.1.3Adjustingcenterofgravityofseat
Thecenterofgravityofseat(CoG)canbeadjustedby
mountingseatframefarthertowardsfrontortherearof
seat.
CAUTION!
Theseatingsystemofthemobilitydeviceis
deliveredexworkswithastandardadjustment
ofcenterofgravity(CoG),whichmeets80–90%
ofuserrequirements.CoGcanbeadjusted
individually.However,anychangeinthis
adjustmentsettingcannegativelyinuence
thestabilityofthepowerwheelchair.
–Youmustperformanindividualriskanalysis
everytimeyouchangethecenterofgravity
oftheseatingposition,inordertoensurethe
safetyandstabilityofthepowerwheelchair.
A:Seatdepth
B:Centerofgravityoftheseat/seatposition
81532486-N

Setup
Theuserweightandseatdepthhavestrong
inuencesonthechoiceofthecenterofgravity
(CoG).Iftheuserisheavyandtheseatdepthis
greater,thefocusshouldbethefartherback.For
bestpossibledrivingcharacteristicsofrear-wheel
drivewheelchairs,theweightshouldbedistributed:
30–40%frontand60-70%rear.Forcenter
wheeldrivestheweightshouldbedistributed25%
front,50%centerand25%rear.
CAUTION!
Riskofdamageduetocollisionsofthelegrests
withotherpartsofthemobilitydevice
–Setthelegreststothesmallestanglebefore
adjustingtheseatcenterofgravity.
–Payattentionwithadjustingseatcenterof
gravitythatlegrestsdonottouchanyother
partsofwheelchair.Thisensuresthatthe
legrestscannotcollidewithotherpartsof
wheelchair.
Seatsystems
Fordetailson
•Standardseat
•Flexseat
•Contourseat
•Maxseat
refertorevision11ofthisservicemanual.
FordetailsonModuliteseatseebelow.
4.2Moduliteseat
TheModuliteseatisavailableintwoversions:
•Telescopicseatframe(plateandstrap):Adjustmentof
centerofgravityviathelateralproles,asdescribed
belowin“Telescopicseatframe”.
•Onepieceseatplate:Adjustmentofcenterofgravity
viatheoblongholesoftheseatadapterasdescribed
belowinchapter“Onepieceseatplate”.
4.2.1Telescopicseatframe
•6mmAllenkey
1.Removeseatplateorslingseat(1),seechapter
“Adjustingseatwidth”inModuliteservicemanual.
2.LoosenAllenscrews(2)infrontandrear,leftandright
–DONOTremove.
3.Shiftpositionofseat.
4.Tightenscrews.
5.Installseatplateorslingseat.
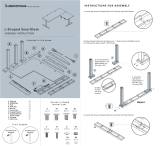
4.2.2One-PieceSeatPlate
•6mmAllenkey
Fig.4-1Thispictureisanexample.
1.Removeseatplate.
2.Loosenscrews(2)leftandright–DONOTremove.
3.Shiftpositionofseatframe.
4.Tightenscrews.
5.Installseatplate.
4.3Imperialtometricconversionchart
Youcanusethischartasanorientationtondtheright
toolsize.
IMPERIALMETRIC
inch
mm
5/64
1.9844
3/32
2.3813
7/64
2.7781
1/8
3.1750
9/64
3.5719
1532486-N9

Invacare®TDX®SP2Series
IMPERIALMETRIC
inch
mm
5/32
3.9688
11/64
4.3656
3/16
4.7625
13/64
5.1594
7/32
5.5563
15/64
5.9531
1/4
6.3500
17/64
6.7469
9/32
7.1438
19/64
7.5406
5/16
7.9375
21/64
8.3344
11/32
8.7313
23/64
9.1281
3/8
9.5250
25/64
9.9219
13/32
10.3188
27/64
10.7156
7/16
11.1125
29/64
11.5094
15/32
11.9063
31/64
12.3031
1/2
12.7000
33/64
13.0969
IMPERIALMETRIC
inch
mm
17/32
13.4938
35/64
13.8906
9/16
14.2875
37/64
14.6844
19/32
15.0813
39/64
15.4781
5/8
15.8750
41/64
16.2719
21/32
16.6688
43/64
17.0656
11/16
17.4625
45/64
17.8594
23/32
18.2563
47/64
18.6531
3/4
19.0500
49/64
19.4469
25/32
19.8438
51/64
20.2406
13/16
20.6375
53/64
21.0344
27/32
21.4313
55/64
21.8281
7/8
22.2250
101532486-N

Testing
5Testing
5.1TestingMotor
•Phillipsscrewdriver,size2
•Digitalmultimeterwithresistancemeasurement
1.Removeshroudthatcoverspowermodule.See6.9
Shrouds,page41.
2.UnplugcableofmotorAfrompowermodule.
3.ConnectmultimeterBtomotorplugcontactsCandD
andmeasureresistancebetweencontacts.
Aresistanceofbetween0.5ohmsand5ohms
indicatesamotorreadyforoperation.A
resistanceofbetween15ohmsandinnity
indicatesadefectivemotor.Highresistancesare
normallycausedbybadconnectionsorworn
carbonbrushes.
Fig.5-1DuraWattmotorservesasanexample.
5.2TestingMotorBrake
Thistestshouldonlybecarriedoutonmobilitydevicewithconventionalmotor-gearboxunits.
CAUTION!
Riskofdamagetopowermoduleduetoshortsinmotorbrake
–NEVERconnectashortedmotorbraketoanintactpowermodule.
–Alwaysreplaceshortedbrakesimmediately.
Adefectivemotorcandamagethepowermodule,butadefectivepowermodulecannotdamagethemotor.
•Phillipsscrewdriver,size2
•Digitalmultimeterwithresistancemeasurement
1.Removeshroudthatcoverspowermodule.See6.9
Shrouds,page41
.
2.UnplugcableofmotorAfrompowermodule.
3.ConnectmultimeterBtomotorplugcontactsEandF
andmeasureresistancebetweencontacts.
Aresistanceofbetween40ohmsand80ohms
indicatesanintactbrake.Aresistanceof0ohms
oraveryhighresistance(mega-ohmsorinnity)
indicatesashort-circuit,abadconnectionora
defectivebrake.
4.Ifthereisadefect,replacemotorandsenditto
InvacareServiceforinspectionorrepair.
Fig.5-2DuraWattmotorservesasanexample.
5.3Raintest
•Checktoensurethattheblackbatteryterminalcapsaresecuredinplace,gaiterisnottornorcrackedwherewater
canenterandthatallelectricalconnectionsaresecureatalltimes.
•Donotusethemobilitydeviceifthegaiteristornorcracked.Ifthegaiterbecomestornorcracked,replace
immediately.
1532486-N
11

Invacare®TDX®SP2Series
5.4FieldLoadTest
Oldbatteriesloosetheirabilitytostoreandreleasepowerduetoincreasedinternalresistance.Inthisprocedure,batteries
aretestedunderloadusingadigitalvoltmetertocheckbatterychargelevelatthechargerconnector.Thechargerconnector
islocatedontheremote.Whenvoltageattheoutputdrops1.0voltsunderload(2.0voltsforapair),replacethebatteries.
Readtheseinstructionscarefullyandthemanufacturer’sinstructionsonthedigitalvoltmeterbeforeproceeding.
•Voltmeter
WARNING!
–Whenperformingthefollowingsteps,ensureyourfeetareclearfromcastersandwall,otherwiseinjury
mayresult.
1.SwitchelectronicsOFFonremote.
2.Makesurebatteryisfullycharged.Anextremely
dischargedbatterywillexhibitthesamesymptomsasa
badbattery.
3.Removefootboard/legrestsfrommobilitydevice.
4.ConnectvoltmeterleadstochargerconnectorAon
mobilitydevice.MostdigitalvoltmetersBarenot
affectedbypolarity.However,analogmeters(meters
withswingingneedles)canbeandshouldbeused
carefully.
Agoodmeterreadingshouldbe25.5VDCto
26.0VDCwiththechairinneutral.
5.SwitchelectronicsONonremote.
6.Ensuethatyourfeetareclearfromcastersandwall.
7.Runmobilitydeviceinneutralforatleast2minutes.
8.Sitinmobilitydeviceandplaceyourfeetagainstadoor
jam,workbenchorotherstationaryobject.
9.Carefullygiveforwardcommand,tryingtodrivethe
mobilitydevicethroughthestationaryobject.Theload
shoulddrawbetween30ampsto40ampsfromthe
batteriesfor0.3seconds.
Performingthisstepputsaheavyloadon
thebatteriesastheytrytopushthroughthe
stationaryobject.Ifthewheelsspin,havetwo
individuals(oneoneacharm)applyasmuch
downwardpressureaspossibleonthearmsof
themobilitydevice.
10.Readmeterwhilemotorsarestrainingtodetermine
voltageunderload.
Ifthevoltagedropsmorethan2.0voltsfrom
apairoffullychargedbatteriesduringthe0.3
seconds,theyshouldbereplacedregardlessof
theunloadedvoltages.
Fig.5-3
5.5CheckingBatteryChargeLevel
Thefollowing“Dos”and“Don’ts”areprovidedforyourconvenienceandsafety.
DON’TDO
Don’tperformanyinstallationormaintenancewithoutrst
readingthismanual.
Readandunderstandthismanualandanyservice
informationthataccompaniesabatteryandchargerbefore
operatingthepersonaltransporter .
Don’tperforminstallationormaintenanceofbatteriesin
anareathatcouldbedamagedbybatteryspills.
Movethepersonaltransportertoaworkareabefore
cleaningterminals,oropeningbatterybox.
Don’tmakeitahabittodischargebatteriestothelowest
level.
Rechargeasfrequentlyaspossibletomaintainahigh
chargelevelandextendbatterylife.
12
1532486-N

Testing
DON’TDO
Don’tusechargersorbatteriesthatarenotappropriate
forthechair.
Followrecommendationsinthismanualwhenselecting
abatteryorcharger .
Don’tputnewbatteriesintoservicebeforecharging.Fullychargeanewbatterybeforeusing.
Don’ttiportiltbatteries.Useacarryingstraptoremove,moveorinstallabattery.
Don’ttaponclampsandterminalswithtools.Pushbatteryclampsontheterminals.Spreadclampswider
ifnecessary.
1532486-N13

Invacare®TDX®SP2Series
6Service
6.1GeneralWarningInformationon
InstallationWork
CAUTION!
Riskofinjuryanddamagetoproperty,if
themaximumspeedreductiononamobility
devicewithalifterdoesnotfunctioncorrectly
Themobilitydevice’selectronicsmustreduce
themaximumpossiblespeedassoonasthe
lifterisraisedabove100mm.
–Testthemaximumspeedreductionfor
correctfunctionafteranymaintenancework
ormodicationstothemobilitydevice.
6.2Tighteningtorques
CAUTION!
Damagecanbecausedtothemobilitydevice
duetoimproperlytightenedscrews,nutsor
plasticconnections.
–Alwaystightenscrews,nutsetctothestated
tighteningtorque.
–Onlytightenscrewsornutswhicharenot
listedherengertight.
Thetighteningtorquesstatedinthefollowinglistare
basedonthethreaddiameterforthenutsandboltsfor
whichnospecicvalueshavebeendetermined.Allvalues
assumedryandde-greasedthreads.
ThreadTighteningtorquein
Nm±10%
M43Nm
M5
6Nm
M610Nm
M825Nm
M1049Nm
M1280Nm
M14120Nm
M16180Nm
UNCThreadTighteningtorquein
Nm±10%
1/4”-20
11–7Nm
5/16”-20
22–14Nm
3/8”-16
41–25Nm
7/16”-14
67–40Nm
1/2”-13
100–60Nm
9/16”-12
150–90Nm
5/8”-11
210–130Nm
3/4”-1
370–230Nm
7/6”-9
600–370Nm
1”-8
900–550Nm
6.3Troubleshooting
6.3.1OperationalFaults
Proceedasfollowsifyouhaveanyproblems:
1.Firstassessthepossiblecauseoftheproblemusing
thefollowingtable.
2.Checktheremotestatusdisplay.Evaluatetheash
errorcode.
3.Carryoutthenecessarychecksandrepairsas
recommendedinthefollowingtable.
Thevariouspowermodulescanbettedinconnection
withdifferentremotesinthemobilitydevice.Rectication
ofoperationalfaultsdependsonthepowermodule
tted.Thepowermodulesusedaredescribedinthe
correspondingcontrolsmanual.
Thetablesforrecticationofoperationalfaults
listedinthefollowingchaptersareonlyanexcerpt
fromtheoriginalmanufacturer'smanuals.Youcan
obtaintheoriginalmanualsfromInvacare.
6.3.2DriveFaultDiagnosis
ProblemOthersymptomsPossiblecauseSolution
Documentation
Mobilitydevicewill
notstart
Theremotestatus
displayilluminates
normallyandshows
anerrorcode.
Drivemotors
disengaged
Engagedrivemotors.Seeusermanual.
BatteriesdefectiveReplacebatteries.See6.11.4Replacing
Batteries(60Ah/
73Ah),page47
and6.11.6Replacing
Batteries/Battery
Cables,page48.
Remotestatusdisplay
doesnotilluminate
Completelydischarged
battery
Pre-chargebatteries.Seeusermanual.
14
1532486-N

Service
ProblemOthersymptomsPossiblecauseSolution
Documentation
Checkmainfuse.See6.11.7Checking
andreplacingmain
fuse,page49.
Powersupplyto
remoteinterrupted
Checkcablesbetween
modulesforloose
connectionsor
damage.
See6.10.7Checking
cable,page45
.
RemotedefectiveReplaceremote.See6.10.1Replacing
PowerModule,page
42.
Remotestatusdisplay
ashing
Variouscauses
Assesserrorcode.Seeremotemanual.
Batteriesdefective
(unstablevoltage)
Replacebatteries.See6.11.6Replacing
Batteries/Battery
Cables,page48
and6.11.4Replacing
Batteries(60Ah/
73Ah),page47.
Replacemotor(s).
See6.7.2Replacing
Motor/GearboxUnit,
page29.
Mobilitydevice
juddersindrivemode
None
Drivemotor(s)
defective
Replacecarbon
brushes.
See6.7.5Replacing
carbonbrushes,page
31
.
Mobilitydevicepulls
toleftorright
None
Drivemotorsrunning
asymmetrically
Changeprogramming
tosynchronisemotors.
Seeprogramming
manual.
TyrevisiblydentedNotenoughtyre
pressure
Checktyrepressure,
replaceinnertube
and/orvalveif
necessary.
Errormessagedoes
notdisappear
None
BadconnectionsCheckallconnecting
cables.
See6.10.7Checking
cable,page45.
MotorbrakedefectiveMeasureinternal
resistanceofbrakes,
replacemotorif
defective.
See5.2TestingMotor
Brake,page11
and6.7.2Replacing
Motor/GearboxUnit,
page29.
Motorsstopandstart
again
None
VoltagedeclineStopdrivingandallow
electronicstocool
down.
Motorrunsbutloses
power
None
Highmotorload
allowspowermodule
tolowervoltage
Stopdrivingandallow
electronicstocool
down.
Motorsstopanddo
notstartagain
None
Highmotorload
allowspowermodule
tolowervoltage
Leavemobilitydevice
switchedonand
letpowermodule
operate.Charge
batteriesovernight
withelectronics
turnedon.
None
FuseburntoutCheckcablingand
replacefuse.
See6.10.7Checking
cable,page45and
6.11.7Checkingand
replacingmainfuse,
page49.
1532486-N15

Invacare®TDX®SP2Series
ProblemOthersymptomsPossiblecauseSolution
Documentation
None
MotordefectiveCheckcarbonbrushes
andreplaceif
necessary.
See6.7.5Replacing
carbonbrushes,page
31.
Measureinternal
resistanceofmotor,
replacemotorif
defective.
See5.1Testing
Motor,page11
and6.7.2Replacing
Motor/GearboxUnit,
page29.
None
Powermodule
defective
Replacepower
module
See6.10.1Replacing
PowerModule,page
42.
Motorslosepower
whiledriving
None
BadconnectionsTurnoffelectronics,
wait10seconds,turn
onelectronics.Check
allcabling.
See6.10.7Checking
cable,page45
.
Motorjuddersorruns
irregularly,oronly
onemotorruns
None
Carbonbrushes
worn(onlyapplies
formotorswithout
lifetimebrushes)
Checkcarbonbrushes
andreplaceif
necessary(only
appliesformotors
withoutlifetime
brushes).
See6.7.5Replacing
carbonbrushes,page
31.
Clutch(es)defective
Replaceclutch.See6.7.2Replacing
Motor/GearboxUnit,
page29.
BearingdefectiveReplacemotor.See6.7.2Replacing
Motor/GearboxUnit,
page29.
CollectordefectiveMeasureinternal
resistanceofmotor,
replacemotorif
defective.
See5.1Testing
Motor,page11
and6.7.2Replacing
Motor/GearboxUnit,
page29.
Motorsdonotrun
None
BadconnectionsCheckallcabling.See6.10.7Checking
cable,page45.
FuseburntoutCheckcablingand
replacefuse.
See6.10.7Checking
cable,page45and
6.11.7Checkingand
replacingmainfuse,
page49.
BatteriesdefectiveReplacebatteries.See6.11.4Replacing
Batteries(60Ah/
73Ah),page47
and6.11.6Replacing
Batteries/Battery
Cables,page48.
Cablingtopower
moduleorremote
defective
Checkcabling.See6.10.7Checking
cable,page45.
Powermodule
defective
Replacepower
module.
See6.10.1Replacing
PowerModule,page
42
.
CorrodedcontactsContactsdefectiveCheckcabling,replace
ifnecessary.
See6.10.7Checking
cable,page45.
Motormakesclicking
noise
None
Clutch(es)defective
Replaceclutch.See6.7.2Replacing
Motor/GearboxUnit,
page29.
161532486-N

Service
ProblemOthersymptomsPossiblecauseSolution
Documentation
BearingdefectiveReplacemotor.See6.7.2Replacing
Motor/GearboxUnit,
page29.
CollectordefectiveMeasureinternal
resistanceofmotor,
replacemotorif
defective.
See5.1Testing
Motor,page11
and6.7.2Replacing
Motor/GearboxUnit,
page29
Scrapingnoiseor
motorblocked
None
Clutch(es)defective
Replaceclutch.See6.7.4Replacing
motor/gearboxclutch,
page30
.
BearingdefectiveReplacemotor.See6.7.2Replacing
Motor/Gearbox
Unit,page29and
6.7.4Replacing
motor/gearboxclutch,
page30.
GearboxdefectiveReplacegearbox.See6.7.2Replacing
Motor/Gearbox
Unit,page29
and6.7.4Replacing
motor/gearboxclutch,
page30.
Gearboxmakes
clickingnoise
None
GearboxdefectiveReplacegearbox.See6.7.2Replacing
Motor/Gearbox
Unit,page29
and
6.7.4Replacing
motor/gearboxclutch,
page30.
DrivewheellooseTightendrivewheel,
secureboltswith
threadlocking
adhesiveifnecessary.
See6.7.2Replacing
Motor/GearboxUnit,
page29.
Gearboxlosesoil
None
Sealingringondrive
shaftdefective
Replacegearboxif
sealingringdefective.
See6.7.2Replacing
Motor/Gearbox
Unit,page29and
6.7.4Replacing
motor/gearboxclutch,
page30.
Checkcarbonbrushes
foroilwetting,replace
motorifbrusheswet.
See6.7.2Replacing
Motor/Gearbox
Unit,page29and
6.7.4Replacing
motor/gearboxclutch,
page30and6.7.5
Replacingcarbon
brushes,page31.
Irregularrunning
None
Driveshaftmovable
orbent
Checkdriveshaft,
replacegearbox,if
defective.
See6.7.2Replacing
Motor/Gearbox
Unit,page29and
6.7.4Replacing
motor/gearboxclutch,
page30.
Batteriesnotbeing
charged
None
Fuseburntout,cable
defective
Checkcablingand
replacefuse.
See6.10.7Checking
cable,page45and
6.11.7Checkingand
replacingmainfuse,
page49.
1532486-N
17

Invacare®TDX®SP2Series
ProblemOthersymptomsPossiblecauseSolution
Documentation
BatteriesdefectiveReplacebatteries.6.11.6Replacing
Batteries/Battery
Cables,page48
and6.11.4Replacing
Batteries(60Ah/
73Ah),page47.
LEDsashingon
charger
ChargerdefectiveReplacecharger.Seechargeruser
manual.
Shortchargingperiod
None
Oneofthebatteries
couldbedefective
Replacebatteries.See6.11.6Replacing
Batteries/Battery
Cables,page48
and6.11.4Replacing
Batteries(60Ah/
73Ah),page47.
Mobilitydeviceruns
tooslowly
None
RemotedefectiveReplaceremote.See6.10.1Replacing
PowerModule,page
42.
BatteriesdefectiveReplacebatteries.See6.11.6Replacing
Batteries/Battery
Cables,page48
and6.11.4Replacing
Batteries(60Ah/
73Ah),page47
.
6.3.3Chargingdevicefaultdiagnosis
Symptom
PossiblecauseSolution
NoLEDsilluminatingonbatterychargerChargingdevicenotconnectedto
mainssupply.
Ensurethatthebatterychargerhas
beenpluggedin.
NomainssupplyCheckthemainssupplywitha
voltmeter .
Defectivemainssupplycable.Checkthemainssupplycable.Replace
damagedcablesorsendthebattery
chargertoInvacareServiceforrepair.
LEDsareburntoutSendthebatterychargertoInvacare
Serviceforrepair .
Aninternalfusemightbeburntout.SendthebatterychargertoInvacare
Serviceforrepair .
BatteriesdonotchargeFuseonmobilitydevicehasburntout.Checkmobilitydevicefuses.See“Main
fuse”.
Batterychargernotconnectedto
mobilitydevice.
Ensurethatthebatterychargerhas
beenconnectedtothemobilitydevice.
NomainssupplyCheckthemainssupplywitha
voltmeter .
Defectivemainssupplycable.Checkthemainssupplycable.Replace
damagedcablesorsendthebattery
chargertoInvacareServiceforrepair.
Batterychargercouldbedefective.Useabatterychargerwhichyouknow
isworkingproperlytochargethe
batteries.Sendthedefectivebattery
chargertoInvacareServiceforrepair.
Batteryvoltageistoolowtooperate
mobilitydevice.
Replacethebatteries.See“Removing
batteries”
181532486-N

Service
6.4ServicePlan(OnceaYear)
CAUTION!
Riskofinjuryanddamagetoproperty,ifmaximumspeedreductiononwheelchairwithlifterdoesnot
functioncorrectly
Thewheelchair’selectronicsmustreducethemaximumpossiblespeedassoonasthelifterisraised.
–Testthemaximumspeedreductionforcorrectfunctionafteranymaintenanceworkormodicationstothe
wheelchair.
Component
CheckRemedy
Notes
Damagetoposture
belt
Replacebeltif
damaged
SeeReplacingPostureBeltin
servicemanualofseatingsystem.
Posturebelt
BeltlockfunctionReplacebeltif
damaged
SeeReplacingPostureBeltin
servicemanualofseatingsystem.
Damagetoarmrests
Replacecoverif
damaged
Armrests
ArmrestxingsTightenscrews
Damagetoclothing
guard
Replaceclothing
guard,ifdamaged
Clothingguard
ClothingguardxingsTightenscrews
PoweredtiltTighttofSLretainer
clip
ReplaceSLretainer
clip,ifnecessary
Poweredrecline(if
tted)
Damagetobackrest
Seams
Fixing
Checkcable
Checkfunction
Replacepartsif
damaged
Tightenscrews
Replacecableor
motorifnecessary
Frames(chassis)/
batterymounting
Checkxings,welded
seamsandbattery
mounting
Tightenscrews
Replacecomponents
ifnecessary
StabilityLockCheckgascylinderRepairorreplaceif
damaged
Replacegascylinder
every2years!
See6.6.2Stabilitylock,page22
.
DahlDockingstationCheckscrewsTightenscrewsSee6.14MountingDahlDocking
System,page52.
Checkdrivewheelsfor
tighttandsideplay
Adjust,replacewheel
hubs
See6.8.8ReplacingDriveWheel
(5–ScrewInstallation),page38
and6.8.9Replacingdrivewheel
hub,page39
.
Checkcastorsfortight
t,oatandsideplay
Replacewheels,
castorforksorwheel
bearings
See6.8Wheels,page34.
Tyres
Repairorreplaceif
damaged
See6.8Wheels,page34
.
ChecksuspensionRepairorreplaceif
damaged
See6.8Wheels,page34.
Wheelsuspensionand
wheels
CheckstraightrunningReplacewheels,
castorforksorwheel
bearings
See6.8Wheels,page34
.
1532486-N19

Invacare®TDX®SP2Series
Component
CheckRemedy
Notes
MotorsTestmotors
See5.1TestingMotor,page11.
Driveunits,clutch
mechanism
Checkfunctionsin
driveandpushmodes
Checkclutch
mechanism
Checkcarbonbrushes,
replaceifnecessary
(notwithlifetime
brushes)
Replacemotorif
necessary
Tightenscrews/nuts,
adjustorreplaceif
necessary
See6.7DriveComponents,page
29
.
BrakesCheckmotorbrakeTestmotorbrake
See5.1TestingMotor,page11.
Legrests
Checkweldedseams,
interlocking,screws,
footplates
Tighten,replaceif
necessary
Powerlegrests(if
tted)
Checkcable
Checkcontacts
Checkfunctions
Replacecableif
necessary
Lighting(iftted)
Checkcable
Checkfunction
Replacelamporcable
ifnecessary
See6.12Lightingunit,page49.
Batterymounting
Checkbatterysupport
andmountingbelts
fordamage
Replaceifnecessary
Checkbatteriesfor
damage
Replacebatteriesif
necessary
See6.11.4ReplacingBatteries
(60Ah/73Ah),page47,6.11.6
ReplacingBatteries/Battery
Cables,page48and6.11.2
HandlingDamagedBatteries
Correctly,page46.
CheckbatteryvoltageChargebatteriesSeeusermanual.
Batteries
Checkcontactsand
terminals
Cleancontactsand
terminals
Seesafetyinformationin6.11.4
ReplacingBatteries(60Ah/
73Ah),page47,6.11.6Replacing
Batteries/BatteryCables,page
48and6.11.2HandlingDamaged
BatteriesCorrectly,page46.
Remote,statusLED
ashing
Evaluateerror/ash
code
See6.3Troubleshooting,page14
.
Fixings
Tightenxings,
replaceifnecessary
Cablesandconnecting
plugs
Replacedamaged
cablesandtighten
connectingplugs,if
necessary
Replacejoystickknob
ifnecessary
Joystickfunction
Replaceremoteif
necessary
Remote/power
module
PowersupplyReplacedamaged
cablesandtighten
connectingplugs,if
necessary
201532486-N
/