Page is loading ...

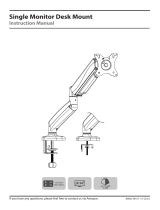
Standard Installation
T M B
The Desk Clamp
Bracket can be
repositioned to suit
different desk top
thicknesses. The
desk top thicknesses
supported are listed
below, from the Top,
to Middle, to Bottom
screw holes.
Top (default) 0 - 35mm (0.00 - 1.38”)
Middle 8 - 50mm (0.31 - 1.97”)
Bottom 22 - 65mm (0.87 - 2.56”)
To reposition the Desk
Clamp Bracket, remove the
two M6 Screws, releasing
the Desk Clamp Bracket as
shown below.
Reattach the Desk Clamp
Bracket in the desired
screw holes (Top, Middle
or Bottom). Then go to
Step 1.
4mm
4mm
Desk Clamp
Bracket
4mm
Allen Key
T
M
B
Desk Clamp Screw
5mm
Allen Key
Screw in the
Desk Clamp
Screw and
tighten.
Installation Complete
You are now ready to install your Systema Monitor
Arm. To continue with installation of the monitor arm,
please refer to the Installation Instructions provided
with the monitor arm.
Push any cables
under the cable
management
wings.
Desktop thicker than 35mm? No access behind the desk?
Option 1: Desk Clamp Mount SYSTEMA Spring Arm (SSK)
Reattach Desk Clamp Bracket,
then go to Step 2.
Position Clamp and Power
Module on the desk top.
APM-01 Desk Mount
Component Checklist
IMPORTANT INFORMATION
POWER
MODULE
Installation Instructions
! Before installing the Power
Module please read your monitor
arm’s installation instructions for
information on post placement
and ergonomic guidelines.
! The manufacturer accepts
no responsibility for incorrect
installation.
! The Power Module is compatible
with the following Atdec products:
Systema
SSK | SP10 | SP40
Visidec Focus
VF-AT | VF-AT-D | VF-AT-NBC
VF-AT-NP | VF-M
Tools Required
Power Module
1
2
• 4mm Allen Key
• 5mm Allen Key
• Power Drill
• 9mm (0.35”) Drill Bit
Position
Power
Module
Desk Clamp
Bracket
Desk Clamp
Bracket
Slide on clamp
Place Desk Clamp
and Power Module in
desired location on
the desk top.
1 4 7
2
5 8
3
6
9
Remove the
Desk Clamp
Bracket.
Tighten
Firmly
!
Installation Complete
You are now ready to install your Systema Monitor Arm. To continue with installation of the
monitor arm, please refer to the Installation Instructions provided with the monitor arm.
Standard Installation
T M B
The Desk Clamp
Bracket can be
repositioned to suit
different desk top
thicknesses. The
desk top thicknesses
supported are listed
below, from the Top,
to Middle, to Bottom
screw holes.
Top (default) 0 - 35mm (0.00 - 1.38”)
Middle 8 - 50mm (0.31 - 1.97”)
Bottom 22 - 65mm (0.87 - 2.56”)
Reattach the Desk Clamp
Bracket in the desired screw
holes (Top, Middle or Bottom).
Then go to Step 1
5mm
5mm
Desk Clamp
Bracket
5mm
Allen Key
T
M
B
Desk Clamp Screw
5mm Allen Key
Screw in the Desk Clamp
Screw and Tighten.
Push any cables
under the cable
management wings.
Desktop thicker than 35mm? No access behind the desk?
Reattach Desk Clamp Bracket,
then go to Step 2.
Position Desk Clamp
and Power Module on
the desk top.
Desk Clamp
Bracket
Desk
Clamp
Bracket
1
2
Slide on clamp
Position
Power
Module
Place Desk Clamp
and Power Module in
desired location on the
desk top.
To reposition the Desk
Clamp Bracket remove the
two M8 screws, releasing
the Desk Clamp Bracket as
shown below.
Tighten
Firmly
!
Option 1: Desk Clamp Mount SYSTEMA Post Clamp (SP10/SP40)
1
2
3
4 7
5
8
6
9
Remove the Desk
Clamp Bracket.

Standard Installation
Reattach the Desk Clamp Bracket in
the desired position (Top, Middle or
Bottom). Then go to Step 2
5mm
5mm
Desk Clamp
Bracket
5mm Allen Key
T
M
B
Desk Clamp
Screw
5mm Allen Key
Screw in the Desk Clamp
Screw and tighten.
Installation Complete
You are now ready to install your Visidec Focus Monitor Arm. To continue with installation of the
monitor arm, please refer to the Installation Instructions provided with the monitor arm.
Push any cables
under the cable
management wings.
Desktop thicker than 29mm? No access behind the desk?
Reattach Desk Clamp Bracket,
then go to Step 3.
Position Clamp and Power
Module on the desk top.
Desk Clamp
Bracket
Desk Clamp
Bracket
1
2
Slide on clamp
Position
Power
Module
To Reposition the Desk Clamp
Bracket, remove the two M8 Screws,
releasing the Desk Clamp Bracket as
shown here.
The Desk Clamp Bracket can be repositioned to suit
different desk top thicknesses. The desk top thicknesses
supported are listed below, from the Top, to Middle, to
Bottom screw holes.
Top 26 - 66mm (0.00 - 1.38”)
Middle 40 - 81mm (0.31 - 1.97”)
Bottom 56 - 96mm (0.87 - 2.56”)
Top (default) 0 - 29mm (0.00 - 1.38”)
Middle 4 - 44mm (0.31 - 1.97”)
Bottom 19 - 59mm (0.87 - 2.56”)
T M B T M B
A B
A
B
Tighten
Loosen
TILT (screen angle up/down)
Tighten
Loosen
PORTRAIT/LANDSCAPE
Allen Key
Storage
95º
Max.
PAN (screen angle left/right)
10º - 20º
5º 15º
1.1 Drill a 9mm (0.35”) hole in the work surface in
the desired position and assemble as shown below.
Installation Instructions
VF-AT
VF-AT-SW
Component Checklist
Focus | Articulated Arm
M4x10/12/16mm (x4)
Phillips Head Mounting Screws
Primary Arm
Cable Cover
Cable Stops
(x2)
Pole Top Cap
Cable Clip
Secondary Arm
Cable Cover
M8x30mm
Screw
Bolt Through
Base
Steel Washer
Arm Assembly
Pole Assembly
Desk Clamp
Assembly
5mm Allen Key
HARDWARE
Display Mounting
Screws
! IMPORTANT - Install Visidec Focus Articulated Arm as per installation instruction.
! This product supports a maximum load of 8kg (17.6lbs).
! The manufacturer accepts no responsibility for incorrect installation.
IMPORTANT INFORMATION:
Step 1. Check Components
Check what you have received against the component checklist and hardware above.
Step 2. Mount Pole Assembly
Option 1: Bolt Through Option 2: Mount using Desk Clamp
Pole Assembly
Pressure Plate
2.1 Remove both the Pressure
plate and M10 Desk Clamp
Screw.
2.2 Fasten the Desk Clamp to the Bolt
Through Base & Pole Assembly using the
M8 x 30mm Screw and Tighten Firmly.
M10 Desk Clamp
Screw
M8 x 30mm Screw
Bolt Through Base
Pole Assembly
Slot
Slot Tab
Bolt Through Base
Steel Washer
M8x60mm Screw
5mm Allen Key
It is recommended that the Pole Assembly be
mounted towards the rear edge of the work surface.
Note: Ensure that the Slot Tab in the Bolt
Through Base fits snugly into the Slot on the
Pole Assembly.
The Visidec logo on the Bolt Through Base
must face the front of this assembly.
5mm Allen Key
5mm Allen Key
Installation Complete
No portion of this document or any artwork contained herein should be reproduced in any way without the express written consent of Atdec Pty Ltd.
Due to continuing product development, the manufacturer reserves the right to alter specifications without notice. Published 29.07.14 ©
Note: Extend Arms to
achieve 100x100mm
hole pattern.
Step 6.2. Insert Cable Stops
Step 7. Adjusting the Display Bracket
Ergonomic Guidelines
A. Insert Cable Stop on
one edge of the Pole
Slot.
B. Press down firmly onto
the other edge of the
Cable Stop and hold.
This allows the rear profile
to flex in place.
Many experts believe that the extended use of any computer screen has the potential to cause serious injury to your eyes,
neck and back. This can be largely avoided by correctly positioning your display.
Viewing angle: Ergonomists recommend that the optimal position
of your display should be slightly below eye level. When looking at
the display’s centre the user should have a downward visual angle
of approximately 10°-20°.
Height: As a guide, the height (h) of your display should
approximately be as follows:
- Tall Male (Max): 560mm (22”)
- Short Male (Min): 368mm (14.5”)
- Tall Female (Max): 520mm (20.5”)
- Short Female (Min) 356mm (14”)
Distance: For visual comfort, a viewing distance (d) between
500mm (20”) to 750mm (29.5”) is recommended.
Tilt Angle: Angular adjustments to reduce reflection on your
monitor should range between 5° forward tilt to 15° backward tilt.
M8x60mm
Screw
9mm (0.35”) hole
Tools Required:
• Power Drill
• 9mm (0.35”) Drill Bit
Place Desk clamp
and power module
in desired location
on desk top.
Follow steps 2.1 & 2.2 in the
Visidec Focus Arm Installation
Instructions to assemble the Pole
to the Desk Clamp.
Tighten
Firmly
!
1 5 8
3
6
9
2
4
7
10
Option 1: Desk Clamp Mount Visidec Focus - Articulated Arm Range
Remove the Desk
Clamp Bracket
GO TO STEP 3
GO TO STEP 3
Installation Complete
You are now ready to install your
Monitor Arm. To continue with
installation of the monitor arm, please
refer to the Installation Instructions
provided with the monitor arm.
GO TO STEP 3
1st
5mm
2nd
5mm
Remove M8 Screw to release the
Spigot Housing from the Desk Clamp.
Release the post from the clamp
as shown here, removing the
Desk Clamp Bracket first.
5mm Allen Key
M8 Screw
Spigot Housing
Post
Spigot Housing
Post Cap
Post
Pole
Bolt Through
Plate
M8x25
CS Screw
9mm (0.35”) Hole
Washer
M8x80mm Bolt
Through Screw
5mm Allen Key
Power Module
Power Module
9mm (0.35”)
Hole
Power Module
Bolt Through
Base
5mm Allen Key
5mm Allen Key
M8x60mm
Screw
Washer
9mm (0.35”) Hole
M8x54/80mm
Bolt Though Screw
Washer(s)
Desk Clamp
Bracket
Drill a 9mm (0.35”) hole in the
desired position through the desk top
and assemble as shown below. It is
recommended that the Spigot Housing
be mounted towards the rear edge of
the desk top.
Drill a 9mm (0.35”) hole in the desired position
through the desk top and assemble as shown
below. It is recommended that the post be
mounted towards the rear edge of the desk top.
Drill a 9mm (0.35”) hole in the
desired position through the desk top
and assemble as shown below. It is
recommended that the pole be mounted
towards the rear edge of the desk top.
Desk Top
Thickness
No. Bolt
Through
Screw
10-13mm 3
13-16mm 2 54mm
16-36mm 1
36-39mm 3
39-42mm 2 80mm
42-63mm 1
A 54mm or 80mm Bolt Through Screw
with 1 to 3 washers, accommodates a
range of desk top thicknesses.
No portion of this document or any artwork
contained herein should be reproduced in
any way without the express written consent
of Atdec Pty Ltd.
Due to continuing product development,
the manufacturer reserves the right to alter
specifications without notice.
Published 20.05.15 ©
SYSTEMA Spring Arm (SSK) Visidec Focus SYSTEMA Post (SP10/SP40)
2
2
11 1
Option 2: Bolt Through Mount
Push any cables under the
cable management wings.
3
/