Page is loading ...

ARIESAUTOMOTIVE.COM
•
NEED ASSISTANCE?
•
877.287.8 634
•
2157002-INS-RA
•
PAGE 1
INSTALLATION MANUAL
2157002
Parts List
1 TrailCrusher
™
bumper
1 Driver / left side bracket
1 Passenger / right side bracket
1 License plate bracket
1 Bolt plate
8 Bolt retainer
6 Button head cap screw, M6
6 Lock nut, M6
10 Carriage bolt, M12
10 Flange nut, M12
2 Cable tie
Torque Specifications
M12 bolt 58 ft-lbs.
M14 bolt 93 ft-lbs.
Use above torque setting unless otherwise noted
Tools Required
Torque wrench Ratchet
Socket set Level
Wrench set Hex key set
Small screw driver --
Level of Difficulty
Moderate
Notes and Maintenance
Before you begin installation, read all instructions thoroughly.
Proper tools will improve the quality of installation and reduce the time required.
To protect the product, wax after installing. Regular waxing is recommended
to add a protective layer over the finish. Do not use any type of polish or wax
that may contain abrasives that could damage the finish.
For polished, gloss and other smooth finishes,
polish may be used to clear small scratches and scuffs on the finish.
Mild automotive detergent may be used to clean the product. Do not use dish detergent, abrasive
cleaners, abrasive pads, wire brushes or other similar products that may damage the finish.
Refer to the table to the left when securing hardware during the
installation process to help prevent damage to the product or vehicle.
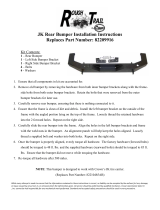
Product Photo
Product Registration
CURT Group stands behind our products with industry leading warranties.
You can help us continue to improve our product line and help us understand
your needs by registering your purchase by visiting:
warranty.curtgroup.com/surveys
At CURT Group, customer is king. We value your feedback and we use that information to make
improvements on our products. Please, take a minute and let us know how we are doing.
Brackets and Hardware
Passenger / right
side bracket
Driver / left
side bracket

ARIESAUTOMOTIVE.COM
•
NEED ASSISTANCE?
•
877.287.8 634
•
2157002-INS-RA
•
PAGE 2
Step 1
Remove the factory mud guards on each
side of the Jeep by removing the three bolts
securing each mud guard in place.
Step 4
Remove the four bolts securing the tow
hook on the driver side. The tow hook will
not be reinstalled.
Remove the two large bolts on the passenger
side frame. Note: The six large bolts from the
tow hook and the frame will be re-used for the
bumper installation.
Remove the two nuts securing the bracket
to the bumper. Repeat on the passenger side.
Step 2
Remove the side braces on each side
of the Jeep by removing the four bolts
securing each side brace in place.
Step 3
Disconnect the wiring harness for the
license plate light from the body of the Jeep.
Separate the connector from the
wiring harness. A small screw driver
may be needed to separate the connector.
Note: The bumper does not
accommodate rear backup sensors.

ARIESAUTOMOTIVE.COM
•
NEED ASSISTANCE?
•
877.287.8 634
•
2157002-INS-RA
•
PAGE 3
Step 5
Remove the two bolts securing the cross
member to the bottom of the bumper.
With assistance, remove
the bumper from the Jeep.
Step 8
Using the four factory bolts removed from
the factory tow hook, fasten the driver-side
bracket to the driver-side frame end.
Snug the fasteners,
but do not fully tighten.
Step 6
Remove the license plate light,
nuts and harness. Set aside for use
in the installation of the new bumper.
Step 7
Place eight M12 carriage
bolts into the new bumper
and secure with bolt retainers.

ARIESAUTOMOTIVE.COM
•
NEED ASSISTANCE?
•
877.287.8 634
•
2157002-INS-RA
•
PAGE 4
Step 9
On the passenger side, attach the
passenger-side bracket with the two
factory bolts on the side of the bracket.
Snug the fasteners,
but do not fully tighten.
Place the provided bolt plate on
the inside of the frame end and
center over the two bottom holes.
Step 12
At this time, adjust the
bumper to its desired location.
Tighten the lower bolts on the driver-side
bracket and the two lower flange nuts on the
passenger-side bracket first.
Note: M12 fasteners should be
torqued to 58 ft-lbs. M14 fasteners
should be torqued to 93 ft-lbs.
Step 10
Place two M12 carriage bolts through
the bolt plate and down through the frame.
Secure with two M12 flange nuts.
Snug the fasteners,
but do not fully tighten.
Step 11
With assistance, slide the bumper
with the carriage bolts in place onto the
brackets installed on the Jeep frame.
Make sure all eight carriage bolts
go through the slots in the passenger-
and driver-side brackets.
Secure the eight carriage bolts
with M12 flange nuts. Snug the
hardware, but do not tighten

ARIESAUTOMOTIVE.COM
•
NEED ASSISTANCE?
•
877.287.8 634
•
2157002-INS-RA
•
PAGE 5
Step 13
Tighten the bolts on the side of the
driver- and passenger-side brackets.
Tighten the carriage bolts and
nuts securing the bumper to the
driver- and passenger-side brackets.
Note: M12 fasteners should be
torqued to 58 ft-lbs. M14 fasteners
should be torqued to 93 ft-lbs.
Step 16
Fasten the license plate to the license plate
bracket using four M6 button head cap screws
and lock nuts. Once all four fasteners have
been started, tighten them all.
Step 14
Route the factory wiring harness for
the license plate light through the large
hole on the driver side of the bumper.
Connect the wiring harness and place the
light into the matching holes on the bumper.
Step 15
Attach the license plate light on the driver
side of the bumper using the factory nuts.

ARIESAUTOMOTIVE.COM
•
NEED ASSISTANCE?
•
877.287.8 634
•
2157002-INS-RA
•
PAGE 6
Step 17
Attach the license plate bracket
to the bumper using two M6 button
head cap screws and two lock nuts.
Tighten the two M6 button
head screws securing the license
plate bracket to the bumper.
Step 18
Reconnect the wiring harness and test
the function of the license plate light.
Use the provided cable ties to fasten any
loose wiring to the body of the Jeep.
Step 19
With the bumper installed, periodic
inspections should be performed to ensure
all mounting hardware remains tight.
To protect your investment, see the
'Notes and Maintenance' section on
the first page of this instruction manual.
Congratulations on the installation of
your new ARIES TrailCrusher
™
bumper.
/