5019 318 33074
AKR 400 - 404 - 405 - 410 - 437
AKR 501 - 521 - 645 - 934
PRODUCT SHEET
D F NL E
GB
P I GR
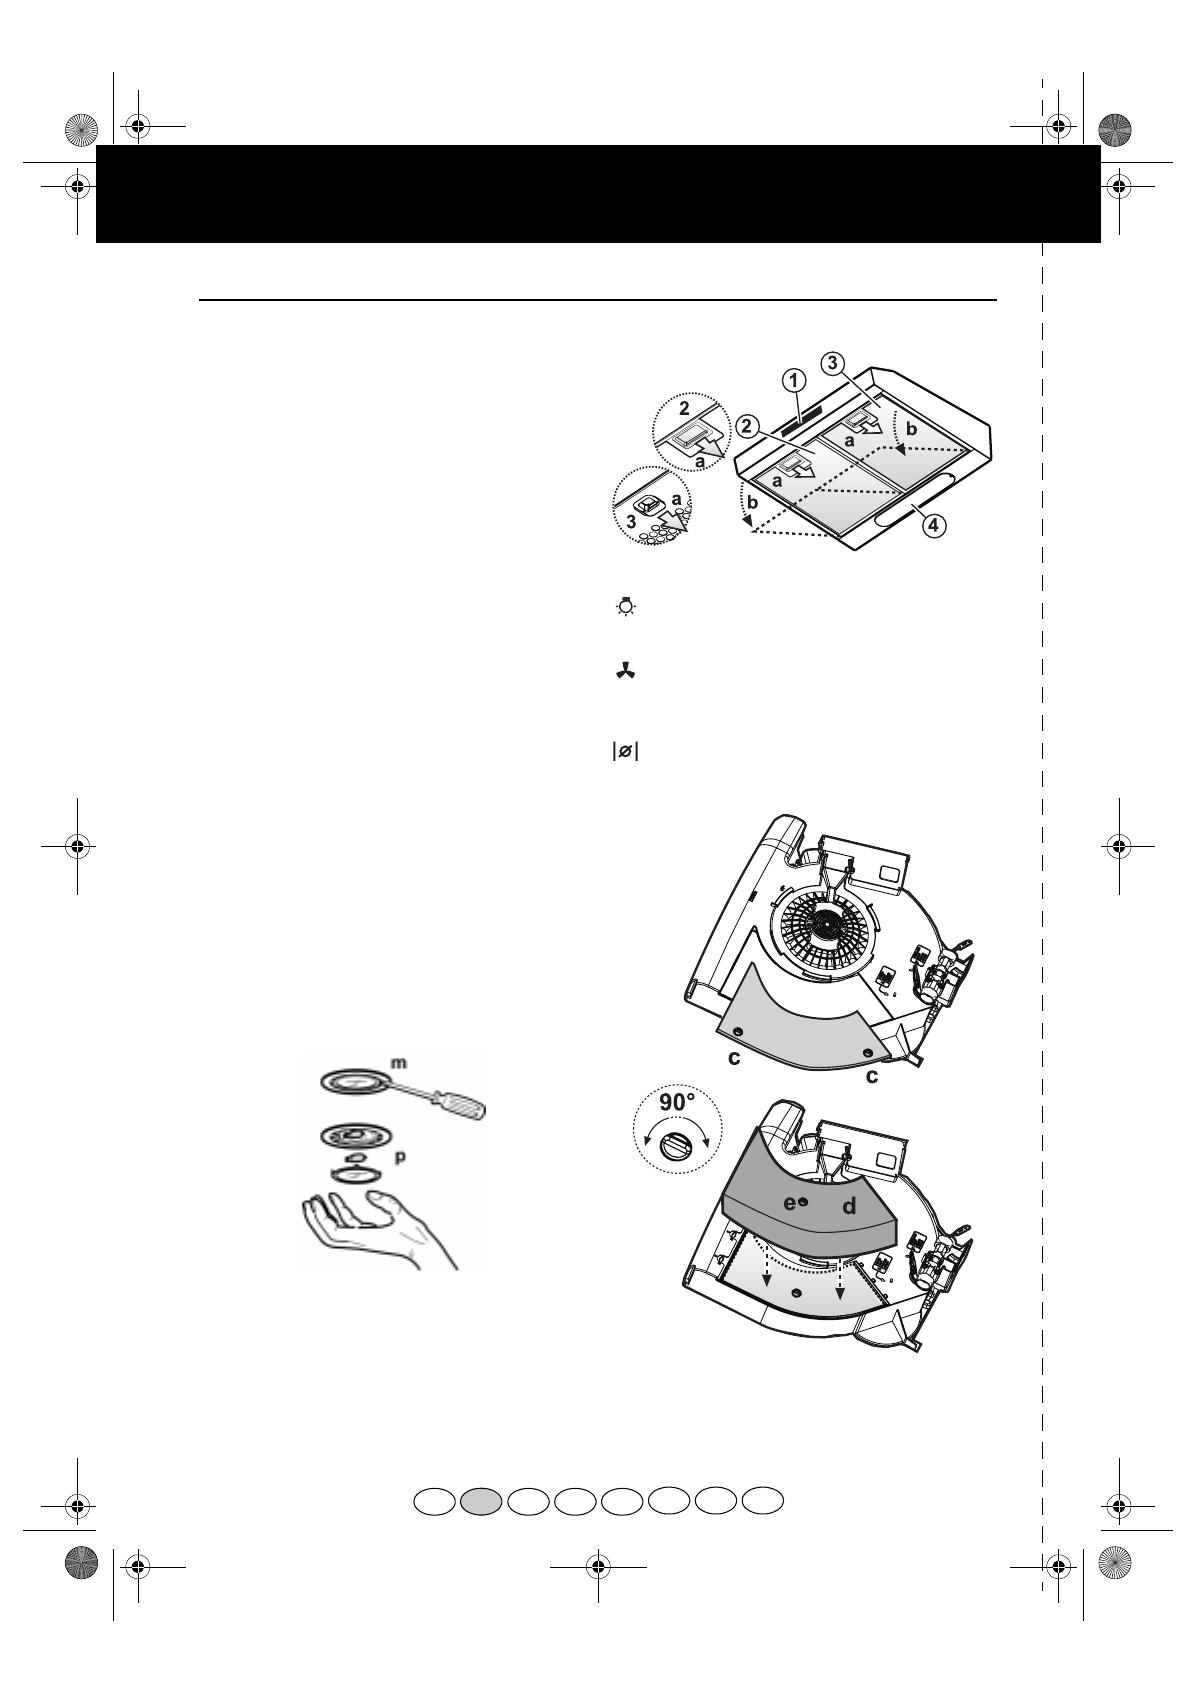
1.
Control panel.
2.
Self-supporting grease filters (depending on model).
3.
Extractor grille with internal grease filter (depending
on model).
4.
Lighting unit.
Replacing bulbs
1.
Disconnect the electrical power supply.
2.
Open the extractor grille or remove the self-supporting
grease filter (depending on model).
Fig. 1 (a-b)
.
3.
Remove the burnt-out bulb.
Replace using 40 W max E14 bulbs only.
4.
Refit the extractor grille or grease filter.
Only for model equipped with halogen bulbs
Use a small screwdriver or any other suitable tool to prise
off
(m-Fig. 3)
the lamp cover
(p-Fig. 3).
Replace the
damaged bulb.
Use 20 W max halogen bulbs only, making sure not to touch
them with your hands. Close the lighting unit (snap-close).
Fitting or renewing the carbon filter:
1.
Disconnect the electrical power supply.
2.
Open the extractor grille or remove the self-supporting
grease filter (depending on model).
Fig. 1 (a-b)
.
3.
To access the carbon filter seat, rotate the knobs 90°
and open the lid.
Fig. 2 (c)
.
4.
Fit the shaped carbon filter in its default location.
Fig. 2 (d)
.
5.
Turn the carbon filter locking knob 90° (check that the
filter is secured, otherwise rotate it further).
Fig. 2 (e)
.
6.
Close the carbon filter compartment
7.
Refit the extractor grille or grease filter.
To remove the carbon filter, proceed in reverse order.
Grease filter maintenance:
1.
Disconnect the electrical power supply.
2.
Open the extractor grille or remove the self-supporting
grease filter (in this last case wash the filter
immediately).
Fig. 1 (a-b).
3.
Remove the device securing the grease filter.
4.
Remove the dirty grease filter.
5.
After the grease filter has been replaced or cleaned
(depending on model), refit the parts in reverse order,
making sure the entire extraction surface is covered.
CONTROL PANEL
Light switch.
The switch has two positions
(lights OFF - lights ON).
To switch on the lights: move the switch to the right.
Extraction speed selection switch.
The extraction speed switch has different settings,
depending on the amount of steam and fumes.
To increase the extraction speed: move the switch to
the right.
Valve open/close switch
(only AKR 645):
move the switch to the right to open
the valve and extract steam and fumes (the hood must
be connected to a peripheric extractor unit).
Fig. 3
Fig. 1
Fig. 2
31833074.fm Page 4 Tuesday, March 25, 2003 11:36 AM


