Page is loading ...

Rev:
Page:
E.C.O. No:
CUSTOMER SERVICE PHONE: 1-800-426-8562
2784-238 1 of 3 6100-0050
Part No:
Tools Required
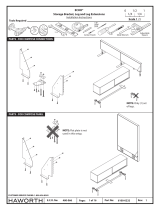
ENCLOSE OSU Bracket
Installation Instructions
MASTER SERIES®
Scale 1 : 1
011/2
1/4 1/4
Tools Required
#2
2”
1”
OR
A
A
B
B
B2
S-87
2”
1”
S-87
RECYCLE EXTRA CLEATS
#8 x 1-1/4" Self-Drilling Screw
(S-87)
#8 x 1-1/4" Self-Drilling Screw
(S-87)

Rev:
Page:
E.C.O. No:
CUSTOMER SERVICE PHONE: 1-800-426-8562
2784-238 2 of 3 6100-0050
Part No:
7-3/4”
7-3/4”
OR
1
2
2
1
A
A
B
B
B2
2”
1”
S-87
1
2
#8 x 1-1/4" Self-Drilling Screw
(S-87)
#8 x 1-1/4" Self-Drilling Screw
(S-87)
NOTE: Make sure the
dislodgement screw (S-87)
is fully engaging the metal
bracket (B).
NOTE: Make sure the
dislodgement screw (S-87)
is fully engaging the metal
bracket (B).
3
2”
1”
S-87
3

Rev:
Page:
E.C.O. No:
CUSTOMER SERVICE PHONE: 1-800-426-8562
2784-238 3 of 3 6100-0050
Part No:
2
1
AB
24” - 48”
60” - 96”
102” - 108”
3
#8 x 1-1/4" Self-Drilling Screw
(S-87)
NOTE: Make sure the
dislodgement screw (S-87)
is fully engaging the metal
bracket (B).
2”
1”
S-87
3
/
