Page is loading ...

modernmaven | Rigid Core
DuraDecor | P: (855) 700 - 5666 | customercar[email protected] | duradecor.com | revised on 06.30.22 | Page 5
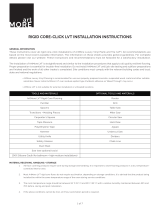
Recommended Tool List
• Knee Pads
• Safety Glasses
• Cut-Resistant Safety Gloves
• Dust Mask
• HEPA-Filtered Vacuum
• Oscillating Multi-Tool or Hand Saw (for door
jambs)
• Jigsaw with Carbide Blades(for complicated
cuts)
• 2 lb. (~32 oz.) Dead Blow Hammer
(preferred) or Rubber Mallet
• Speed Square
• Pencil
• Chalk Line
• Tape Measure
• Utility Knife with Blades
• Wedge Spacers
• Pull Bar
• 6-foot and 1-foot Straight Edge or Level

modernmaven | Rigid Core
DuraDecor | P: (855) 700 - 5666 | customercar[email protected] | duradecor.com | revised on 06.30.22 | Page 6
1. Substrate Preparation
Flatness
Check all substrates for atness prior to installation. The
maximum acceptable tolerance is < 1/8-in. gap (2 x US
quarters) over 6-ft. and ≤ 1/16-in. gap (1 x US quarter) over
1-ft. Make any necessary adjustments to the substrate
before installation. Dormant cracks, saw cut joints and
grout lines < 1/8-in. wide or deep are acceptable – all others
must be cleaned of all dirt and debris, then lled using a
suitable commercial grade patching or repair compound,
following the product instructions.
Concrete Substrates & Concrete Moisture
All concrete must be free of contaminates and structurally
sound. If required, smooth the surface using a suitable,
moisture-resistant commercial grade leveling or patching
compound, following the product instructions. Do not install
if hydrostatic pressure is visible, present or suspected. If
a chemical adhesive remover has been used, contact the
technical department.
For all on and below grade concrete slabs, test the surface to
conrm it is absorbent (porous), following the ASTM F3191
Standard Practice for Field Determination of Substrate Water
Absorption (Porosity) for Substrates to Receive Resilient
Flooring. The water droplets placed on the substrate must
be absorbed for it to be considered absorbent. If required,
the concrete can be made porous by mechanical methods,
such as diamond grinding, a DiamaBrush buer attachment,
shotblasting or similar.
If the substrate cannot be made porous and will not have
a topical moisture mitigation system installed, install a ≥
6-mil thick polyethylene (PE) sheet, which is available at
most home improvement stores. Use sheeting that is ≤ 10-
ft. wide to prevent wrinkles and folds. Sheeting must be
installed over the entire area and extend at least 2-in. up the
walls. All seams must be overlapped and sealed according
to the product instructions.
Wood Substrates
All wooden suboors and substrates must be dry and
in compliance with the moisture content percent (MC-%)
for your region. Regional values are freely available by
searching “moisture map of wood” images. Test using a
non-destructive electronic moisture meter, following the
product instructions.
The suboor must comply with local building codes, have
at least 18-in. of well-ventilated air space below and have a
suitable vapor retarder to isolate the suboor from ground
cover and outdoor conditions. Wood suboors must have
a total thickness of at least 1-in. Sleepers must not make
direct contact with concrete or earth. If necessary, install an
underlayment grade plywood with a minimum thickness of
1/4-in. on the surface. The underlayment must be installed
Installation Instructions
in the opposite direction to the suboor, following ASTM
F1482 Standard Practice for Installation and Preparation of
Panel Type Underlayments to Receive Resilient Flooring.
Note: plywood is a water-sensitive suboor that may
become damaged or deformed by topical liquids. To protect
wood suboors from topical water exposure, follow the Wet
Area Guidelines below.
Radiant Heating Substrates
When installing oor covering over a substrate that contains
a radiant heating system, ensure the radiant heat does not
directly contact the oor covering and is set at the correct
“in-service” temperature for 48-hours prior, during and
after the installation. The radiant heat may be gradually
increased or decreased to maintain the correct “in-service”
site conditions.
Note: Ensure the temperature of the radiant heating system
does not exceed 85°F (29°C).
Additional Acoustic Underlayments
Additional acoustic underlayments are not recommended
or required. However, should one be used, ensure a
polycarbonate chair mat is used in all rolling chair areas.
Do not use additional acoustic underlayments in any
commercial areas.
Unsuitable Substrates
These include but are not limited to: any oating or
loose oor coverings, hardwood, carpet, cushion vinyl,
rubber, cork, foam, asphalt tile, any additional acoustic
underlayment, any substrate with visible mold, mildew, or
fungi and any substrate in wet areas, such as inside showers
and saunas. Do not install directly over any adhesive or
adhesive residue of any kind. Do not install directly over
radiant heated substrate or in recreation vehicles, campers
or boats.
Note: Existing hardwood oor coverings will swell when
exposed to moisture: vinyl oor covering may restrict the
movement of moisture in hardwood, which may result in
ooring failure, especially when installed on or below grade.
Some hardwood oor coverings may also discolor vinyl oor
covering, which is excluded from warranty coverage. By
electing to install over any existing oor covering releases
the manufacturer from any responsibility regarding the
suitability and continued performance of that product,
including any resulting eect on the new oor covering,
such as indentations and damaged locking mechanisms.
Other Suboors/Substrates
These may be acceptable. However, they must be
smooth, at and remain dry, without contaminates and be
structurally sound.
Wet Area Guidelines
Some suboors and substrates, such as plywood, may be

modernmaven |
Rigid Core
DuraDecor | P: (855) 700 - 5666 | customercar[email protected] | duradecor.com | revised on 06.30.22 | Page 7
sensitive to and damaged or deformed by topical liquids,
such as water, pet urine and spills. While modernmaven
Rigid Core Flooring is a waterproof product, water-
sensitive suboors may require additional protection to
prevent water exposure. When installing oor covering in
wet areas, ensure that bathmats or similar are used where
appropriate to decrease the amount of water that can
collect on the surface. Any and all spills should be cleaned
up immediately after discovering them and within 8 hours.
Suboor atness is critical to preventing water migration
through seams that may ex or peak due to foot trac and
suboor deection - be sure to check atness and make all
necessary adjustments prior to installing.
Water-sensitive substrate must have a ≥ 6-mil thick
polyethylene (PE) sheet (available at Hardware stores)
installed over the entire area and extend at least 2-in.
up the walls. All seams must be overlapped and taped
according to the product instructions. In addition, the area
must be separated from all other rooms using a suitable
water-resistant t-molding. Following ooring installation,
the plastic sheet must be trimmed ush with the surface
of the suboor. Prior to installing wall-base or molding,
the required perimeter expansion gap must be lled with
a 100% silicone caulk, including the wet area side of all
t-moldings. Additionally, all door jambs, plumbing and
vertical surfaces that won’t have wall-base or molding
installed must be sealed with 100% silicone caulk. Once the
entire perimeter has been lled or sealed, water-resistant
wall-base, moldings or other accessories may be installed.
Apply a bead of silicone caulk to the parts of the wall-base
or moldings that will make contact with the surface of the
ooring. Ensure all wall base and moldings are attached to
the suboor, wall or wall-base without compression, to allow
movement and cleanup any remaining silicone immediately.
Do not anchor wall-base or moldings into or through the
oor covering.
2. Expansion Gap
If the length or width of the installation area is ≤ 50-ft., an
expansion gap of at least 1/4-in. must be created around the
entire perimeter. If the overall length or width is between
50 – 85-ft., then the gap must be increased to 1/2-in. around
the entire perimeter. A maximum of 85-ft. in length or
width must not be exceeded. If required, use a suitable trim
molding covering the edges by 1/8-in. and allowing a 1/2-in.
expansion gap.
For three-season rooms, a gap of at least 1/2-in. around
the entire perimeter is required. In addition, the area must
be separated from all other rooms using a suitable trim
molding. The maximum of 30-ft. in length or width must not
be exceeded.
Note: Areas with very heavy furniture ≥ 800-lb. (363-kg)
must be isolated from the rest of the installation with a
compatible t-molding and have ≥ 1/2-in. expansion gap.
Installation Instructions
3. Floor Installation Instructions
General Installation Preparation
It is recommended that all wall-base be removed before
ooring installation. Alternately, a quarter round molding
that covers both the requiredexpansion gap and at least
1/8-in. of the oor covering (attached to the wall or wall-
base only) may be installed. Undercut all wooden door
jambs and the rst inch of any remaining wall-base (which
will be covered with molding) with an Oscillating Multi-Tool
or hand saw - the height must be the thickness of the oor
covering plus 1/64-in., which allows the oor covering to
expand and contract freely, out of sight, with temperature
uctuations (see gure 1). Steel door jambs should be
pattern-scribed, leaving the required expansion gap. Use
a color-coordinated 100% silicone to ll the void. Clean the
entire area to be installed using a HEPA-ltered vacuum.
Before beginning, check and make sure the lot numbers
on the packaging match and mix the oor covering from
several boxes to ensure a random appearance. During
the installation, inspect for visible defects, including any
damage, gloss, color or shade variations, dirt and debris
in the locking mechanism (remove using a soft brush),
as installing it assumes full responsibility. If you have
any concerns, do not install and immediately contact the
technical department.
Layout
Follow thedesignordrawings provided or agreed upon by
the designer, architect, or end-user. The end joint layout for
all planks should be random - make sure joints are not “stair
stepped” (see gure 2). Failure to randomize end joints
could weaken the integrity of the joint system, which may
lead to failure. All planks must be at least 8-in. in length and
all end seams must be staggered by ≥ 8-in. Tiles must be
installed in a brick-bond pattern, oset by 1/2 or 1/3 of the
plank.
Cutting
To cut the oor covering, measure and mark the surface
with a pencil, then carefully score the surface a few times
on the mark using a sharp utility knife along the side of a
speed square (see gure 3). Snap the plank downwards
and complete by cutting the backing from underneath (see
gure 4). For complicated cuts, such as door jambs, it is
recommended to use a jigsaw with a carbide blade following
the product safety instructions.
Installation
Clean the entire area to be installed twice using a HEPA-
ltered vacuum. Determine the best wall to start installation
on - typically this would be the longest straight wall with a
doorway (if present). Measure the width of the room and,
allowing for two expansion gaps, calculate the width of your
last row. If it is less than half the width of the oor covering,
or if a balanced design is required, then reduce the width
of the rst row accordingly. Use a chalk-line to mark the

modernmaven |
Rigid Core
DuraDecor | P: (855) 700 - 5666 | customercar[email protected] | duradecor.com | revised on 06.30.22 | Page 8
outside edge of the rst row on the substrate (see gure 5).
If needed, trim the rst row (the side without the extended
locking mechanism) to t, accounting for the expansion
gap.
First Row (Slide)
At the left corner of the starting wall, position the rst tile or
plank ush with the walls. Use the side and end without the
extended locking mechanism against the walls. Place wedge
spacers between the oor covering and wall to maintain the
required expansion gap around the entire perimeter (see
gure 6). Before connecting the second piece, lay it at on
the substrate, adjacent to the rst row and lined up with
the end of the previous piece. Then, while keeping the joint
perfectly in line, slide the second plank into the rst, locking
the mechanism together (see gure 7). Complete the rst
row using this method. If there is a doorway, measure, mark
and cut the ooring to make sure the cut edge will be located
underneath the door jamb and frame while maintaining
the required expansion gap. A jigsaw should be used for
complicated cuts like these. Keeping the installation straight
is critical, so check the rst row using a chalk line or similar
and, as needed, adjust and reinforce the row by adding more
wedge spacers. The acceptable straightness tolerance is
within 1/16-in. for lengths over 20-ft. or 1/32 in. for lengths
under 20-ft. Complete the following rows starting with a
cut piece, such as a piece from a previous row. Install the
side joints before the end joints as instructed under “Side
Joints” and “End Joints”.
Side Joints (Angle-Angle)
Starting at the left corner, place the side without the
extended locking mechanism into the side of the previously
installed row at a ~ 25° angle (see gure 8). Make sure the
joint is seated properly, then slide the plank or tile into
position (see gure 9). The end joint must line up perfectly.
Lay the tile or plank at and complete the end joint.
End-Joints (Drop-Lock or Fold-Down)
Always check the alignment of the end joint and adjust if
necessary. Lock the joint into place by lightly tapping along
the high side, starting from the “T”, using a 2-lb. (~ 32-oz.)
soft faced dead blow hammer or rubber mallet (see gure
10). Keep the striking head at with the oor covering and
tap until perfectly ush. If the locking mechanism does not
line up properly, then check and adjust the straightness as
necessary.
Additional Tips
Do not hit the locking mechanism directly with any hammer,
tapping block or pull bar (except the last row) - doing so will
damage the locking mechanism and may result in peaking,
gapping or broken joints. If required, use a ~ 6-in. piece of
scrap oor covering, seated in the locking mechanism, to
lightly tap and close any joints.
If you need to install small cuts of oor covering that are
< 3-in. in length or width, place a thin bead of liquid super-
glue on the previously installed locking mechanism just
before installing. This will ensure the pieces remain locked
together during use. Do not get the adhesive on the surface
- coverage will be ~ 30 ft. per oz.
After the rst ve or six rows are completed, turn around and
continue installing, working on top of the installed material.
This will allow the side joints to be pulled together rather
than pushed together, which will make the installation even
easier.
If you need to disengage the end joints for any reason, rst
unlock the side joints by lifting the outside edge of the row
to ~ 25° and disconnect the entire row. Make sure all pieces
are lying at and are properly engaged (tap to engage, if
required), then simply slide them apart. If they are angled or
pulled upwards, the joint will break.
Completion
If used, plastic sheeting must be trimmed ush with the
surface of the oor covering. If installed in a wet area,
plastic sheeting must be trimmed ush with the suboor.
When installing in wet areas, ensure the expansion gap and
all vertical surfaces are lled or sealed with a 100% silicone
caulk and ensure all wall-base and moldings are water-
resistant, following to the Wet Area Guidelines. Install all
necessary wall-base and/or moldings and ensure they
are anchored to the substrate, wall or wall-base without
compression, to allow movement. Do not anchor wall-base
or moldings into or through the oor covering.
Protection
If required, protect the clean oor covering from other trades
or heavy loads using ½-in. plywood or similar and tape all
seams. For light trac, use Ram board or similar and tape
all seams. For furniture, use only polyurethane, silicon or
felt glides (replaced > 3-times a year), keeping them clean
and grit-free – all glides should be ≥ 1-in.2, especially on
heavy furniture. Use protective polycarbonate chair mats
designed for resilient ooring underneath rolling chairs or
soft “W-type” wheels. Use non-rubber-backed entrance
matting at all outdoor entrances, as this will improve air
quality and reduce maintenance. Do not drag heavy or
sharp objects directlyacross the surface - use hard surface
“sliders” (available at Hardware stores). For areas that
may be subjected to standing water on the surface, such
as bathrooms with a bath or shower, theperimeterof the
installation must be properly sealed using a 100% silicon
caulk to prevent water from getting beneath the ooring. To
avoid excessive fading or discoloration from direct sunlight
exposure, use appropriate window treatments, an eective
UV/IR lm or Low-E glass windows. Take photographs and
have any required documentation signed and led following
completion.
Installation Instructions

modernmaven | Rigid Core
DuraDecor | P: (855) 700 - 5666 | customercar[email protected] | duradecor.com | revised on 06.30.22 | Page 9
Installation Images
Figure 1: Preparation - Undercut Doorjambs
Figure 2: Layout - Stagger seams
Figure 3: Cutting - Mark, score and cut
Figure 4: Cutting - Snap plank downward
Figure 5: Installation - Mark the starting line
Figure 6: First Row - Place wedge spacers

modernmaven |
Rigid Core
DuraDecor | P: (855) 700 - 5666 | customercar[email protected] | duradecor.com | revised on 06.30.22 | Page 10
Figure 7: First Row - Slide planks together
Figure 8: Side Joints - Install piece at 25° angle
Figure 9: Side Joints - Align joint with previous
Figure 10: End Joints - Lock piece into place
Installation Images
/