ALTA Roller Shades User manual

Type
User manual

ALTA Roller Shades bring you the convenience of light and privacy control at your fingertips. These shades are designed for both inside and outside mounts, providing a versatile solution for your windows. With the TouchLift mechanism, you can effortlessly raise, lower, and adjust the shade to your desired position. The installation process is simple and straightforward, ensuring a seamless integration into your home décor. Upgrade your windows with ALTA Roller Shades and experience the perfect balance of style and functionality.

ALTA Roller Shades bring you the convenience of light and privacy control at your fingertips. These shades are designed for both inside and outside mounts, providing a versatile solution for your windows. With the TouchLift mechanism, you can effortlessly raise, lower, and adjust the shade to your desired position. The installation process is simple and straightforward, ensuring a seamless integration into your home décor. Upgrade your windows with ALTA Roller Shades and experience the perfect balance of style and functionality.

ROLLER SHADES (SKYLINE)
TouchLift with Mounting Bar
INSTALLATION INSTRUCTIONS
1. Install the Brackets
2. Install the Shade
2a. Inside Mount
2b. Outside Mount
1
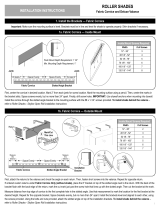
Inside Mount, install the brackets level and aligned to each other, using the screws provided.
Outside Mount, install the brackets level and aligned to each other, with the plastic tab facing up and approximately 1/2” above the opening on the window
frame, window molding, wall, or ceiling using the screws provided.
2 1/2”
Space evenly
2 1/2”
Space evenly
2 1/2”
Space evenly
2 1/2”
Space evenly
Desired
Mounting Bar
end mark
Desired
Mounting Bar
end mark
1
2
3
Snap
Click
Click
1
2
Inside mount (IB) Outside mount (OB)
First, position the mounting bar to engage the ridge into the front lip of all brackets. Then, rotate the shade backwards until the mounting bar engages the bracket(s).
First, position the mounting bar to engage the ridge into the bottom lip of all brackets. Then, rotate the shade upwards until the mounting bar engages the bracket(s).
Snap
3
Tab
Tab
Tab
Front of Shade
Tab
Front of Shade
Important: Make sure the mounting surface is level. Brackets must be in line and level for shade to operate properly. Shim brackets if necessary.
INSTALLATION INSTRUCTIONS
4a. Inside Mount
4. Remove the Shade (Only if Necessary)
3. Adding Optional top treatment (Fabric Corner or Deluxe valance)
4b. Outside Mount
First, press the release tab on all the bracktes. Then, rotate the shade towards the front and downward until the mounting bar desingage from the bracket(s).
Child Safety
2
Please refer to Roller Shades - Skyline Fabric Cornice and Deluxe Valance installation instructions.
First, press the release tab on all the brackets. Then, rotate the shade towards the front until the mounting bar disengages from the bracket(s).
1
2
Snap
Immediately remove this product if a cord longer than 22 cm or a loop
exceeding 44 cm around becomes accessible. Rev 7/21 Print 7/21
WARNING
RISQUE D’ÉTRANGLEMENT–
Les enfants en bas âge
MISE EN GARDE
peuvent s’étrangler avec des cordes. Enlevez immédiatement ce produit si une
corde mesurant plus de 22 cm devient accessible ou si le contour d’une boucle de
plus de 44 cm devient accessible.
STRANGULATION HAZARD –
Young chidren can be strangled by cords.
Snap
1
Tab
Tab
Front of Shade
Front of Shade
2
3
STORES À ENROULEUR (SKYLINE)
TouchLift avec barre de montage
INSTRUCTIONS D’INSTALLATION
1. Installez les supports
2. Installez le store
2a. Montage intérieur
2b. Montage extérieur
3
Montage intérieur, installez les supports de niveau et alignés les uns aux autres, en utilisant les vis fournies.
Montage extérieur, installez les supports de niveau et alignés les uns aux autres, avec l’onglet de plastique vers le haut et environ ½ po par dessus l’ouver-
ture sur le cadre de la fenêtre, la moulure, le mur ou le plafond en utilisant les vis fournies.
Espace uniforme
2 1/2 po
2 1/2 po
Espace uniforme
2 1/2 po
Espace uniforme
Desired
Mounting Bar
end mark
Desired
Mounting Bar
end mark
1
2
3
Snap
Clic
Clic
1
2
Montage intérieur (IB) Montage extérieur (OB)
Pour commencer, positionnez la barre de montage pour engager le bord en avant de tous les supports. Ensuite, tournez le store vers l’arrière jusqu’à ce que
la barre de montage engage le(s) support(s).
Pour commencer, positionnez la barre de montage pour engager le bord en avant de tous les supports. Ensuite, tournez le store vers le haut jusqu’à ce que
la barre de montage engage le(s) support(s).
Espace uniforme
2 1/2 po
Snap
3
Onglet
Onglet
Onglet
Devant du store
Onglet
Devant du store
Important : Assurez-vous que la surface de montage est de niveau. Les supports doivent être alignés an que le store fonctionne correctement.
Utilisez des cales si nécessaire.
INSTRUCTIONS D’INSTALLATION
4a. Montage intérieur
4. Retirez le store (seulement si nécessaire)
3. Ajouter un traitement supérieur en option (Coin en tissu ou cantonnière deluxe)
4b. Montage extérieur
Premièrement, appuyez sur l’onglet de déclenchement sur tous les supports. Ensuite, tournez le store vers le devant et vers le bas jusqu’à ce que la barre de
montage désengage du support(s).
4
Veuillez référer aux instructions d’installation pour les stores à enrouleur Skyline Corniche en tissu et cantonnière deluxe.
Premièrement, appuyez sur l’onglet de déclenchement sur tous les supports. Ensuite, tournez le store vers le devant jusqu’à ce que la barre de montage
désengage du support(s).
1030890 • rév 04/22
1
2
Snap
Sécurité des enfants
Immediately remove this product if a cord longer than 22 cm or a loop
exceeding 44 cm around becomes accessible. Rev 7/21 Print 7/21
WARNING
RISQUE D’ÉTRANGLEMENT–
Les enfants en bas âge
MISE EN GARDE
peuvent s’étrangler avec des cordes. Enlevez immédiatement ce produit si une
corde mesurant plus de 22 cm devient accessible ou si le contour d’une boucle de
plus de 44 cm devient accessible.
STRANGULATION HAZARD –
Young chidren can be strangled by cords.
Snap
1
Onglet
Onglet
Devant du store
Devant du store
2
3
  • Page 1 1
  • Page 2 2
  • Page 3 3
  • Page 4 4

ALTA Roller Shades User manual

Type
User manual

ALTA Roller Shades bring you the convenience of light and privacy control at your fingertips. These shades are designed for both inside and outside mounts, providing a versatile solution for your windows. With the TouchLift mechanism, you can effortlessly raise, lower, and adjust the shade to your desired position. The installation process is simple and straightforward, ensuring a seamless integration into your home décor. Upgrade your windows with ALTA Roller Shades and experience the perfect balance of style and functionality.

Ask a question and I''ll find the answer in the document

Finding information in a document is now easier with AI

in other languages