ALTA BandLift User manual

Type
User manual

ALTA BandLift is a versatile window blind system that offers both tilt-only and BandLift operation, providing precise light control and privacy management. With its innovative design, ALTA BandLift allows you to easily adjust the angle of the slats to filter in just the right amount of light, creating a comfortable and inviting ambiance in your home. Additionally, the BandLift feature enables you to conveniently raise and lower the blind, making it effortless to control the amount of sunlight entering the room.

ALTA BandLift is a versatile window blind system that offers both tilt-only and BandLift operation, providing precise light control and privacy management. With its innovative design, ALTA BandLift allows you to easily adjust the angle of the slats to filter in just the right amount of light, creating a comfortable and inviting ambiance in your home. Additionally, the BandLift feature enables you to conveniently raise and lower the blind, making it effortless to control the amount of sunlight entering the room.

WOOD & FAUX BLINDS
Tilt Only and BandLift
INSTALLATION INSTRUCTIONS
1b. Install the Brackets — Outside Mount
1a. Install the Brackets — Inside Mount
1c. Using Extension Brackets (optional) 2. Install the Blind
Install each bracket with two screws, either through the side or up through
the top. Minimum 1 1/8” mounting surface height requirement.
For Intermediate Bracket (if required), space evenly between the two end
brackets. Make sure all brackets are leveled and aligned.
For Flush Mount with Valance, the minimum is 3 1/2” for 2” slat and 3 7/8”
for 2 3/8” and 2 1/2”slats.
First, mark where the ends of the headrail will be positioned. Then, install
each bracket with two screws through the back. Minimum 1 3/4” mounting
surface height requirement.
For Intermediate Bracket (if required), space evenly between the two end
brackets. Make sure all brackets are leveled and aligned.
Important: On 2-3/8” & 2-1/2” slats, spacer blocks will be attached to the
end of each bracket (if extension brackets are not used).
Position the extension brackets to the wall markings made on step 1.
The bracket tops must be aligned and level to one another.
First, mount the extension brackets with screws through diagonal holes.
Attach the installation brackets to the extension brackets. Then, mark where
the ends of the headrail will be positioned and install each bracket with two
screws either through the back.
For Intermediate Bracket (if required), space evenly between the two end
brackets. Make sure all brackets are leveled and aligned.
First, open the installation brackets door latches by pressing up on the
bracket bottoms while lifting the doors open. Then, slide the headrail into
the brackets and push it all the way back. The front lip of the headrail should
hook to the center support lips (if installed). Finally, snap the door shut over
the locking tab to secure it.
Right Hand
Bracket
Left Hand
Bracket
Right Hand
Bracket
Left Hand
Bracket
Intermediate Bracket
(optional)
Spacer Block
(if necessary)
3/8
1
1
Side or Top Installation
Intermediate Bracket
(optional)
2
3
Click
INSTALLATION INSTRUCTIONS
Child Safety
4a. Install Components — Hold-Down (Optional) 4b. Install Components — Wand
6. Remove the Blind (only if necessary)
5. Install the Valance
3. Unpack the Blind (applies to ‘Tilt Only’)
First, lower the blind and connect the bottom rail pins to the hooks on both
sides. Then, mark the hold-down bracket locations on the mounting surface.
With the brackets level, attach the hold-downs using the provided screws.
First, lay the valance face down on a protected surface with the back side up. Insert the clip dovetail into the valance groove and twist the clip until it is straight
with the clear tabs at the top of the valance. Then, install and space all provided clips evenly.
Important: The magnetic clip has three projection positions (5/8”, 3/4” and 7/8”). To change the projection, rst insert a small at head screwdriver into the slot
on one side of the magnet. Push the screwdriver in, towards the magnet, and then move the magnetic valance clip to the desired position.
Finally, align the valance to the headrail, making sure to hold the valance securely from the front side with both hands. Position the magnetic valance clips to the
top-front lip of the headrail until it is level and in position. Then, press the valance gently forward, just enough so the magnetic valance clips adhere to the headrail.
Each blind will be packaged with a minimum of two clear lm sleeves. Blinds equal to or greater than 48” will have additional sleeves, on each end and in the
middle. For best results:
1. Open longer sleeves (1) to release the bottom portion of the slats. Be sure to hold
the slats and guide into position.
2. Then open the shorter sleeves (2) to release the slats and gently lower to the full
length of the blind.
IB
OB
Immediately remove this product if a cord longer than 22 cm or a loop
exceeding 44 cm around becomes accessible. Rev 7/21 Print 7/21
WARNING
RISQUE D’ÉTRANGLEMENT–
Les enfants en bas âge
MISE EN GARDE
peuvent s’étrangler avec des cordes. Enlevez immédiatement ce produit si une
corde mesurant plus de 22 cm devient accessible ou si le contour d’une boucle de
plus de 44 cm devient accessible.
STRANGULATION HAZARD –
Young chidren can be strangled by cords.
2
1
2
3
4
First, remove the Valance by gently pulling it. Then, open the end brackets
by inserting a at blade screwdriver between the bottom of the cover and the
quick release tab and twisting. You may also push up on the bottom of the
end brackets to release the locking tab. Finally, slide the headrail out.
4
Optional projections positions:
5/87/8”
Narrow Projection Wide Projection
Click
1 2 3
Click
Snap
1 2 3
2
1
Clear Film Sleeve
1 1
2
3/4” Projection
NOT shown
STORES EN BOIS ET SIMILIBOIS
Inclinaison seulement et BandLift
INSTRUCTIONS D’INSTALLATION
1b. Installez les supports — Montage extérieur
1a. Installez les supports — Montage intérieur
1c. Utilisation des supports d’extension (facultatif) 2. Installez le store
Installez chaque support avec deux vis, soit par le côté, soit par le haut.
Une hauteur minimale de 1 1/8” est requise pour la surface de montage.
Pour le support intermédiaire (si nécessaire), espacez uniformément entre
les deux supports d’extrémité. Assurez-vous que tous les supports sont de
niveau et alignés.
Pour le montage encastré avec cantonnière, le minimum est de 3 1/2” pour
les lattes de 2” et de 3 7/8” pour les lattes de
2 3/8” et de 2 1/2”.
Tout d’abord, marquez l’endroit où seront placées les extrémités du caisson.
Ensuite, installez chaque support avec deux vis à l’arrière. Une hauteur
minimale de 1 3/4” est requise pour la surface de montage.
Pour le support intermédiaire (si nécessaire), espacez uniformément entre
les deux supports d’extrémité. Assurez-vous que tous les supports sont de
niveau et alignés.
Important : Sur les lattes de 2 3/8” et de 2 1/2”, des blocs d’espacement
seront xés à l’extrémité de chaque support (si les supports d’extension ne
sont pas utilisés).
Positionnez les supports d’extension sur les marques sur le mur réalisés
à l’étape 1. Le haut des supports doivent être alignés et de niveau les uns
aux autres.
Tout d’abord, montez les supports d’extension avec des vis à travers les
trous diagonaux.Fixez les supports d’installation aux supports d’extension.
Ensuite, marquez l’endroit où seront placées les extrémités du caisson et
installez chaque support avec deux vis par l’arrière.
Pour le support intermédiaire (si nécessaire), espacez uniformément entre
les deux supports d’extrémité. Assurez-vous que tous les supports sont de
niveau et alignés.
Tout d’abord, ouvrez les loquets de porte des supports d’installation en
appuyant sur le bas des supports tout en soulevant les portes. Ensuite,
faites glisser le caisson dans les supports et poussez-la vers l’arrière.
La lèvre avant du caisson doit s’accrocher aux lèvres du support central
(si installé). Enn, fermez la porte en la faisant claquer sur la languette
de verrouillage pour la xer.
Support
droit
Support
gauche
Support
droit
Support
gauche
Support intermédiaire
(facultatif)
Bloc d’espacement
(si nécessaire)
3/8 po
3
Montage de côté ou en haut
Support intermédiaire
(facultatif)
1
2
3
Click
INSTRUCTIONS D’INSTALLATION
Sécurité des enfants
4a. Installez les composants – Taquets de retenue (facultatif)
6. Retirez le store (seulement si nécessaire)
5. Installez la cantonnière
4b. Installez les composants — Baguette (facultatif)
1 2 3
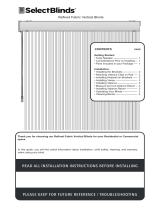
3. Déballez le store (s’applique à “Inclinaison seulement”)
Tout d’abord, abaissez le store et connectez les épingles de la traverse in-
férieure aux crochets des deux côtés. Ensuite, marquez les emplacements
des taquets de retenue sur la surface de montage. Une fois que les supports
sont de niveau, xez les taquets de retenue à l’aide des vis fournies.
Tout d’abord, posez la cantonnière face vers le bas sur une surface protégée, le dos vers le haut. Insérez la queue du clip dans la rainure de la cantonnière et tournez
le clip jusqu’à ce qu’il soit aligné avec les languettes transparentes en haut de la cantonnière. Ensuite, installez et espacez uniformément tous les clips fournis.
Important : Le clip magnétique a trois positions de projection (5/8”, 3/4” et 7/8”). Pour modier la projection, insérez d’abord un petit tournevis à tête plate dans
la fente située sur un côté de l’aimant. Poussez le tournevis à l’intérieure vers l’aimant, puis déplacez le clip magnétique de la cantonnière jusqu’à la position
souhaitée.
Enn, alignez la cantonnière sur le caisson, en assurant à bien tenir la cantonnière à l’avant avec les deux mains. Placez les clips magnétiques de la cantonnière
sur la lèvre supérieure avant du caisson jusqu’à ce qu’elle soit de niveau et en position. Ensuite, poussez doucement la cantonnière vers l’avant, juste assez
pour que les clips magnétiques de la cantonnière adhèrent au caisson
Chaque store sera emballé avec un minimum de deux manchons de lm transparent. Les stores d’une taille égale ou supérieure à 48” seront munis de man-
chons supplémentaires, à chaque extrémité et au milieu. Pour obtenir les meilleurs résultats :
1. Ouvrez les manchons les plus longs (1) pour libérer la partie inférieure des lattes. Veuillez
maintenir les lattes et guidez-les en position.
2. Ouvrez ensuite les manchons courts (2) pour libérer les lattes et abaissez-les doucement
sur toute la longueur du store.
Immediately remove this product if a cord longer than 22 cm or a loop
exceeding 44 cm around becomes accessible. Rev 7/21 Print 7/21
WARNING
RISQUE D’ÉTRANGLEMENT–
Les enfants en bas âge
MISE EN GARDE
peuvent s’étrangler avec des cordes. Enlevez immédiatement ce produit si une
corde mesurant plus de 22 cm devient accessible ou si le contour d’une boucle de
plus de 44 cm devient accessible.
STRANGULATION HAZARD –
Young chidren can be strangled by cords.
1033972 • rev 09/22
IB
OB
2
1
Manchon de lm transparent
1 1
2
1
2
3
4
Tout d’abord, retirez la cantonnière en la tirant doucement. Ensuite, ouvrez
les supports d’extrémité en insérant un tournevis à lame plate entre le bas
du couvercle et la languette de dégagement rapide et en le tournant. Vous
pouvez également pousser sur le bas des supports d’extrémité pour libérer la
languette de verrouillage. Enn, faites glisser la barre de tête vers l’extérieur.
4
Positions de projection
facultatives :
5/8” 7/8”
Projection étroite Projection large
Clic
1 2 3
Clic
Snap
4
  • Page 1 1
  • Page 2 2
  • Page 3 3
  • Page 4 4

ALTA BandLift User manual

Type
User manual

ALTA BandLift is a versatile window blind system that offers both tilt-only and BandLift operation, providing precise light control and privacy management. With its innovative design, ALTA BandLift allows you to easily adjust the angle of the slats to filter in just the right amount of light, creating a comfortable and inviting ambiance in your home. Additionally, the BandLift feature enables you to conveniently raise and lower the blind, making it effortless to control the amount of sunlight entering the room.

Ask a question and I''ll find the answer in the document

Finding information in a document is now easier with AI

in other languages