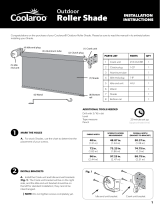
West Elm Cordless Roller Shade Assembly Instructions

Category
Cable trays
Type
Assembly Instructions
1
Cordless Roller Shade
Installation Instruction
Recommended Tools
Screw gun / Drill
Tape Measure
Screwdriver
Level
Pencil
Hardware Included
1Screws needed for installing
Hardware
Drawing
Usage
1 1/4" Hexagon screw
To install bracket
2Hardware for Roller shade with Raceway System
Hardware
Drawing
Usage
Mounting
bracket
To install Shade
Valance
bracket
To install Valance (mounted on
raceway)
Valance clip
To install Valance (placed on
Valance)
Handle
For Cordless Shades
Shade Bracket
cover
Shade bracket cover
(Pre-installed on the shade
bracket)
3Usage for Mounting bracket, Valance bracket, Valance clip
Shades Width
(X)
Mounting
bracket
Valance
clip
20X33
2 pcs
2 pcs
34X40
2 pcs
3 pcs
41X54
3 pcs
3 pcs
55X72
3 pcs
4 pcs
Shade Bracket Installation
Installation of Roller Shade with Raceway System (Inside Mount)
Measure 2" in from top left and top right of where the blind will
sit, and mark where the screws will go.
When installing the mounting bracket, the distance from the
bracket's mounting hole to the edge of the window frame should
be at least 3/4".
Make sure all brackets line up with each other horizontally. Each
bracket will require two 1 1/4" hexagon screws for the installation.
If more brackets are supplied, space them evenly between the first
two brackets.
Installation of Roller Shade with Raceway System(Outside Mount)
Measure 2" in from top left and top right of where the blind will
sit, and mark where the screws will go.
When installing the mounting bracket, the distance from the
bracket's mounting hole to the edge of the window frame should
be at least 3/4".
Make sure all brackets line up with each other horizontally. Each
bracket will require two 1 1/4" hexagon screws for the
installation.
If more brackets are supplied, space them evenly between the
first two brackets.
Shade Installation and Removal
Before installing the shade into the mounting brackets, please
locate the lock pin in the shade bracket on the end plug side. Slide
the pin downward into the end plug to prevent the shade from
falling.
The way to attach the shade to mount brackets....
Insert the back edge of the raceway into the back plastic part of the
bracket, and then turn the raceway upwards so that the front rib of
the raceway snaps into the bracket.
Removal of Roller Shade with Raceway System
Use a tool to push back the front or back plastic part of the
brackets.
Turn the back side of the raceway downward so that it detaches
from the bracket.
Finally remove the raceway by pulling downward from the
brackets.
Fabric Valance Installation
Valance Bracket Installation
After installing the shade, the brackets for the valance come next.
Align the valance bracket with the raceway first and then push the
bracket onto the raceway. The top groove of the valance bracket
should hook onto the top of the raceway while the bracket's bottom
groove clips into the bottom rib of the raceway, as shown below.
The drawing below shows the valance brackets installed in an
ideal position.
Valance Clip Installation
Insert the valance clip from the notch of dedicated groove on the
back of valance, paying special attention to the direction the
valance clip, the valance clip should face upwards.
Slide the valance clips to locations aligned with the valance
bracket as pictured below.
If the valance clip is accidentally installed in wrong direction, do
not force the valance clip into groove but easily take it out to
prevent from breaking the trail.
With Raceway and Fabric Wrapped Valance
N301078-4
The direction of this
valance clip is
facing upward
2
Attach Valance to Shade
Slide the valance clips to a position on the valance so that they are each
aligned with a valance bracket on the shade, and then push the valance
clips into the valance bracket.
Valance Removal
First, remove Valance together with valance clip from valance
bracket.
Take down shade from mounting bracket before removing valance
bracket from raceway.
Turn the valance bracket 90 degree then take off valance bracket
from raceway, as shown below.
How to install or remove Handle for Cordless Shade
Attach Handle to Hem Bar
Turn over hem bar and you can see a label attached at the center of
hem bar. Align the center of the bottom of handle with the label
and hook the handle to the hem bar from top to bottom.
Press the handle from top to bottom to make the top of handle clip
into the hem bar.
Finally tear off the label from hem bar.
Remove handle from hem bar
Use straight screwdriver to pry the bottom of Handle from hem bar and
then handle can be removed.
Roller Shade Operation
Cordless Operation
Pull the handle downwards
or upwards and the shade
will be lowered or raised.
The tension in our cordless roller
shades can be adjusted to provide
optimal light control and to ensure
easy and dependable operation on
a variety of window types and
sizes. If a cordless shade has been
tending to slide down on its own
or it fails to roll up, the issue can
be easily fixed by turning the
adjustment dial towards “+” to
increase the tension.
Conversely, if the cordless shade
cannot stop at the desired height
and tends to roll up by itself, the
tension can be decreased by
turning the adjustment dial
towards the “-”.
*The blind must be installed on
the shade brackets when
adjusting.
The center of handle should
be aligned with the label.
Label
  • Page 1 1
  • Page 2 2

West Elm Cordless Roller Shade Assembly Instructions

Category
Cable trays
Type
Assembly Instructions

Ask a question and I''ll find the answer in the document

Finding information in a document is now easier with AI