Page is loading ...

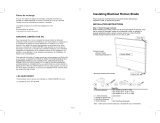
DUAL SHADES
INSTALLATION INSTRUCTIONS
1. Install the Brackets
Important: Make sure the mounting surface is level. Brackets must be in line and level for shade to operate properly.
2. Install the Shade
3. Remove the Shade (Only if Necessary)
Note on Motorization: Prior to installation, pair the shade to remote using the programming instructions that are included with the remote control.
Important: Please see back side for instructions regarding AgileLift.
Important: Please see back side for instructions regarding AgileLift.
Inside Mount, install the brackets level and aligned to each other, using the screws provided.
Outside Mount, center the shade over the window opening at the desired height and mark the end of the clutch side of the shade. Measure the width of the
shade fabric, and mark the width of the fabric plus 1 1/4” from the previously marked mark.
1
2 1/2”
Space evenly
2 1/2”
Space evenly
2 1/2”
Space evenly
2 1/2”
Space evenly
Desired
Cassette
end mark
Desired
Cassette
end mark
Click
1
2
Click
3
3
2
Snap
1
IB
OB

INSTALLATION INSTRUCTIONS
Child Safety
4. AgileLift
5. Install the Hold Down Brackets (optional) — Outside Mount Only
2
Important: The bottom rail must be disconnected from the hold down brackets to raise the shade.
First, lower the shade and place the hold down pins into the hole on the bottom rail end caps. Then, mark the hold down bracket locations on the mounting
surface. Center the hold down brackets over the mounting hold locations and check their alignment. Finally, attach the brackets using screws.
Important: Do not pull the lock pin until shade is securely assembled onto the brackets. Once removed, keep the lock pin in a safe place, as it will be needed to
remove the shade.
With the shade installed, remove the lock pin prior to operating by pulling it downward. If for any reason needs to make an adjustment on the position of the
installation brackets or remove the shade; raise the shade and insert the lock pin prior to disengaging the shade from the installation brackets.
Note: Illustration shown without a Cassette for clarity.
Click

STORES DOUBLES
INSTRUCTIONS D’INSTALLATION
1. Installez les supports
2. Installez le store
3. Retirez le store (uniquement si nécessaire)
3
Important : Assurez-vous que la surface de montage est de niveau. Les supports doivent être alignés et de niveau an que le store fonctionne correctement.
Remarque sur la motorisation : Avant l’installation, couplez le store à la télécommande en suivant les instructions de programmation fournies avec la télécommande.
Important : Veuillez consulter le verso pour les instructions concernant AgileLift.
Important : Veuillez consulter le verso pour les instructions concernant AgileLift.
Montage intérieur, installez les supports de niveau et alignés les uns aux autres en utilisant les vis fournies.
Montage extérieur, placez le store au centre par dessus l’ouverture de la fenêtre à la hauteur désirée puis faites une marque sur le côté du store avec l’em-
brayage. Mesurez la largeur du tissu du store, puis marquez la largeur du tissu plus 1 1/4 po de la marque précédente.
2 1/2 po
Espace égale
2 1/2 po
Espace égale
Espace égale
2 1/2 po
Espace égale
Marque
d’extrémité
désirée
pour la
cassette
Marque
d’extrémité
désirée
pour la
cassette
2 1/2 po
IB
OB
3
2
Snap
1
Clic
1
2
Clic
3

4. AgileLift
5. Installez les taquets de retenue (facultatif) - Montage extérieur seulement.
INSTRUCTIONS D’INSTALLATION
Sécurité des enfants
C8-10-9100 • rév 04/224
Important : la traverse inférieure doit être déconnectée des supports de retenue pour soulever le store.
Tout d’abord, abaissez le store et placez les épingles de retenue dans le trou des capuchons d’extrémité de la traverse inférieure. Ensuite, marquez les emplace-
ments des taquets de retenue sur la surface de montage.
Centrez les taquets de retenue sur les emplacements de montage et vériez leur alignement. Enn, xez les supports à l’aide de vis.
Important: Ne pas tirer sur l’épingle de verrouillage tant que le store n’est pas monté sur les supports de façon sécuritaire. Une fois retirée, conservez l’épingle
de verrouillage dans un endroit sûr, car elle sera nécessaire pour retirer le store.
Lorsque le store est installé, retirez l’épingle de verrouillage avant de l’utiliser en la tirant vers le bas. Si, pour une raison quelconque, il est nécessaire d’ajuster
la position des supports d’installation ou de retirer le store, soulevez le store et insérez l’épingle de verrouillage avant de désengager le store des supports
d’installation.
Remarque : L’illustration est présentée sans cassette pour plus de clarté.
Clic
/


