Page is loading ...

ROLLER BASICS
Motorized Shades
INSTALLATION INSTRUCTIONS
Open Roll
2. Install the Shade
3. Install the Bracket Covers
Motorized with Open Roll
Contoured ValanceDeco Fascia
1. Install the Brackets
1
Secure the roller shade installation brackets with the supplied screws.
If shade was ordered as outside mount (OB), attach the supplied screw
covers on to the bracket for a nished look.
OB
IB
Click
Screw Cover
Outside Mount Only
Click
1
Left
Bracket
Click
2
Left Shade Side
Click
3
Right
Shade Side

INSTALLATION INSTRUCTIONS
1. Install the Fascia Brackets
Motorized with Deco Fascia
2. Install the Brackets
4. Install the Deco Fascia
5. Install the Returns (Optional)
3. Install the Shade
2
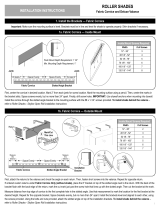
The magnet clips arrive pre-attached and evenly spaced to the Deco Fascia.
Outside mount (OB) requires a T-Bracket installation. Space brackets evenly.
Note: Do not attach the Deco Fascia until the shade has been installed.
Secure the roller shade installation brackets with the supplied screws.
If shade was ordered as outside mount (OB), attach the supplied screw
covers on to the bracket for a nished look.
Inside Mount (IB)
Outside Mount (OB)
Metal returns (Outside mount only) include a plastic corner connector.
Plastic returns (Inside mount with Outside Mounted fascia) snap on the
end of the fascia.
Magnet
IB
OB
OB
IB
Click
Screw Cover
Outside Mount Only
1
3
2
Click
1
Left
Bracket
Click
2
Left Shade Side
Click
3
Right
Shade Side

INSTALLATION INSTRUCTIONS
Motorized with Contoured Valance
1. Install the Brackets 2. Install the Valance Brackets
3. Install the Return (Outside Mount Only - Optional)
4. Install the Shade
Secure the roller shade installation brackets with the supplied screws.
If shade was ordered as outside mount (OB), attach the supplied screw
covers on to the bracket for a nished look.
Inside Mount (IB)
Note: Prior to installing the installation brackets to the wall, insert the
valance onto each installation bracket.
Outside Mount (OB)
3
12
OB
IB
Click
Screw Cover
Outside Mount Only
Click
1
Left
Bracket
Click
2
Left Shade Side
Click
3
Right
Shade Side

INSTALLATION INSTRUCTIONS
Child Safety
Programming Instructions
4
Refer to programming instructions included with your operating option.

STORES À ENROULEUR DE BASE
Stores motorisés
INSTRUCTIONS D’INSTALLATION
Rouleau ouvert
2. Installer le store
3. Installer les couvercles de support
Motorisés avec rouleau ouvert
Cantonnière contournéeBordure Deco
1. Installer les supports
5
Fixez les supports d’installation pour les stores à enrouleur avec les vis
fournies. Si le store est de montage extérieur (OB), attachez les couvercles
de vis fournies sur le support pour un aspect ni.
OB
IB
Clic
Couvercle de vis
Montage extérieur
seulement
Clic
1
Support
gauche
Clic
2
Côté gauche du store
Clic
3
Côté droit
du store

INSTRUCTIONS D’INSTALLATION
1. Installer les supports de bordure
Motorisés avec bordure Deco
2. Installer les supports
4. Installer la bordure Deco
5. Installer les retours (facultatif)
3. Installer le store
6
Les pinces avec aimants arrivent attachées à la bordure Deco en intervalles
uniformes. Montage extérieur (OB) nécessite une installation de supports
en T. Installez les supports en intervalles uniformes. Remarque : Ne pas
attacher la bordure Deco jusqu’à ce que le store soit installé.
Fixez les supports d’installation pour les stores à enrouleur avec les vis
fournies. Si le store est de montage extérieur (OB), attachez les couvercles
de vis fournies sur le support pour un aspect ni.
Montage intérieur (IB)
Montage extérieur (OB)
Les retours en métal (montage extérieur seulement) incluent un
connecteur de coin en plastique.
Les retours en plastique (montage intérieur avec bordure de montage
extérieure) s’enclenchent sur l’extrémité de la bordure.
Aimant
IB
OB
OB
IB
Clic
Couvercle de vis
Montage extérieur
seulement
1
3
2
Clic
1
Support
gauche
Clic
2
Côté gauche du store
Clic
3
Côté droit
du store

INSTRUCTIONS D’INSTALLATION
Motorisés avec cantonnière contournée
1. Installer les supports 2. Installer les supports de cantonnière
3. Installer le retour (Montage extérieur seulement - facultatif)
4. Installer le store
Fixez les supports d’installation pour les stores à enrouleur avec les vis
fournies. Si le store est de montage extérieur (OB), attachez les couvercles
de vis fournies sur le support pour un aspect ni.
Montage intérieur (IB)
Remarque : Avant d’installer les supports d’installation au mur, insérez la
cantonnière dans chaque support d’installation.
Montage extérieur (OB)
7
12
OB
IB
Clic
Couvercle de vis
Montage extérieur
seulement
Clic
1
Support
gauche
Clic
2
Côté gauche du store
Clic
3
Côté droit
du store

INSTRUCTIONS D’INSTALLATION
Instructions de programmation
8 1030742 • rév 04/22
Veuillez référer aux instructions de programmation comprises avec votre option opérationnelle.
Sécurité des enfants
/
