ALTA Roller Shades User manual

Type
User manual

ALTA Roller Shades are a stylish and functional window treatment solution that offers both privacy and light control. With a variety of colors and styles to choose from, these shades can complement any décor. They are also easy to install and operate, making them a great choice for any homeowner.

Features:

  • Inside or outside mount options
  • Easy to install with included hardware
  • Smooth and quiet operation
  • Multiple colors and styles to choose from
  • Optional fascia for a clean, finished look

Use Cases:

  • Living rooms
  • Bedrooms
  • Offices
  • Kitchens
  • Bathrooms
ROLLER SHADES (SKYLINE)
Shades with Fascia
INSTALLATION INSTRUCTIONS
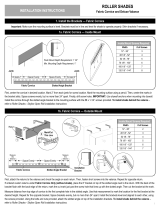
1. Install the Brackets
2a. Install the Shade 2b. AgileLift
1
Inside Mount (IB), Install each bracket with two screws either through the side or up through the top. Make sure all brackets are leveled and aligned.
Outside Mount (OB), Secure each bracket with two screws. Make sure all brackets are level. Minimum 1 1/4” mounting surface height requirement.
Note: The 3” Fascia uses a different bracket than the 4” Fascia for optimized performance.
Important: Make sure the mounting surface is level. Brackets must be in line and level for shade to operate properly. Shim brackets if necessary.
Important: Please see AgileLift section before installing AglieLift Shades.
First, place the spring loaded pin end into the round hole of the bracket. Then,
keeping the pin end secure in its bracket, insert the hooks on the motor head
straight into the two slots in the bracket. Once the two hooks are through the
slots, gently pull down on the motor until the hooks have locked securely to
the bracket. The bottom of the motor head should point straight down.
Important: Do not to pull the lock pin until shade is securely assembled onto
the brackets.
First, follow steps to Install the Shade. Lastly, remove the lock pin prior to
operation by pulling it down.
Note: If for any reason needs to make an adjustment on the position of the
installation brackets or remove the shade; raised the shade and insert the
lock pin prior to disengaging the shade from the installation brackets.
4
3” Fascia 4” Fascia
OB IB OB
IB
2
3
1
INSTALLATION INSTRUCTIONS
3b. 4” Fascia
3a. 3” Fascia
4.Extra Features — Level Adjust for 4” Fascia Only
3. Install the Fascia
First, position the fascia top ridge into the front top channel of all brackets. Then, rotate the bottom front of the fascia downwards until the bottom rear of the
fascia snap into the bracket. Finally, attach the bracket covers.
First, attach the fascia clip to both brackets, as showed. Then, position the fascia top ridge into the front top channel of all brackets. Rotate the bottom front of
the fascia downwards until the bottom rear of the fascia snap into the fascia clip. Finally, attach the bracket covers.
Note: In some installations, due to leveling issues, the shade may “telescope”. This is not considered a defect.
The 4” fascia offers an optional adjuster bracket with screws that allow the shade to raise or lower ensuring a perfect leveled installation. Once leveled,
the shade should stop telescoping.
2
Click
Click
Click
1
2
3
4
Click
1
2
3
INSTALLATION INSTRUCTIONS
Child Safety
6. Remove the Shade (Only If Necessary) — Remove the Fascia
5. 2-on-1 Shades
First, rotate upward to disengage the fascia. Then, gently pull up the control unit (Motor or Spring) until the hooks touch the top part of the bracket
slot. Pull the shade towards the spring loaded pin end until the hooks are complete out of the bracket slots. Finally, remove the spring loaded pin end from
the idler bracket.
Snap
Snap
Immediately remove this product if a cord longer than 22 cm or a loop
exceeding 44 cm around becomes accessible.
Rev 7/21 Print 7/21
WARNING
RISQUE D’ÉTRANGLEMENT–
Les enfants en bas âge
MISE EN GARDE
peuvent s’étrangler avec des cordes. Enlevez immédiatement ce produit si une
corde mesurant plus de 22 cm devient accessible ou si le contour d’une boucle de
plus de 44 cm devient accessible.
STRANGULATION HAZARD –
Young chidren can be strangled by cords.
Please refer to Roller Shades - Skyline 2-on-1 / Coupled Shades Installation Instructions.
3
3” Fascia 4” Fascia
STORES À ENROULEUR (SKYLINE)
Stores avec bordure
INSTRUCTIONS D’INSTALLATION
1. Installez les supports
2a. Installez le store 2b. AgileLift
Montage intérieur (IB), Installez chaque support avec deux vis à travers le côté ou à travers le dessus. Assurez-vous que tous les supports sont de niveau et
alignés les uns aux autres.
Montage extérieur (OB), Installez chaque support avec deux vis. Assurez-vous que tous les supports sont de niveau. Exigence de 1 ¼ po min. pour l’hauteur
de la surface de montage.
Remarque : La bordure de 3 po utilise un support différent que la bordure de 4 po pour une performance optimale.
Important : Assurez-vous que la surface de montage est de niveau. Les supports doivent être alignés an que le store fonctionne correctement.
Utilisez des cales si nécessaire.
Important : Veuillez consulter la section AgileLift avant d’installer les stores AglieLift.
Premièrement, placez le côté avec l’épingle à ressort dans le trou rond du
support. Ensuite, en gardant le côté du ressort sécurisé dans son support,
insérez les crochets sur la tête du moteur directement dans les deux fentes
dans le support. Une fois que les deux crochets sont à travers les fentes, tirez
doucement le moteur vers le bas jusqu’à ce que les crochets soient verrouillés
dans le support. Le bas de la tête du moteur devrait faire face en bas.
Important: Ne tirez pas l’épingle de verrouillage jusqu’à ce que le store soit
assemblé de façon sécuritaire sur les supports.
Premier, suivre les étapes pour to Installer le stores. Dernièrement, retirez
l’épingle de verrouillage avant d’utiliser le store en le tirant vers le bas.
Remarque : Si vous avez besoin de faire un ajustement aux supports
d’installation ou si vous devez retirer le store; soulevez le store puis insérez
l’épingle de verrouillage avant de désengager le store des supports
d’installation.
4
4
Bordure de 3 po Bordure de 4 po
OB IB OB
IB
1
2
3
INSTRUCTIONS D’INSTALLATION
3. Installez la bordure
3b. Bordure de 4 po
3a. Bordure de 3 po
4.Caractéristiques supplémentaires — Ajuster le niveau pour bordure de 4 po seulement
5
Premièrement, positionnez le bord supérieur de la bordure dans le canal supérieur de tous les supports. Ensuite, tournez le devant inférieur de la bordure vers
le bas jusqu’à ce que l’arrière de la bordure inférieure s’enclenche dans le support. Finalement, attachez les couvercles de support.
Premièrement, attachez la pince de bordure sur les deux supports, comme montré. Ensuite, positionnez le bord de la bordure dans dans le canal supérieur
de tous les supports. Tournez le devant du bas de la bordure vers le bas jusqu’à ce que l’arrière du bas de la bordure s’enclenche dans la pince de bordure.
Finalement, attachez les couvercles de support.
Remarque : Dans certaines installations, en raison des problèmes de niveau, le store peut “télescoper”. Ceci n’est pas considéré comme un défaut.
La bordure de 4 po offre un ajustement de support en option avec des vis qui permettent au store de soulever ou abaisser assurant une installation de
niveau parfait. Une fois de niveau, le store devrait arrêter de se télescoper.
Clic
Clic
Clic
1
2
3
4
Clic
1
2
3
INSTRUCTIONS D’INSTALLATION
1030889 • rév 04/226
Immediately remove this product if a cord longer than 22 cm or a loop
exceeding 44 cm around becomes accessible. Rev 7/21 Print 7/21
WARNING
RISQUE D’ÉTRANGLEMENT–
Les enfants en bas âge
MISE EN GARDE
peuvent s’étrangler avec des cordes. Enlevez immédiatement ce produit si une
corde mesurant plus de 22 cm devient accessible ou si le contour d’une boucle de
plus de 44 cm devient accessible.
STRANGULATION HAZARD –
Young chidren can be strangled by cords.
Sécurité des enfants
6. Retirez le store (seulement si nécessaire) — Retirez la bordure
5. Stores 2-sur-1
Premièrement, tournez vers le haut pour désengager la bordure. Ensuite, tirez doucement l’unité de contrôle vers le haut (moteur ou ressort) jusqu’à ce que
les crochets touchent la partie supérieure de la fente du support. Tirez le store vers le côté de l’épingle à ressort jusqu’à ce que les crochets soient hors des
fentes de support. Finalement, retirez le côté de l’épingle à ressort du support du côté inactif.
Snap
Snap
Immediately remove this product if a cord longer than 22 cm or a loop
exceeding 44 cm around becomes accessible.
Rev 7/21 Print 7/21
WARNING
RISQUE D’ÉTRANGLEMENT–
Les enfants en bas âge
MISE EN GARDE
peuvent s’étrangler avec des cordes. Enlevez immédiatement ce produit si une
corde mesurant plus de 22 cm devient accessible ou si le contour d’une boucle de
plus de 44 cm devient accessible.
STRANGULATION HAZARD –
Young chidren can be strangled by cords.
Veuillez référer aux instructions d’installation pour les stores à enrouleur - Skyline 2-sur-1 / Stores couplés.
Bordure de 3 po Bordure de 4 po
  • Page 1 1
  • Page 2 2
  • Page 3 3
  • Page 4 4
  • Page 5 5
  • Page 6 6

ALTA Roller Shades User manual

Type
User manual

ALTA Roller Shades are a stylish and functional window treatment solution that offers both privacy and light control. With a variety of colors and styles to choose from, these shades can complement any décor. They are also easy to install and operate, making them a great choice for any homeowner.

Features:

  • Inside or outside mount options
  • Easy to install with included hardware
  • Smooth and quiet operation
  • Multiple colors and styles to choose from
  • Optional fascia for a clean, finished look

Use Cases:

  • Living rooms
  • Bedrooms
  • Offices
  • Kitchens
  • Bathrooms

Ask a question and I''ll find the answer in the document

Finding information in a document is now easier with AI

in other languages