Page is loading ...

Thanks for choosing a KC HiLiTES product. We take pride in building the highest quality, best engineered systems possible.
Your satisfaction with our product is important, so if you have any questions, please call our customer service line at 800-
528-0950. For warranty information, visit our website at www.kchilites.com.
Parts Included
10 - M8 x 1.25 x 30 mm Black Zinc Bolts
10 - M8 Black Zinc Washers
2 - Protective Rubber Gaskets
MOUNTING THE BRACKETS
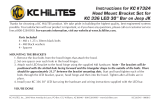
1. Remove the upper five of the six torx head bolts from each of the windshield frame
brackets. These are located in the lower corner of the driver and passenger side of the
windshield.
2. Align the rubber protective gasket with the holes on the vehicle and secure temporarily
with small pieces of scotch tape or similar.
3. Place the bracket on the gasket and start each of the five M8 bolts and washers. Tighten all
by hand. Remove the tape used to secure and then tighten all bolts.
4. Repeat procedure for opposite side of vehicle.
5. Install your 50” C50 LED bar to the brackets and wire it according to the instructions
included with the LED bar.
YOU’RE DONE
KC HiLiTES, Inc., 2843 West Avenida de Luces, PO Box 155, Williams, AZ 86046 * 800-528-0950 * www.kchilites.com KC3265AW - 081513
Instructions for KC #7323
Windshield Mount Bracket Set for
KC 338 LED 50” Bar on Jeep JK
Remove
these
5 bolts.

Thanks for choosing a KC HiLiTES product. We take pride in building the highest quality, best engineered systems possible. Your
satisfaction with our product is important, so if you have any questions, please call our customer service line at 800-528-0950. For
warranty information, visit our website at www.kchilites.com.
Parts Included
1 - LED Light Bar
1 - Wiring Harness Kit
1 - Set Mounting Brackets w/Hardware
PLEASE NOTE - This light bar is for OFF ROAD USE ONLY
INSTALLING THE BRACKETS
NOTE - If this LED bar is part of a package including
brackets for a specific vehicle, follow the bracket
mounting instructions included with the brackets.
1. Using the Allen wrench supplied, attach one bracket to each end of
the bar (they can be mounted facing inward or outward depending
on your needs. Tighten only enough to hold in place. Later after aiming, you will tighten securely.
MOUNTING YOUR LIGHTS
1. Choose a location on your bumper or other flat surface
for mounting your bar. Measure the distance between
mounting bracket holes and mark carefully. Now drill
an 8mm hole for each bracket. Install the bar with the
bolts and nuts supplied and tighten securely.
WIRING YOUR LIGHTS
1. Remove the fuse from the harness. Attach the harness
wire to the light. Route the harness toward the 12V
battery/power source and mount the relay using the
supplied sheet metal screw. Attach the negative (black)
wire to a good chassis ground and power (red) wire to
a positive 12 volt power source.
2. Disconnect the switch wire at the quick-connect terminal from the harness and continue routing through the firewall to
the inside of the vehicle. If you are unable to find an existing hole in the firewall, it may be necessary to cut a 3/4 x
7/16” hole for the plug to pass through.
3. Re-connect the switch lead to the harness and find a flat suitable place to mount the stick-on switch. Clean the area
where mounting the switch with alcohol, let dry, then peal off the protective covering on the switch and firmly press in
place.
4. Re-install the fuse.
AIMING YOUR LIGHTS
1. Since this light bar is not legal on any public road or highway, aiming is entirely up to you. Most prefer the beam as far
down the road as possible, others adjust it slightly down to illuminate more area close to the vehicle.
2. After aiming the bar to your preference, tighten all hardware.
YOU’RE DONE
KC HiLiTES, Inc., 2843 West Avenida de Luces, PO Box 155, Williams, AZ 86046 * 800-528-0950 * www.kchilites.com KC3265AV - 111413
Instructions for
KC #334, 335, 336, 337, 338
LED Light Bars with Harness
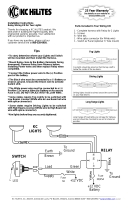
Typical LED Kit
Battery
Relay
Quick connect
Fuse
Switch
To Light Bar
Black
Red
-+
Wire Harness
Connector type
may vary.
/


