Page is loading ...

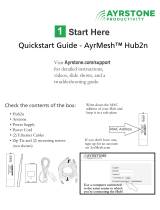
Check the contents of the box:
• AyrMesh Receiver
• Power Supply
• Power Cord
• (2) Ethernet Cables
• Zip Tie (not shown)
MAC Address
Write down the MAC
address of your Receiver and
keep it in a safe place
If you don't have one,
sign up for an account
on AyrMesh.com
Use a computer connected
to the same router as your
Gateway Hub!
MAC - 11:22:33:44:55:66
POE
LAN
1
Start Here
Visit Ayrstone.com/support
for detailed instructions,
videos, slide shows, and a
troubleshooting guide.
Quickstart Guide - AyrMesh™ Receiver

2
Assemble
and attach to
router
Click one end of an Ethernet cable
into the port on the power supply
marked "POE"
Use another Ethernet cable to connect the
LAN port of the power supply to one of
the LAN ports on your router.
Connect the power cable to the power supply
NOTE: Receiver must be "initialized" by
connecting it to your Router until it shows
up in your AyrMesh.com account.
This usually takes
5 minutes, but may
take longer.
Press button on
the back of the
Receiver and slide
door open
Press button
POE
LAN
POE
LAN
Plug the other end of the Ethernet cable from the "POE" port
on the power supply into the port on the Receiver -
slide in until it clicks in place
Slide the cover back
onto the Hub
Plug in the power
supply. This is how
the whole thing
should look:
The left two lights
on the Receiver should be
lit up:
Make sure you have an account on AyrMesh.com
LAN
Reset
DO NOT FORCE CABLES
INTO OR OUT OF PORTS!

3
Let the Receiver
initialize itself
The Receiver will check in to AyrMesh.com
to download the configuration parameters for
your AyrMesh Hubs. This usually takes a few
minutes, but may take half an hour.
The power and Ethernet lights (left 2) will
be on (the Ethernet light may flash), and
the signal lights (right 4 lights) will start out
"running" from left to right. When the
Receiver has checked in to AyrMesh.com,
only the rightmost signal light will be on.
4
Finish the Installation
The Receiver should be mounted outside,
up as high as possible, with the front pointing
at the nearest AyrMesh Hub.
Maximum range for the Receiver depends on
having clear line-of-sight.
The Receiver is most easily mounted to a pole
with a zip-tie, as shown. The Ethernet Cable
is connected to the PoE port of the power
supply.
Do NOT remove the Receiver from the
router until after you see this light pattern.
5
Signal Lights on
the Receiver
Right Signal light - green
Third Signal light - green
Second Signal light - yellow
First Signal light - red
Ethernet activity light - green
Power light - green
Receivers use the signal lights to show the
signal strength to the nearest Hub. The signal
strength is exhibited as follows:
- Just the first (red) signal light - very low signal
- First and second (yellow) light - good signal
- First, second, third (green) light - very good
- All 4 signal lights - excellent signal
The signal lights on a Receiver are refreshed
approximately once per second.
NOTE: To prevent water damage,
make sure Receiver is mounted
straight up and that the Ethernet
cable has a "drip loop" where it
enters any building.

6
Using the AyrMesh
Receiver
Using the AyrMesh Receiver is extremely
simple: just plug whatever device you want
to have join your network into the "LAN"
port of the Receiver's power supply.
For instance, to connect an IP camera to
the AyrMesh Receiver, just run an Ethernet
cable from the camera to the Receiver's
LAN port.
To use the Receiver to provide connectivity
inside a building, mount the Receiver outside
and connect a WiFi Access Point's "WAN"
port to the Receiver's "LAN" port with an
Ethernet Cable. Make sure the WiFi Access
Point is in "bridge" mode (or plug into one
of the "LAN" ports) with its DHCP
server off so it is not acting as a router. Also
make sure it has a different IP address from
your main router.
Power
Supply
PoE LAN
To Receiver
IP Camera
Power
Supply
PoE LAN
To Receiver
Ethernet Switch
(plug devices into
open ports)
Power
Supply
PoE LAN
To Receiver
WiFi Access Point/
Router (bridge mode)-
plug into open ports,
use WiFi
See http://ayrstone.com/support
for additional information, hints,
and troubleshooting tips.
7
Troubleshooting
- Ethernet Light does not come on, or Receiver
does not appear in router's DHCP table, or
Receiver never checks in to AyrMesh.com
- Check all cables between router and Receiver
- Ethernet Light comes on, Receiver appears in
router's DHCP table, but Receiver does not
check in to AyrMesh.com
- Add Receiver's MAC address to your
AyrMesh.com account manually
- Signal lights do not not come on once installed
- Make sure Receiver is pointed at Hub and
is in range.
/