
GATE
INSTALLATION TIPS
UFP Thornton, LLC
THE DIAGRAMS AND INSTRUCTIONS IN THIS BROCHURE ARE FOR ILLUSTRATION PURPOSES ONLY AND ARE NOT MEANT TO REPLACE A LICENSED PROFESSIONAL. ANY CONSTRUCTION OR
USE OF THE PRODUCT MUST BE IN ACCORDANCE WITH ALL LOCAL ZONING AND/OR BUILDING CODES. THE CONSUMER ASSUMES ALL RISKS AND LIABILITY ASSOCIATED WITH THE
CONSTRUCTION OR USE OF THIS PRODUCT. THE CONSUMER OR CONTRACTOR SHOULD TAKE ALL NECESSARY STEPS TO ENSURE THE SAFETY OF EVERYONE INVOLVED IN THE PROJECT,
INCLUDING, BUT NOT LIMITED TO, WEARING THE APPROPRIATE SAFETY EQUIPMENT. EXCEPT AS CONTAINED IN THE WRITTEN LIMITED WARRANTY, THE WARRANTOR DOES NOT
PROVIDE ANY OTHER WARRANTY, EITHER EXPRESS OR IMPLIED, AND SHALL NOT BE LIABLE FOR ANY DAMAGES, INCLUDING CONSEQUENTIAL DAMAGES.
©2014 UFP Thornton, LLC. All rights reserved.
26200 Nowell Road, Thornton, CA, 95686 • 209.794.8750 • www.ufpi.com • 7853_8/14
• Measure to be sure you can install the gate and the post with
approximately a 2" gap between the ground and the bottom of
the gate panel.
• Hang the pre-assembled panel between the posts (fig. 2).
Secure in place with shims under the gate, or clamp the gate to
the post. Make sure the gate is level and square.
• Remove clamps and shims.
Planning
Setting and Installing Gate
Setting Post
• Prior to construction, check with your local regulatory agency
for special code requirements in your area.
• Contact your utility supplier to locate and mark underground lines.
• Gates are ready-to-finish. We recommend painting, staining
or sealing prior to installation.
• Careful planning and measuring of your fence project is essential,
as moving posts after the concrete sets is extremely difficult.
• Some hardware, such as decorative hinges, may not be
compatible with this product. Please consult the hardware
manufacturer if uncertain.
• Before setting the gate posts, ensure that the opening will be
wide enough to fit the gate and the width of the gate hardware
you use. The actual gate width is 42". Hardware width will vary.
• Dig the holes for the gate posts 18" to 24" in diameter and 36"
to 42" deep (depending on local ordinance or expected frost
depth in winter). See fig. 1.
DOUBLE-CHECK ALL MEASUREMENTS!
36" to 42"
Gate plus hardware
width
18" to 24"
•
•
• •
•
•
GateOpening.ai
2" Gate to ground
•
•
fig. 1
fig. 2
Granger Garden: 201567
Thornton Garden: 201566
Waverly Garden: 201569
Woodburn Garden: 201568
Product Codes

CONSEJOS PARA LA
INSTALACIÓN DE PUERTAS
UFP Thornton, LLC
©2014 UFP Thornton, LLC. Todos los derechos reservados.
26200 Nowell Road, Thornton, CA, 95686 • 209.794.8750 • www.ufpi.com • 7853_8/14
LOS DIAGRAMAS E INSTRUCCIONES DE ESTE FOLLETO SON PARA FINES ILUSTRATIVOS SOLAMENTE Y NO ESTÁN DESTINADOS A REEMPLAZAR A UN PROFESIONAL MATRICULADO.
CUALQUIER CONSTRUCCIÓN O USO DEL PRODUCTO DEBEN ESTAR DE ACUERDO CON TODOS LOS CÓDIGOS LOCALES DE CONSTRUCCIÓN O DE ZONIFICACIÓN. EL USUARIO ASUME
TODOS LOS RIESGOS Y RESPONSABILIDADES ASOCIADOS CON LA CONSTRUCCIÓN O EL USO DE ESTE PRODUCTO. EL USUARIO O CONTRATISTA DEBEN TOMAR TODAS LAS MEDIDAS
NECESARIAS PARA GARANTIZAR LA SEGURIDAD DE TODAS LAS PERSONAS INVOLUCRADAS EN EL PROYECTO, INCLUIDO, ENTRE OTROS, EL USO DEL EQUIPO DE SEGURIDAD
APROPIADO. A EXCEPCIÓN DE LO CONTENIDO EN LA GARANTÍA LIMITADA POR ESCRITO, EL GARANTE NO PROPORCIONA NINGUNA OTRA GARANTÍA, YA SEA EXPRESA O TÁCITA, Y
NO SERÁ RESPONSABLE DE NINGÚN DAÑO, INCLUIDOS DAÑOS CONSECUENTES.
• Mida para asegurarse de que puede instalar la puerta y el poste
con una brecha de aproximadamente 2" entre el suelo y la parte
inferior del panel de la puerta.
• Cuelgue el panel prefabricado entre los postes (fig. 2). Asegure
en su lugar con cuñas debajo de la puerta o sujete la puerta
al poste con abrazaderas. Asegúrese de x-que la puerta esté
nivelada y cuadrada. Retire las abrazaderas y las cuñas.
Planificación
Colocación e instalación de la puerta
Colocación de postes
• Antes de la construcción, consulte a su organismo regulador
local sobre los requisitos especiales de los códigos en su área.
• Póngase en contacto con su proveedor de servicios básicos para
localizar y marcar las líneas subterráneas.
• Las puertas están listas para recibir acabados. Recomendamos
pintar, barnizar o sellar antes de la instalación.
• La cuidadosa planificación y medición de su proyecto de cercas
es esencial, ya que mover los postes después de que el concreto
se asienta es extremadamente difícil.
• Algunos herrajes, como bisagras decorativas, podrían no ser
compatibles con este producto. Por favor consulte al fabricante
de los herrajes si no está seguro.
• Antes de colocar los postes de la puerta, asegúrese de que
la apertura será suficientemente ancha para que quepan la puerta
y el ancho de los herrajes que usará para la puerta. El ancho real
de la puerta es 42". El ancho de los herrajes es variable.
• Cave los hoyos para los postes de puerta con un diámetro
de entre 18" y 24" y con una profundidad de entre 36" y 42"
(dependiendo de la ordenanza local o la profundidad de la
helada esperada en invierno). Vea la figura 1.
¡VERIFIQUE DOS VECES TODAS LAS MEDIDAS!
36" to 42"
Ancho de la puerta
más los herrajes
18" to 24"
•
•
• •
•
•
GateOpening.ai
2" Hueco entre
puerta y piso
•
•
fig. 1
fig. 2
Jardín Granger: 201567 Jardín Waverly: 201569
Jardín Woodburn: 201568 Jardín Thornton: 201566
Códigos de producto
-
 1
1
-
 2
2
none 201566 Operating instructions
- Type
- Operating instructions
- This manual is also suitable for
Ask a question and I''ll find the answer in the document
Finding information in a document is now easier with AI
in other languages
Related papers
-
none 201570 Installation guide
-
Unbranded 201571 Operating instructions
-
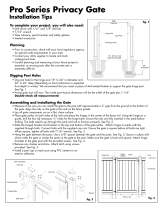 Veranda 181990 Installation guide
-
none 204977 Installation guide
-
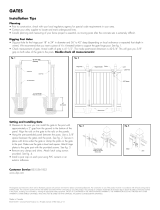 Veranda 181989 Operating instructions
-
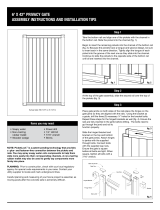 Veranda 181977 Operating instructions
-
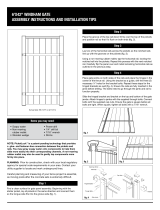 Veranda 181975 Installation guide
-
Veranda 181973 Operating instructions
-
none 181983 Installation guide
-
 Veranda 181978 Installation guide
Other documents
-
Unbranded 97276 Installation guide
-
 Riverside Furniture 49702 Assembly Instructions
-
Premier UFP-220 Installation guide
-
 Belknap Hill Trading Post 237250 Installation guide
-
Deckorators Aluminum Gate Installation guide
-
Veranda 128010 Installation guide
-
 Veranda 153150 Installation guide
-
Veranda 306111 Installation guide
-
Outdoor Essentials 306117 Installation guide
-
 Veranda 181980 Installation guide


