Page is loading ...

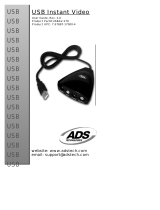
Instant TV: English
Watch and Record TV Shows on CD or DVD
User’s Guide: First Edition
Instant TV
ADS Tech
North America Support Hours:
M-F : 8 am - 5 pm, PST
Email : [email protected]
website : www.adstech.com
Tech


Introduction. . . . . . . . . . . . . . . . . . . . 4
Installation Instructions. . . . . . . . . . . . . . . . . 5
Installing Instant TV. . . . . . . . . . . . . . . . 7
Video@Home Instructions. . . . . . . . . . . . . . . . . . 12
Video@Home Index. . . . . . . . . . . . . . . . . . 33
Help Resources. . . . . . . . . . . . . 35
Service and Warranty . . . . . . . . . . . . . . . 36
FCC Information . . . . . . . . . . . . . . . . . . 37
3
Table of Contents
© 2004 ADS Technologies. All Rights Reserved
First Edition: January, 2004
Microsoft, MS-DOS, Windows, Windows 95, Windows 98SE, Windows 2000, Windows ME
and Windows XP are registered trademarks of Microsoft Corporation.
IBM is a registered trademark of the International Business Machines, Inc.
ADS is a registered trademark of ADS Technologies Inc.
ADS Technologies (ADS) makes no warranty of any kind with regard to this material,
including but not limited to, the implied warranties of merchantability and fitness for a
particular purpose. The information furnished within this written document is for
information purposes only and is subject to change without notice. ADS Technologies
assumes no responsibility or liability for any errors or inaccuracies that may appear herein.
ADS makes no commitment to update or to keep current information contained within this
document. (rtt)

4
Introduction
Package Contents:
• Instant TV USB 2.0 TV Tuner device
• Instant TV Remote Control
• Battery for Remote Control
• 6 ft. USB cable
• 6 ft. A/V cable - Yellow, Red and White RCA to Yellow RCA/3.5mm
Mini Stereo cable
• Instant TV CD containing:
• Instant TV audio and video drivers
• Video@Home 2 TV watching and recording application
• Windows Media Encoder
• User’s Guide
System Requirements:
• Intel Pentium IV 2 GHz or faster
• Windows XP (home or professional)
• 256 MB of RAM
• Available USB 2.0 port
• Microsoft USB 2.0 drivers
• 30 MB of free hard disk space for software installation
• CD-ROM drive for software installation
• Sound card
• AGP 2X Graphics card running at 800 x 600 or higher resolution
• Internet Connection to access www.TitanTv.com
• 4 GB of hard drive space for approximately 2 hours of TV record time
Features:
• USB 2.0 connection to the PC
• Capture audio and video via the USB 2.0 port
• Pause live TV in Time-Shift mode
• Use remote to jump to last viewed channel
• Time-Shift Recording - Rewind, pause or fast forward live TV
• Scheduled recording with Electronic Program Guide (www.TitanTv.com)
• Full screen TV viewing on PC monitor
• Record video from any analog video source
• Direct to Disk capture - Capture TV shows directly to re-writable disks
(CD-RW, DVD+RW or DVD-RW disks)
• Edit and update re-writable disks - Add shows to a disk, add chapters
and menus
• Integration with full DVD Authoring software applications
* DVD burner for burning DVD disks
* CD burner for burning VCD and SVCD disks

5
I N S TA L L AT I O N
G U I D E
NOTE: INSERT the CD and install the Drivers before
plugging the Instant TV Device in your computer!

6
Instant TV lets you capture video in VCD, SVCD or DVD video formats
you can easily and quickly archive your TV shows to disk. Instant TV
captures video in the correct format so you don’t have to waste time
converting the video before you burn to disk. And if you use CD-RW or
DVD+RW/DVD-RW disks you can record direct to disk. Now you can
easily create your library of TV shows on disk that you can playback on
the home DVD player.
The In sta nt T V Ha rdw are:
The Instant TV has the following connections:
• USB Port (USB 2.0 ONLY)
• Audio In (to record audio from external audio/video sources)
• Audio Out (pass-through audio from external sources)
• RCA (composite) Video In
• S-Video (Y/C) Video In
• Cable TV connector (F-Connector for NTSC, IEC for PAL)
USB Port - The USB Connection for this product is for USB 2.0
connections only. USB 2.0 is required because the video is coming
from the Instant TV device as un-compressed RAW (YUV) video. Your
PC and the Video@Home software will do the work to convert the video
stream into VCD, SVCD or DVD video files.
Audio In - The audio in 3.5mm stereo jack is used to capture audio
from your video sources. Use the A/V cable included to connect your
other video sources such as VCR’s, Camcorders, DVD players, etc. to
the Instant TV for recording video from these sources to your computer
hard drive.
Audio Out - This is audio pass-through from your external video
sources such as VCR’s or DVD players. The Instant TV device is a
capture only device. There is no audio or video export on this model.

7
RCA Video In - Use the supplied A/V cable to connect other video
sources to this video input jack.
S-Video In - If you have video sources with an S-Video output, you can
connect an S-Video cable (not supplied) to Instant TV to capture from
S-Video sources. Generally S-Video provides improved video quality over
RCA (composite) video sources.
TV Tuner - The Instant TV includes a Cable Ready TV tuner. Connect
your cable TV source to Instant TV to tune up to 125 channels of
Cable television.
Installing your Instant TV
Follow these easy steps to install the Instant TV hardware and
software and you’ll be watching and recording TV on your Windows
XP PC in minutes.
Impor t ant Not e Be fore yo u St art:
The Installation of the Instant TV hardware and device drivers is quick
and simple. Please follow the instructions to install the drivers first,
before connecting the Instant TV hardware to your PC. The Driver
Install step will check for a Microsoft USB Update. This patch has
already been distributed by Microsoft’s Windows Update. If your
updates are current, you probably already have this update. If this patch
is not present on your system, we will install the patch during this
installation step. Once the patch is installed you will be required to
re-boot your PC. Once you have installed the drivers and the Microsoft
update, then you can connect the Instant TV device to your USB 2.0
port, Instant TV will be recognized and the drivers will load.

8
Please follow the steps as outlined below:
Install Drivers
1.) Insert the Instant TV CD into your
Windows XP CD-ROM drive.
2.) Double Click the Drivers button on the
Launch screen.
3.) During the Driver install process an
update from Microsoft for your Windows
XP system will also be installed (Fig. 1),
if it is not already present on your
system.
4.) If this Microsoft patch is installed, you will be asked to re-boot your
PC. If the patch is already present on your system, this step is by-
passed and the install process goes very quickly.
Connect Instant TV to your PC
1.) Once your PC has restarted use the USB
2.0 cable supplied and connect the cable
between a USB 2.0 port on your PC and
the USB connection on the Instant TV.
2.) Windows will recognize the device and
load the drivers associated with the
Instant TV device. When the “New
Hardware Wizard” appears on your
screen, Select “Install software
Automatically” as shown in Fig. 2. There will be a video device driver and
an audio device driver loaded, so you will go through this process twice.
3.) The drivers for Instant TV are Windows
XP compatible but at the time of this
printing, the device drivers have not yet
been submitted to Microsoft for a digital
signature. When you see the dialog box
in Fig. 3, click “Continue Anyway” and
the driver will install properly. Once the
video device driver is loaded, you will go
through this same process a second
time to install the USB Audio driver.
4.) At the end of the installation process for
both the Video and Audio drivers the New Hardware Wizard will confirm
that it has finished installing the software – Click Finish.
5.) Connect a Cable TV source to the TV tuner or use the Audio/Video
cables to connect to a video source such as a VCR.
6.) If you had any problems during hardware installation or you want to verify
that the Instant TV is present and recognized by Windows, go to the
trouble shooting steps for instructions on how to check Windows
Hardware Device Manager.
Your Hardware is Now Installed
Fig. 1
Fig. 2
Fig. 3

Installing the Video@Home2 software
1.) Insert the USB Instant TV CD into your CD-Rom Drive
2.) Click the Video@Home 2 button on the launch screen.
3.) Follow the steps for Video@Home Installation.
4.) A Video@Home 2 icon will be placed on your computer desktop.
5.) Start the Video@Home 2 application by double clicking this icon.
6.) The complete guide to Video@home 2 can be found later in this
User Guide.
The USB Instant TV Remote Control
Use the Remote Control just like you would any TV Remote control.
This remote can open and Close the Video@Home application, change
TV channels, raise and lower audio volume and even allow one button
TV or video recording.
Instant TV Remote Control Buttons Overview
• Power - You can press the POWER button to open or close the
Video@Home 2 application any time, as long as the
Video@Home TV Scheduling icon is present in the icon tray on your
Windows desktop.
• Input - The Input button allows you to switch from TV to RCA
or S-Video inputs on the Instant TV device.
• Mute - Pressing the Mute button will mute the TV audio.
Pressing a second time will un-mute the audio.
• T/S Time Shift Mode - Pressing the T/S button will put you into
the Time-Shift mode in Video@Home. When you are in the
Time-Shift mode you can pause, rewind and fast forward through TV
shows. The Time-Shift mode creates a TV recording buffer that allows
you use the Time-Shift features.
• Live - Use the LIVE button when in the Time-Shift mode to
instantly go to the current Live broadcast. To exit Time-Shift
mode, press the Stop button.
9

10
• Vol + Pressing the Vol+ button will increase the audio
monitoring level
• Vol - Pressing the Vol – button will decrease the audio
monitoring level
• Record - Press the Record button to begin video recording.
• Play/Pause - Use the Play/Pause button to start playback or
Pause video in the Time-Shift mode or when playing back
previously recorded video.
• CH + Press the CH+ to change the TV Channel by
incrementing up the channel list.
• CH - Press the CH- button to change the TV Channel by
decrementing down the channel list.
• Rewind - Use the Rewind button to step through several
rewind speeds in the Time-Shift mode or when watching
pre-recorded video.
• Fast Forward - Use the Fast Forward button to step through
several Fast Forward speed in Time-Shift mode or when
watching pre-recorded video.
• STOP - Use the Stop Button to Stop video playback, Stop
Recording or to Exit the Time-Shift mode.
• 0 – 9 buttons - Use the number buttons to change TV channels. You
need to enter at least 2 digits to change a TV channel so tuning to
channel 4 you would press 0 + 4, and for channel 39, you would
press 3 + 9.
• Jump - The Jump button will toggle between your current TV
channel and the previously tuned channel. Use the Jump
button to bounce between your two favorite TV stations.

11
Schedule Recordings with TitanTV.com
(Internet Connection Required)
You can use TitanTV.com to schedule
automatic recording of TV shows on your
computer. TitanTV is an Internet based
TV scheduling website. They provide
local TV and Cable listings for North
America. To access TitanTV you will
need to be connected to the Internet.
Titan TV is a FREE service. You will never pay a subscription fee to
automatically schedule your TV recordings.
1. Right Click the Video@Home2 Scheduling icon located in the
task bar.
2. Click "Titan TV EPG Service"
3. Once the TitanTV website is loaded, Sign up as a NEW USER,
it’s FREE
4. Follow the Registration form instructions.
5. When you are asked "PVR/Tuner Type" – select Video@Home 2
6. Under Digital Tuner, leave these boxes un-checked.
7. On the Next screen you’ll select your Cable Provider and SAVE
your setup.
8. Click View Programming Grid
to see the Electronic Program
Guide showing programs in
your area.
9. Click on any of the programs
with the Red Dot to select this show for Automatic recording. Just
click on the Red Dot and the Video@Home 2 Programming Guide
will launch to confirm your recording choice. If you get a
confirmation box from TitanTV, be sure to click “enable Single
Click Recording”.
10. Once a scheduled
recording has been
programmed,
Video@Home
will present the
Scheduled Recordings
box for confirmation.
The sheduled recording will take place automatically as long as your PC is
turned on and the Video@Home TV Scheduling Icon is displayed in your
icon tray.

12
English edition for Ulead Video@Home 2, June 2003.
© 2002-2003 Ulead Systems, Inc.
All rights reserved. No part of this publication may be reproduced or transmitted in any form or by any means, electronic or
mechanical, including photocopying, recording or storing in a retrieval system, or translated into any language in any form
without the express written permission of Ulead Systems, Inc.
Software license
The software described in this document is furnished under a License Agreement, which is included with the product. This
Agreement species the permitted and prohibited uses of the product.
Licenses and trademarks
All rights reserved. Ulead, Ulead Systems logo, are registered trademarks and/or trademarks of Ulead Systems, Inc.
Intel, Pentium and MMX are registered trademarks and/or trademarks of Intel Corporation. Microsoft, Windows, DirectX
and/or other Microsoft products referenced herein are either trademarks or registered trademarks of Microsoft Corporation.
Adobe, the Adobe logo, and Acrobat are trademarks of Adobe Systems Incorporated.
All other product names and any registered and unregistered trademarks mentioned in this manual are used for
identication purposes only and remain the exclusive property of their respective owners.
Sample les
Files provided as samples on the program CD can be used for personal demonstrations, productions and presentations.
No rights are granted for commercial reproduction or redistribution of any sample les.
North & South America
Ulead Systems Inc.
http://www.ulead.com
Support: http://www.ulead.com/tech
Japan
Ulead Systems Inc.
http://www.ulead.co.jp
Support: http://www.ulead.co.jp/tech
Germany
Ulead Systems GmbH
http://www.ulead.de
Support: http://www.ulead.de/tech
International
Ulead Systems, Inc.
http://www.ulead.com
http://www.asiapac.ulead.com
http://www.ulead.com.tw
Support:
http://www.ulead.com/tech
http://www.asiapac.ulead.com/tech
http://www.ulead.com.tw/tech
China
Ulead Systems, Inc.
http://www.ulead.com.cn
Support: http://www.ulead.com.cn/tech

13
Welcome to Ulead Video@Home
Ulead Video@Home empowers your Instant TV with easy-to-use
interface and functions. This enables you to instantly view or record
TV programs and other video sources (such as VCR, camcorder, and
even TV game console) through S-Video and Composite jacks. During
recording, the Instant TV saves the video as video les (video format
varies depending on the Instant TV you purchased) on the hard drive.
Thanks to Ulead Video@Home, a variety of interesting viewing and
recording tasks are available at your ngertips.
Installing and running
The following procedures show you how to perform the required
installation as well as operate the Instant TV and Ulead Video@Home.
To install the Instant TV and Ulead Video@Home:
1. Connect at least one video source such as the CATV cable to the TV
input of the Instant TV.
2. Connect the Instant TV via its connection cable to the compatible
jack on your computer.
3. Insert the program CD into the CD/DVD drive.
4. Follow the screen instructions until the installation of the required
driver and Ulead Video@Home is complete.
To run Ulead Video@Home:
1. Ensure that at least one video source is connected to the Instant
TV; the connection cable is properly connected; and the Instant TV is
switched on.
2. Double-click the Ulead Video@Home icon on your desktop, or select
Ulead Video@Home from the Windows Start: Programs group.
3. Once Ulead Video@Home is opened, a Preview Window appears on
the screen. Use the Control Panel to view or record videos as needed.
Notes:
• When Ulead Video@Home rst time connects to TV, you must select your local TV
settings and click Auto Scan. So, Ulead Video@Home can store all TV channels
available in your local area.
• If you cannot hear the TV sound, check if your audio output and input are connected
properly. For example, for a Instant TV using the Line-in jack of your sound card
as audio input, you must make sure the Line In option is not set to mute in Windows
Volume Control. Also, click Source: Playback Audio Input to check if it is
correctly selected.
• Ulead Video@Home automatically connects to the currently active video source. You
can switch to other video source as needed.

14
Introducing the Workspace
Preview Window
1. Source 16. Mute On/Off
2. Media Library 17. Channel Down
3. Start 18. Channel Up
4. Play 19. Last Viewed Channel
5. Pause 20. Numeric Pad
6. Time-Shift status bar and cursor 21. Playback speed notch
(green: playable) (red: recording in progress)
7. Stop 22. About
8. End 23. Current Playback speed notch
9. Record 24. Current Volume Level
10. Time-Shift 25. Volume Up
11. Snapshot 26. Volume Down
12. Playlist 27. Help
13. Video Format 28. Minimize/Restore Control Panel
14. Settings 29. Resize Screen
15. HDD/Disc 30. Exit
OSD (On Screen Display) shows various information such as the
command you just applied, the currently selected channel, and the audio
language. OSD is displayed on the upper right corner, and disappears
automatically in a few seconds later.

15
1. Source toggles between different video and audio sources.
2. Media Library lets you easily manage captured video and image les.
3. Start moves to the very beginning of a video.
4. Play selects a playlist, and then starts playback.
5. Pause temporarily stops playback or (time-shift) recording.
6. Time-Shift status bar and cursor are for navigation use available
only during Time-Shift recording.
7. Stop ceases playback or Time-Shift recording.
8. End moves to the very end of a video.
9. Record starts recording.
10. Time-Shift starts time-shift recording.
11. Snapshot captures the currently displayed screen to a still image.
12. Playlist opens, creates, or edits a playlist.
13. Video Format toggles between different video formats for previewing
and recording.
14. Settings gives you various options to setup Ulead Video@Home.
15. HDD/Disc toggles Press down the button to enable the Disc-Direct
mode. Press it again to return to normal.
16. Mute On/Off switches between volume on and volume off.
17. Channel Down switches to the previous TV channel.
18. Channel Up switches to the next TV channel.
19. Last Viewed Channel toggles between the currently selected TV
channel and the previous one.
20. Numeric Pad enters the TV channel number to switch to that channel.
21. Playback speed notch Clicks a notch to increase or decrease
playback speed.
22. About displays software-related information such as version and
copyright information.
23. Current Playback speed notch indicates the playback speed at the
present time, and you can click to drag the playback shuttle control.
24. Current Volume Level displays the present volume level.
25. Volume Up turns up the volume.
26. Volume Down turns down the volume.
27. Help opens Ulead Video@Home online Help.
28. Minimize/Restore Control Panel shrinks the Control Panel to the
Windows taskbar or shows the panel.
29. Resize Screen changes the size of the Preview Window.
30. Exit closes Ulead Video@Home.

16
1. Backward Jumper 9. Current output/Time-Shift/playlist
and video format
2. Time-Shift playable area 10. Current Time
3. Current Channel 11. Remaining hard drive space
(for recording reference only;
in hh:mm:ss)
4. Elapsed Time 12. Remote Control Status
5. Time-Shift recording area 13. Mute Status
6. Forward Jumper 14. MTS Status
7. Playback status 15. Program Mode
8. Current Input Source 16. Current playback speed
1. Backward Jumper rewinds back to a certain point when time-shifting
or a playlist is active.
2. Time-shift playable area shows the video length recorded by Time-
Shift. You can click anywhere in this area to preview during time-
shift recording.
3. Current Channel shows the currently selected TV channel number.
4. Elapsed Time shows the time length that you have recorded or the
time passed for a playlist.
5. Time-Shift recording area shows the video length being recorded by
Time-Shift.
6. Forward Jumper moves ahead to a certain point when timeshifting
or a playlist is active.
7. Playback status indicates the current playback mode.
8. Current Input Source indicates the source in use.
9. Current output/Time-Shift/playlist and video format The rst part
shows the output mode in use, and the second part (in bracket)
shows the video quality in use.
10. Current Time shows the present time in the hh:mm:ss format.
11. Remote Control Status shows the current mode of the remote
control that came with your Instant TV. For example, a lock
indicates that the remote control is not connected to the program.

17
12. Remaining hard drive space shows the current HDD space for
video recording in the hh:mm:ss format.
13. Mute Status switches between volume on and volume off.
14. MTS Status shows the current MTS mode.
15. Program mode shows the current program status between.
16. Current playback speed indicates the playback speed at the
present time.
In addition, a quick menu (as depicted below) is available when you
right-click either the Preview Window or the Control Panel.
Right-Click Menu
A Ulead Video@Home Scheduling wizard is also available in the icons
area of the Windows task bar. This special icon provides quick access to:
• open the Ulead Video@Home program.
• start Ulead Video@Home earlier in time to activate scheduled recording.
• customize TV program le types associated with Ulead Video@Home.

18
Customize Settings
Settings for Ulead Video@Home are provided here in several categories
for you to choose from.
Preferences
General
When rst time using Ulead Video@Home, it is recommended to select
Display conrmation message after capturing. So, it is easy to know
which folder stores captured video or image les.

18 19
Record
You can specify a video le format for recording by choosing an existing
preset, or create your own or by adding a new preset. Selecting Use
Disc-Direct* lets you record video directly onto a disc instead of writing
to the hard drive. Select Use Preview mode if you want to use the video
format available from your Instant TV.
Time-Shift
This determines the video le format for Time-Shift recording. You can
also add your own presets. Also, Time-Shift recycle buffer sets the
video recording cache length. Select this option only when you want to
use the cache as the recorded video le, because it only records the
video previous shown (as compared to the current playback point) at a
xed amount of time you specify.

20
Skin
You can select your preferred Control Panel.
Scheduled recording
Scheduled recording lets you create a list of all the TV programs
you want to record before they start broadcasting. This mechanism
provides hassle-free convenience just as you would work with a
conventional VCR.
To perform scheduled recording:
1. Click Settings and select Scheduled Recording.
2. Click Add.
3. Enter the program name as you wish and select the channel the on
which the TV program you want to record is aired.
4. Set the recording mode for video quality.
5. Select how often you want to record this program in
Recording Frequency.
6. Set up the time and date when the program is aired in Start date,
Start time, and End time.
7. Click OK.
8. If you want to record another program, repeat steps 1 to 7.
Notes:
• You must leave your PC and Instant TV on, so scheduled recording can be active
even if you’re out.
• Before scheduled recording starts, if you want to temporarily close Ulead
Video@Home, you must right-click the Ulead Video@Home Scheduling wizard icon
(located on the Windows task bar) and set the time for Ulead Video@Home to
automatically open before recording starts.
• While scheduled recording is active, you cannot switch to another TV channel in Ulead
Video@Home.
• The minimum recording time is 30 seconds; maximum 12 hours for MPEG.
/

