Page is loading ...

INSTRUCTION MANUAL
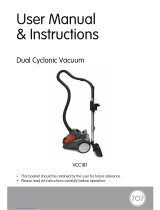
Please read this manual carefully before using, and keep it for future reference.
2400W
CYCLONIC BAGLESS
VACUUM CLEANER
GBV2400R


General Safety 4
Unpacking 8
Product Overview 10
How to Use 11
Conecting suction hose to vacuum cleaner 11
Conecting suction hose to telescopic tube 11
Connecting an attachment 12
Cord rewind 12
airflow control 13
accessories 13
Cleaning and Maintenance 14
FAQs 18
Specifications 19
Customer Helpline Last Page
CONTENTS

4
Read this manual thoroughly before you start using the product.
The safety precautions instructions reduces the risk of fire, electric shock and
injury when correctly complied to.
Please follow all instructions and take notice of all warnings.
IMPORTANT INFORMATION
GENERAL SAFETY
The lightning flash with symbol within the
triangle is intended to warn you of a
non-insulated dangerous voltage in the
product’s enclosure that could be of
sucient magnitude to generate a risk of
electric shock to persons.
The exclamation point within the triangle
is intended to warn you to the presence
of important operating and maintenance
instructions in the documents included with
the product.
The lightning flash symbol within the triangle is intended to warn you of
non-insulated dangerous voltage the product’s enclosure that could be of
sucient magnitude to generate a risk of electric shock to persons.
• Only using furniture that can safely support the Products.
• Ensure the Product is not overhanging the edge of the supporting furniture.
• Do not place the product on a high furniture without securing both the furniture
and the product to a stable support.
• Do not place the product on cloth or other conductive materials.
• Warn children of the dangers of climbing on furniture to reach its controls and
to call for an adult to assist.
IMPORTANT INFORMATION
The cover (or back) of the unit should not be
removed to prevent risk of electric shock. This
unit must be serviced by a qualified service
personnel only.

5
GENERAL SAFETY (Cont.)
• Before turning on, make sure your outlet voltage and circuit frequency
correspond to the voltage stated on the appliance rating label. If this is not the
case, do not use the appliance.
• Insert the plug firmly into an appropriate mains socket. Do not alter the plug.
Do not use an extension cord or electrical outlet with inadequate
current-carrying capacity.
• To protect against fire and electric shock, do not immerse the cord, plug or
the appliance itself in water or other liquid. Ensure your hands are dry before
handling the plug or switching on the appliance. Do not use it outdoors or on
wet surfaces.
• Do not kink or damage the power cord. Do not wrap it around the appliance.
Do not pull or carry the vacuum cleaner by the cord. Do not use the cord as a
handle, close a door on the cord or pull the cord around sharp edges or
corners. Do not run the vacuum cleaner over the cord. Run the cord in such a
way that there will be no risk of anyone pulling it inadvertently or tripping over
it. Keep the cord away from heated surfaces.
• This vacuum cleaner is equipped with a plug and a power supply cord that
automatically retracts. If anything is damaged, both the plug and the cord
must be repaired by a qualified repairer or electrician. When unplugging, grab
the plug, do not pull the cord. Then press the cord retraction pedal and hold
the plug, guiding it back onto the cord reel to prevent whipping and causing
injury or damage.
• Always switch o the appliance first and then unplug the cord from the outlet
when you have finished vacuuming, before connecting or changing accessories
and before emptying the dust tank or cleaning the appliance.
• Do not leave the vacuum cleaner unattended when plugged in.

6
WARNING!
ELECTRICAL SAFETY AND POWER CORD HANDLING
• Voltage: Make sure that your outlet voltage and circuit frequency
correspond to the voltage stated on the appliance rating plate.
• Power outlet: Connect the appliance to a properly earthed power outlet,
which must be easily accessible so that you can unplug it if necessary.
• Power cord: Do not kink or damage the power cord. Do not let it hang over
the edge of a table or benchtop, and do not let it touch hot or sharp surfaces.
Make sure the cord does not run under the vacuum cleaner.
• Electrical safety: Do not insert any objects into the appliance.
USAGE RESTICTIONS AND CONDITIONS
• This appliance is intended for indoor domestic use only. It is not suitable for
commercial, industrial or laboratory use.
• Do not use the appliance outdoors.
• The appliance is not intended to be operated by means of an external timer.
GENERAL SAFET (Cont.)
• Switch the appliance o and unplug it from the power supply after you have
finished using it and before cleaning, servicing, maintenance, or moving the
appliance. DO NOT pull the cord when disconnecting, grip the plug and pull it
gently out of the outlet.
• To reduce the risk of electrocution and other electrical hazards, do not immerse
the cord or plug in water, do not spill liquids onto the vacuum cleaner, and do
not operate it with wet hands.
• Do not use this appliance if it has a damaged cord or plug, if it is not working
properly, or if it has been damaged or dropped. If damaged, please contact our
support centre line - info@ayonz.com
• If the appliance and/or its cord are damaged, it must be replaced by the
manufacturer, its service agent or a similarly qualified person in order to avoid
a hazard. Do not attempt to repair, disassemble, or modify the appliance.
There are no user-serviceable parts inside this unit.

7
GENERAL SAFETY (Cont.)
• The appliance is not intended for use by persons (including children) with
reduced physical, sensory or mental capabilities, or lack of experience and
knowledge, unless they have been given supervision or instruction on the use
of the appliance by a person responsible for their safety.
• Supervise children to ensure they do not play with the appliance. Do not allow
children to clean the vacuum cleaner or perform user maintenance.
• Maintain the oven in a clean condition to avoid deterioration, which could
aect its working life and result in a hazard risk.
• We accept no liability for any eventual damages due to improper use, incorrect
handling or non compliance with these instructions.
This appliance is intended to be used in household and similar applications
such as:
– sta kitchen areas in shops, oces and other working environments;
– farm houses;
– by clients in hotels, motels and other residential type environments;
– bed and breakfast type environments.
If the supply cord is damaged, it must be replace by the manufacturer, its service
agent or similarly qualified persons in order to avoid a hazard.

8
Before installing your appliance, read all safety instructions in this manual,
especially the sections on electrical safety and installation.
INSTALLATION
UNPACKING
• When unpacking the product, be sure to keep all the packaging materials
until you have made sure your new product is undamaged and in good
working order. This product has been packaging to protect itself
against transportation.
• Be sure to remove all packaging materials around the product and that
the plastic film used is also removed.
• CAUTION: Plastic wrapping can be a suffocation hazard for babies and young
children. Make sure all packaging materials are out of reach for children and
that they are disposed of correctly.

9
PRODUCT OVERVIEW

10
PRODUCT OVERVIEW (Cont.)
PET CLEANER ATTACHMENT
Used for pet hair of furniture,
floors, chairs, etc.

11
SETTING UP THE VACUUM CLEANER
CONNECTING THE SUCTION HOSE TO THE VACUUM CLEANER BODY
• Plug the suction hose into the suction hose connection at the front
of the vacuum cleaner. Push it in firmly until you hear it click into
place (A).
• To remove the suction hose, press the two catches on the side of the
suction hose (B ) and pull out the suction hose.
CONNECTING THE SUCTION HOSE TO THE TELESCOPIC TUBE
• To connect the suction hose to the
telescopic tube, slide the end of the
suction hose with the exhaust air
valve onto the end of the telescopic
tube with the wider diameter (C).
• To remove the suction hose from the
telescopic tube, simply pull off
the suction hose.
Make sure the vacuum cleaner is unplugged from the power outlet before
assembling or removing any accessories.
HOW TO USE
WARNING!

12
HOW TO USE (Cont.)
PULLING OUT THE TELESCOPIC TUBE
• Press the slider on the telescopic tube (D) in the direction shown by
the arrow and pull the telescopic tube out to the length you want.
• Let go of the slider and keep pulling out the telescopic tube until it
locks in place.
CONNECTING AN ATTACHMENT
• Select a nozzle attachment and plug it onto the end of the telescopic
tube with the narrower diameter.
• To change the nozzle attachment, pull off the nozzle attachment and
plug a new nozzle attachment onto the telescopic tube. The vacuum
cleaner comes with a floor brush, an upholstery nozzle and a crevice
nozzle with fold-out brush. Usage is explained on the following pages.
CORD REWIND
• Holding the power plug firmly, pull it to fully unwind the cord.
• Position the cord so no one is likely to trip over it.
• To rewind the power cord, press the cord retraction button.
Note: Take care, the cord retracts very quickly. Guide it with one hand
to prevent the cord from whipping, which could cause damage or injury.

13
HOW TO USE (Cont.)
AIRFLOW CONTROL
• To lower the airflow (suction power)
temporarily during vacuuming, push up
the suction control valve on the
curved handle.
• Push it down again to cover the opening
for increased suction (E).
UPHOLSTERY NOZZLE
Used for cleaning sofas,
lounge, chairs, car seats, etc.
2-IN-1 CREVICE NOZZLE
Used for cleaning upholstery, the car interior for all
little gaps that cannot be reach with other nozzles.
ACCESSORY HOLDER
Used to connect and hold your accessoring to the
telescopic tube of your vacuum cleaner.
- Flip over the top of nozzle following the arrow
direction marked on nozzle to switch between the
brush attachment.

14
CLEANING AND MAINTENANCE
STEP 1
Hold down the release button indicated on
(F) image. It will detach the dust tank from
the vacuum cleaner.
STEP 2
Hold the dust tank over a bin and press the
release button to open the bottom flap (G).
• Always unplug the vacuum from the power outlet before attempting to
clean any part of the vacuum or removing its contents/accessories.
• For optimum cleaning performance, clean the filters each time you
empty the dust tank.
• Only use the vacuum with the filter intact, in dry conditions.
WARNING!

15
CLEANING AND MAINTENANCE (CONT.)
STEP 3
You can remove the in-tank filter unit to clean
the product further. First locate arrows on the
dust tank (H).
STEP 4
When the intank filter is in place, the upper arrow
points towards the lower arrow and the closed
lock symbol (I).
STEP 5
To remove the in-tank filter unit, turn the dust lid
until the upper arrow points towards the lower
lower arrow OPEN lock symbol.
STEP 6
Clean the dust tank and filter with a damp cloth
and mild detergent, then wipe all parts dry
before putting it all back together.

16
CLEANING AND MAINTENANCE (CONT.)
STEP 7
Push up the latch on the dust tank lid and flip the
lid over to show the HEPA filter (see J. image).
STEP 9
Take the filters out over an open dustbin. Then clean the filters using a brush, if
necessary or wash the filters in cold or lukewarm water with a mild detergent. Do
not machine-wash the filters!
STEP 10
Allow the filters to air-dry completely before putting them into the in-tank
filter unit.
Close the dust tank lid. Make sure you hear the fastener clip lock in place.
STEP 8
Remove the HEPA Filter
(K) by pulling it out and
removing the foam filter
underneath (L).
As you now have the dust tank removed, you should also consider cleaning the
HEPA filter, which is located underneath the dust tank lid.
CLEANING THE HEPA FILTER

17
CLEANING AND MAINTENANCE (CONT.) CLEANING AND MAINTENANCE (CONT.)
STEP 11
Following the same procedure but
reverse, once assembling back the
dust bin with filters and locking the
dust canister and lid together by
making sure the uppser arrow is
pointing towards the lock logo.
Place the bottom of the dust bin
into the vacuum cleaner area it was
removed from, then click the Top
mechanism into place. See the (M)
image as reference.
CLEANING THE MOTOR FILTERS
The motor filters are located inside the
vacuum cleaner unit under the dust
tank area. (dust tank must be removed to
access).
1. Remove the small motor filter
(N, image #1) see right image.
- Clean the filter over a dust
bin by tapping on it.
2. Open the Filter Lid
(N. image #2) Remove the filter
located inside and hold over a bin
and tap the filter to remove he dust.
3. Once cleaned, place the filter back inside and close the Filter Lid (#2).
Insert the dust canister back into the vacuum cleaner as instructed at the top
of this page.

18
If experiencing issues with your oven and isn’t operating correctly please
check the following pages for solutions to the problems. If none of the solutions
offered help solve the problem with your appliance then please contact our
call centre on info@ayonz.com.
DO NOT ATTEMPT TO REPAIR THE APPLIANCE YOURSELF.
Never use the vacuum when the suction power is very weak. When this
occurs, switch off the vaccum cleaner and unplug it. Check if the dust
canister is full. Then check if any airways is jammed with rubbish or
debris, once removed turn vacuum back on to see if operated normally.
FAQS
PROBLEM POSSIBLE SOLUTION
VACUUM IS NOT
WORKING
Make sure that it is plugged in securely into the
power wall socket.
THE VACUUM CLEANER
WILL NOT PICKUP DIRT
AND HAS LOSS OF
SUCTION
- Make sure the dust canister is installed correctly.
- The dust tank is full, if so empty its contents.
- The filters are clogged, go through cleaning and
maintenance pages (page 11) to clean out all filters
and dust.
- Make sure the accessories such as the flexible
hose and attachments are installed correct and
are not blocked or cloggest with rubbish that has
been vacuumed.
DUST IS ESCAPING THE
VACUUM CLEANER
- The dust tank is full, please empty it.
- The dust tank is not installed correctly. Check to
ensure that the dust tank is clicked into place and
installed correctly.
- The filters are not installed correctly, follow the
cleaning and maintenance steps (page 11) to clean
the filters and remove and debris.
WARNING!

19
SPECIFICATIONS
Ratings 220-240V ~ 50/60Hz
2000W Norm. / 2400W Max.
Dimensions 450 (w) x 365 (d) x 800-1000 (h) mm
Weight Net: 6.1 kg / Gross: 7.1 kg

CUSTOMER HELPLINE:
info@ayonz.com
DISTRIBUTED BY:
Ayonz Pty Ltd
/