Page is loading ...

Dover Gate Kit
Assembly and Installation Tips
To complete your project,
you will also need:
•Doverfencepanel
•Drilldriver
•¼”drillbit
•Circularsawwithane-toothbladeorahandsaw
•7/16”wrench
•Tapemeasure
•Pencil/marker
•Safetyglasses
•4x4treatedwoodpost
Planning
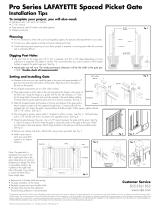
•Priortoconstruction,checkwithyourlocalregulatory
agencyforspecialcoderequirementsinyourarea.
•Contactyourutilitysuppliertolocateandmark
undergroundlines.
•Carefulplanningandmeasuringofyourfenceproject
isessential,asmovingpostsaftertheconcretesetsis
extremelydifcult.
Digging Post Holes
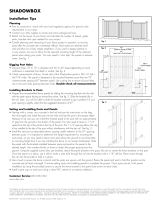
•Digpostholeforthehingepost18”to24”indiameter
and36”to42”deep(dependingonlocalordinanceor
expectedfrostdepthinwinter).Werecommendthatyou
insertapieceof4x4treatedlumbertosupportthegate
hingepost.SeeFig.1.
•Actualgatesizewillvary.Theinsidepost–to-postdimension
willbethewidthofthegateplus1-1/4”.Double-check
all measurements!
Assembling the Gate
Note: For optimal performance and aesthetics, we recommend a walk gate width of
40-1/2”. This is accomplished utilizing the width of 4 pickets from the Dover fence
panel.
•Measuretheopeningwhereyourgateistobeinstalled.Gatewidthwillneedtobe
reducedby1-¼”toallowfora5/8”gaponbothsidesofthegatebetweentheposts.
•MeasureandmarktheDoverfencepaneltothedesiredsize.Thefencepanelwill
needtobetrimmed3-1/2”lessthanthedesiredgatewidthtoallowforthedimensions
ofthegatejambs.Foreaseofassembly,itisrecommendedtoutilizefullfencepickets.
Ifapicketdoesneedtobetrimmedtolength,theroughedgeshouldbeplaceinsidethe
gatejamb.
•Removethetop&bottomfencerailsfromthepicketsandtrimtothedesiredwidthusing
acircularsawwithane-toothbladeorahandsaw.TheDoverfencerailshavetabs
oneachendforinstallationintothefenceposts.Thetabbedendsmustbetrimmedoffthe
paneltocreateaatfacefortheinstallationofthegatejambs.SeeFig.2.Layallgate
componentsoutonaat,cleansurface.Re-assemblethepanelbyinsertingthepickets
intothebottomrailrstandthenslidingonthetoprail.Allrailsneedtobeushwith
thepickets.
dovertrim.ai

5/8
Fig.4 DoverGateSpacer.ai
•Slidethegatejambontothefence
panelandplacethehingesinthe
centerofthefencerail.Usingthe
hingeasaguide,drillthefour(4)
necessary¼”holesforthehinge
bolts.Ensuretherailsarefully
insertedinthejambbefore
drilling.Theboltsneedtogo
throughthejambandrailtofunction
properly.SeeFig.3.
•Inserttheboltsandlooselyattach
thenuts(thesewillbetightenedlater).
Duplicateforeachofthefour
corners.Onceallcornersareloosely
fastened,measurefromcorner-to-
cornertoensurethegateissquare.
Whensquare,tightenallboltswitha7/16”wrench.
Donotover-tightenasitmaycrushthegatejambs.SeeFig.3.
Installing Gate
•Measuretobesureyoucaninstallthegatetothepostwith
approximatelya2”gapfromthegroundtothebottomof
thepanel.Aligntherailsonthegatetotherailsonthefence
panels.
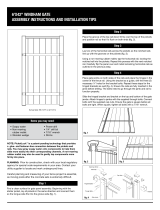
•Hangthegatebetweentheposts.Usea5/8”spacerbetween
thegateandtheposts.SeeFig.4.Secureinplacewithshims
underthegateorclampthejambonthegatetothepost.
Makesurethegateislevelandsquare.Attachhingebrackets
tothegatepostwiththeprovidedscrews.SeeFig.5.
•Removeanyclampsandshims.Attachlatchusingscrews
provided.SeeFig.6.
•InstallapostcaponeachpostusingPVCcementoran
exterioradhesive.
Note:TheDovergatelatchisdesignedto
beusedontheleftorrighthandsideofthe
gate,dependingoncustomerpreference
ordesign.Thelatchisassembled,ready
tobeinstalledontherighthandsideof
thegate.Ifyoudesiretoswitchthelatch
followthesesimplesteps:
•Removethe2shoulderboltsandspring.
•Changeorientationoftheclicker
•Re-attachspringandinsertshoulderbolts.
•Shoulderboltsmustbefullytightened.
Threadlockingadhesiveisrecommended.
Latch
Striker
Fig.6 DoverLatch.ai
fig. 6
fig. 4
Customer Service
855-556-1852
www.ufpi.com
Thediagramsandinstructionsshownareforillustrationpurposesonlyandarenotmeanttoreplacealicensedprofessional.Anyconstructionoruseoftheproductmustbein
accordancewithalllocalzoningand/orbuildingcodes.Theconsumerassumesallrisksandliabilityassociatedwiththeconstructionoruseofthisproduct.Theconsumeror
contractorshouldtakeallnecessarystepstoensurethesafetyofeveryoneinvolvedintheproject,including,butnotlimitedto,wearingtheappropriatesafetyequipment.
EXCEPTASCONTAINEDINTHEWRITTENLIMITEDWARRANTY,THEWARRANTORDOESNOTPROVIDEANYOTHERWARRANTY,EITHEREXPRESSORIMPLIED,ANDSHALL
NOTBELIABLEFORANYDAMAGES,INCLUDINGCONSEQUENTIALDAMAGES.
©2012UniversalForestProducts,Inc.Allrightsreserved.5784Dov_4/13
fig. 5
fig. 3

•Deslicelajambadelapuertaenelpanel
delacercaypongalasbisagrasenel
centrodelabaranda.Usandolabisagra
comoguía,taladreloscuatro(4)huecos
de¼depulgadaquesenecesitanpara
lospernosdelabisagra.Asegúreseque
loslistonesesténcompletamenteinsertados
enlajambaantesdeperforar.Lospernos
debenatravesarlajambayellistónpara
funcionarcorrectamente.VealaFig.3.
•Insertelospernosypongalastuercassin
apretar(éstasseapretarándespués).Repita
encadaunadelascuatroesquinas.Una
vezquetodaslasesquinasestánsujetadas
sinapretar,midadesdeunaaotraesquina
paraasegurarsequelapuertaestáencuadrada.Cuando
estéencuadrada,aprietetodoslospernosconunallave
inglesade7/16depulgada.Noaprietedemasiado,ya
quepuedeaplastaralasjambasdelapuerta.
VealaFig.3.
Instalación de la puerta
•Midaparaasegurarsequepuedeinstalarlapuertaalposte
conunespaciodeaproximadamente2pulgadasdesdeel
suelohastalaparteinferiordelpanel.Alineeloslistonesde
lapuertaconloslistonesdelospanelesdelacerca.
•Cuelguelapuertaentrelostrespostes.Useunseparadorde
5/8depulgadaentrelapuertaylospostes.VealaFig.4.
Fíjelaconcuñasdebajodelapuertaoaancelajambade
lapuertaalposte.Asegúresedequelapuertaestéanivel
yencuadrada.Fijelossoportesdelabisagraalpostedela
puertaconlostornillosprovistos.VealaFig.5.
•Quitecualquierabrazaderaocuñas.Sujeteelpestillocon
lostornillosprovistos.VealaFig.6.
•Pongaunatapadepostesobrecadaposte
usandocementoPVCounadhesivopara
usoexterior.
Nota:ElpestillodepuertaDoverestádiseñado
paraserutilizadoenelladoizquierdooderecho
delapuerta,dependiendodelapreferenciadel
clienteodeldiseño.Elpestilloestámontado,listo
paraserinstaladoenelladoderechodela
puerta.Sideseacambiarelpestillosigaestos
sencillospasos:
•Quitelos2pernosdeajusteyelresorte.
•Cambielaorientacióndelclicker.
•Vuelvaacolocarelresorteeinsertelos
pernosdeajuste.
•Lospernosdeajustedebenestarbienapretados.
Serecomiendaelusodeunadhesivobloqueadorderoscas.
Servicio al Cliente
855-556-1852
www.ufpi.com
Losdiagramasylasinstruccionesquesemuestransonsóloparanesilustrativosynosustituyenaunprofesionalconlicencia.Cualquierconstrucciónousodelproductodebe
estarenconformidadcontodosloscódigoslocalesdezonicacióny/odeconstrucción.Elconsumidorasumetodoslosriesgosyresponsabilidadesasociadosconlaconstruc-
ciónoelusodeesteproducto.Elconsumidorocontratistadebetomartodaslasmedidasnecesariasparagarantizarlaseguridaddetodoslosinvolucradosenelproyecto,
incluyendo,peronolimitadoal,usodelequipodeseguridadapropiado. EXCEPTOPORLOQUESEINDICAENLAGARANTÍALIMITADAPORESCRITO,ELGARANTENO
OFRECENINGUNAOTRAGARANTÍA,EXPRESAOIMPLÍCITA,YNOSERÁRESPONSABLEPORNINGÚNDAÑO,INCLUSODAÑOSCONSECUENTES.
©2012UniversalForestProducts,Inc.Todoslosderechosreservados.5784Dov_4/13
Fig.4 DoverGateSpacer.ai
5/8
fig. 4
Pestillo
Fig.6 DoverLatch.ai
Plancha
de cerradura
fig. 6fig. 5
/


