Page is loading ...

Kit includes:
•1–Metalpostreinforcement
•4–Railsupportsforthetopandbottomrails
•20–Self-tappingscrewstofastenpicketstorails
Tocompleteyourproject,youwillalsoneed:
•Gloves(recommendedforusewhilehandlingrailsupportsduetosharpedges)
•Drilldriver
•Safetyglasses
•Tapemeasure
•Sawwithmetalcuttingblade(foruseoncornerpostreinforcementsonly)
MetalPostReinforcement
•Insertthepostreinforcementintothepostensuringtheorientationallowsforthefencerailstobeinsertedintothepost.Installthe
postaccordingtothefenceinstallationinstructions.
•Note:Cornerpostreinforcementsrequireaeldmodication.Priortoinstallation,usetheholesintheroutedcornerpostasa
templateandnotchouttheholesononesideofthepostreinforcementusingasawwithametalcuttingblade.Donotremove
morematerialthanisnecessary.Insertthemodiedpostreinforcementintothepostmakingsuretheroutedholeslineupwith
thenotchedpostreinforcement.Installthepostaccordingtothefenceinstallationinstructions.
RailSupports
•Wearing gloves, join two of the rail supports together to create an
enclosedrectangularbox.SeeFig.1.Slidethetwojoinedrailsupports
intothetopfencerail.Repeatforbottomrail.
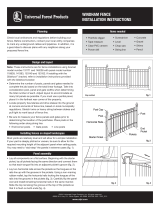
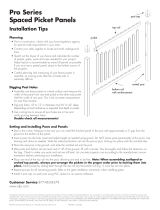
•Installfencebetweenpostsaccordingtothefenceinstallationinstructions.
Self-tappingScrews
•Once the fence is installed, fasten the pickets to the rail using the
providedself-tappingscrews.Fastenersshouldbelocatedinthemiddle
ofthepicketsandmustfullyengagethepicketstotherails.
•Screwscanbeplacedononesideofthepanelorcanbealternatedeveryotherpicketonthefrontandbackofthepanel.
CustomerService855-556-1852
www.ufpi.com
Thediagramsandinstructionsshownareforillustrationpurposesonlyandarenotmeanttoreplacealicensedprofessional.Anyconstructionoruseoftheproductmustbeinaccordancewithalllocalzoningand/obuild-
ingcodes.Theconsumerassumesallrisksandliabilityassociatedwiththeconstructionoruseofthisproduct.Theconsumerorcontractorshouldtakeallnecessarystepstoensurethesafetyofeveryoneinvolvedinthe
project,including,butnotlimitedto,wearingtheappropriatesafetyequipment.EXCEPTASCONTAINEDINTHEWRITTENLIMITEDWARRANTY,THEWARRANTORDOESNOTPROVIDEANYOTHERWARRANTY,
EITHEREXPRESSORIMPLIED,ANDSHALLNOTBELIABLEFORANYDAMAGES,INCLUDINGCONSEQUENTIALDAMAGES.
©2012UniversalForestProducts,Inc.Allrightsreserved.5784DoverWIndLoad_4/13
ProSeries
DOVERWindLoadAdaptorKit
fig. 1

Servicioalcliente855-556-1852
www.ufpi.com
Losdiagramaseinstruccionesquesemuestransonsóloconnesilustrativosynopretendensustituiraunprofesionalconlicencia.Cualquierconstrucciónousodelproductodebeestarenconformidadcontodoslos
códigoslocalesy/odezonicación.Elconsumidorasumetodoslosriesgosyresponsabilidadesasociadasconlaconstrucciónoelusodeesteproducto.Elconsumidorocontratistadebetomartodaslasmedidas
necesariasparagarantizarlaseguridaddetodoslosinvolucradosenelproyecto,incluyendo,peronolimitándoseal,usodelequipodeseguridadapropiado.AEXCEPCIÓNDELOQUEFIGURAENLAGARANTÍA
LIMITADAESCRITA,ELGARANTENOOFRECENINGUNAOTRAGARANTÍA,EXPRESAOIMPLÍCITA,YNOSEHACERESPONSABLEPORNINGÚNDAÑO,INCLUYENDODAÑOSCONSECUENTES.
©2012UniversalForestProducts,Inc.Todoslosderechosreservados.5784DoverWindLoad_4/13
Eljuegoincluye:
•1–Refuerzodemetalparaposte
•4–Soportesparaloslistonessuperioreinferior
•20–Tornillosautorroscantesparasujetarlospiquetesaloslistones
Paracompletarsuproyectoustednecesitarátambién:
•Guantes (se recomienda usarlos mientras trabaja con los soportes de los listones debido a sus
bordespuntiagudos)
•Taladroatornillador
•Lentesdeseguridad
•Cintamétrica
•Sierraconhojaparacortarmetal(parausarlasóloenlosrefuerzosdelposteesquinero)
Refuerzodemetalparaposte
•Inserteelrefuerzoenelposteasegurándosequesuorientaciónpermitaqueloslistonesdelacercasepuedaninsertarenel
poste.Instaleelpostedeacuerdoalasinstruccionesdeinstalacióndelacerca.
•Nota:Losrefuerzosdelospostesesquinerosrequierenunamodicaciónenelsitiodetrabajo.Antesdelainstalación,use
losagujerosdelposteesquinerocomounaplantillaycortemuescasenlosagujerosenunladodelrefuerzodelposteusando
unasierraconunahojaparacortarmetal.Noquitemásmaterialdeloqueseanecesario.Inserteelrefuerzomodicadode
posteenelposteasegurándosequelosagujerosenrutadossealineenconelrefuerzodelposteconmuescas.Instaleelposte
deacuerdoconlasinstruccionesdeinstalacióndelacerca.
Soportesdeloslistones
•Usando guantes, una dos soportes de listones para crear una caja
rectangularcerrada.VealaFig.1.Deslicelosdossoportesunidosenel
listónsuperiordelacerca.Repitaestoparaellistóninferior.
•Instale lacerca entre los postes de acuerdo con las instrucciones de
instalacióndelacerca.
Tornillosautorroscantes
•Una vez instalada la cerca, sujete los piquetes al listón usando los tornillos autorroscantes provistos. Se deben colocar
sujetadoresenelcentrodelospiquetesydebenasegurarbienlospiquetesaloslistones.
•Alostornillosselospuedeponerenunladodelpanelopuedeniralternados,pasandounpiquete,enlapartefrontalytrasera
delpanel.
SeriePro
JuegodeladaptadorDovercontra
lafuerzadelviento
Fig. 1
/


