1
RACKMUX-V15/17-N-PRIMUX
RACKMUX KVM DRAWER WITH PRIMUX
®
KVM SWITCH VIA CAT5
Quick Start Guide
What's in the Box
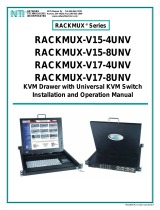
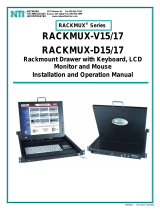
• NTI RACKMUX-V15/17-N-PRIMUX
• Line cord, country specific
• Terminating Plug (for last Host Adapter in chain)
• CDROM w/ Owner's Manual and Quick Start Guide (pdf files)
• This Quick Start Guide
What's also needed (sold separately)
• NTI Host Adapter(s) HA-PS2 / HA-USB / HA-SUN (see chart on page 4)
• CAT5/5e/6 unshielded twisted-pair cable(s) terminated with RJ45 connectors wired straight thru (pin 1 to pin 1, etc.)
RACKMUX
®
Series
(Host Adapter sold separately)
NETWORK
TECHNOLOGIES
INCORPORATED
Tel:330-562-7070
Fax:330-562-1999
1275 Danner Dr
Aurora, OH 44202
www.networktechinc.com
NTI
R

2
(Rear View)
CAT5 Cable
to User Station
Cable to CPU
Terminating
Plug (Supplied)
Hardware Setup
1. Disconnect power from the CPU.
Note: The Host Adapter must be connected to the CPU before power is connected to the CPU. Failure to do so may result in
damage to the Host Adapter.
2. Plug the Host Adapter into the devices and video ports on the back of the CPU.
3. Connect a CAT5 cable from the "OUT" port on the Host Adapter to the "CAT5" port on the User
Station (the PRIMUX KVM switch at the rear of the RACKMUX).
4. Connect the Terminating Plug (supplied) to the "IN" port on the Host Adapter.
FYI: If more Host Adapters will be connected, follow the instructions that follow for
"Daisy-Chained Host Adapters".
(Front View)
Rear View of PS/2 CPU
purple-keyboard
green-mouse
video
(Front View)
Rear View of USB CPU
devices
video
Rear View of SUN CPU
(Front View)
devices
video

3
5. Connect the power cord to the User Station.
6. Press the switch to power-up the RACKMUX.
7. Plug in the power cord(s) and power-up the CPU(s).
Daisy-Chained Host Adapters
Up to 64 CPUs can be connected in a daisy-chain to a create a segment of CPUs controlled by a single user from a User Station. (A
"segment" is a User Station connected to 1 or more Host Adapters) The first Host Adapter is connected to the User Station via the "OUT"
port. Additional Host Adapters in the segment will have CAT5 cable connected from their "OUT" port to another Host Adapter's "IN" port
to enable communications between the user and each CPU in the system (see the illustration on the next page). A Terminating Plug must
be installed in the "IN" port of the last Host Adapter in the segment.
CAT5 Cable
to User Station
Cable to CPU 1
Cable to CPU 2 Cable to CPU 3 Cable to CPU 64
CAT5 Cable
CAT5 Cable
CAT5 Cable
CAT5 Cable
Terminating
Plug (Supplied)
Daisy-chained Host Adapters
IEC Powercord
REAR VIEW OF RACKMUX-V15-N-PRIMUX
NTI
NETWORK
TECHNOLOGIES
INCORPORATED
Tel:330-562-7070
Fax:330-562-1999
1275 Danner Dr
Aurora, OH 44202
www. networktechinc.com
RS232
CAT5

4
Initial Startup
Upon startup, the Command Mode screen will be displayed, autologging you in as NEWUSER1 without administrative rights. No
password will be necessary. As NEWUSER1 you have full access to all Host Adapters and their connected CPUs.
To logout as a user, press <L> and the login screen will appear
If you logout and want to log back in as NEWUSER1, either ;
A) type <NEWUSER1> at the login prompt and press <Enter> twice
-or-
B) power-cycle the PRIMUX and be automatically logged-in as NEWUSER1
To login as the administrator, enter the following while holding down the <Shift> key:
administrator name = <ROOT> or <ADMINISTRATOR> (either can be used)
administrator password= <NTI>
Make a Connection
1. From Command Mode, press <G> + <xx> where xx is the index number of the desired Host Adapter/CPU to connect to.
Press <Enter> to select the Host Adapter.
Press <Enter> again to connect to the Host Adapter.
-or-
Using the mouse, move the selection bar to the desired Host Adapter listed in the OSD menu and click once to make a connection.
2. Press <X> or <Esc> on the keyboard to exit Command Mode and control the connected CPU.
Congratulations, you have successfully installed your RACKMUX-V15/17-N-PRIMUX.
Host Adapter Ordering Chart
NTI # Application
HA-PS2 PS/2 CPU
HA-SUN SUN CPU
HA-USB USB CPU (Win,Sun, or Mac)
To order CAT5 cables or Host Adapters, either visit our website at www.networktechinc.com or call us at 1-800-RGB-TECH (800-742-
8324) or 1-330-562-7070.
MAN104 Rev 9/2/2008
/


