Zvox Audio SB700 Quick Setup

Type
Quick Setup

This manual is also suitable for

Face Up
Face Front
Place the soundbar on
stable, at surface.
Ensure all components
are stable and secure.
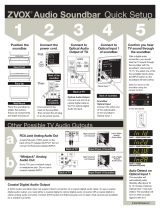
Optical Audio Output
Connect one end of an
optical digital cable to
the TV’s optical digital
Audio Out jack.
With a digital audio
connection, you should
hear the TV sound through
the soundbar with the
soundbar’s volume set to
12-15. You select one of the
four available inputs using
the INPUT button on the
soundbar’s remote control.
Auto-Detect on
Optical Input 1
The soundbar will
automatically enter
Standby after about 10
to 15 minutes of silence.
Optical Input 1 has Auto-
Detect. The soundbar will
turn on when an audio
signal is sent to it.
Soundbar
Optical Input
Connect the other end
of the opticalcable
to the soundbar’s
Optical Input 1.
First connect to the
input on the soundbar.
Then connect the AC plug
to an AC power source.
Connect to
Optical Audio
Output of TV.
Connect to
Optical Input 1
of soundbar.
Conrm you hear
TV sound through
the soundbar.
RCA Jack Analog Audio Out
A red/white pair of RCA jacks on the
back of the TV labeled OUTPUT. Do not
connect to RCA jacks labeled INPUT.
Coaxial Digital Audio Output
A ZVOX Audio soundbar does not support direct connection of a coaxial digital audio cable. To use a coaxial
digital audio output, you need either a coaxial digital to optical digital audio converter OR a coaxial digital to
stereo analog audio converter. Contact ZVOX Audio at [email protected] to learn what sources are available
for a suitable converter.
“Minijack” Analog
Audio Out
Some TVs use a minijack output
or headphone jack. Do not use a
minijack labeled INPUT.
Position the
soundbar.
Connect the
power cord.
or the end panel.
© 2016 ZVOX Audio LLC.
ZVOX
®
Audio Soundbar
Quick Setup
Other Possible TV Audio Outputs
a
b
Select an input on the
soundbar using the
remote control
,1387
',$/2*
(03+$6,6
6855281'
32:(5
,138
Back of the
soundbar
AC power
receptacle
Back of TV
Back of TV
Input Panel of Soundbar
1234 5
',*,7$/
$8',2
287
+'0, +'0,
9,'(2
Back of TV
DC
Power
Input
Optical Input 1
Back of soundbar
$8',2
287
6'
9,'(2,1
69,'(2
Left & Right
Analog
Audio Input
Left & Right
Analog
Audio Input
Left Channel
Right Channel
/0212
$8',2
$8',2
,1
$8',2
287
$17
&$%/(
5
Right Channel
Left Channel
Input 2—digital (optical jack)
Input 1—digital (optical jack)
Input 2—analog
(red/white RCA jacks)
Bluetooth input
Wall Mount
Then
First
Your Current TV Remote Can Control Your Soundbar.
After following the steps outlined in this guide, your cable or satellite
remote will adjust the volume output from your soundbar system. Please
Note: If you have a DirecTV remote control, use the “Guide to Popular
Remotes” document available on the ZVOX Audio website under
Support/Product Manuals.
The steps involve pressing the Volume, Mute, and Power buttons of your
preferred remote control with the remote positioned close to the numeric
display of the soundbar. Once complete, the soundbar will respond to
the buttons it has learned from your preferred remote control.
To insure accuracy, the learning routine records each button’s
commands twice, then conrms a successful button learning.
ZVOX
®
Audio has specic instruction sets available for a variety of
popular remote controls. These instructions provide an alternate method
for conguring your soundbar to respond to your preferred remote
control. If you cannot easily teach the soundbar to respond to your
preferred remote control, examine our “Guide to Popular Remotes”
document available on the ZVOX Audio website under Support/Product
Manuals, or contact ZVOX Audio about additional instructions for your
preferred remote control.
123
Stand or sit within easy reach
of the soundbar’s control buttons
(the end on your right hand side).
You will need to press two buttons on
the soundbar end panel to start the learning
process. Then you will press four buttons on
your preferred remote control.
Locate the following
buttons on your
remote control:
1
VOLUME UP
2
VOLUME DOWN
3
MUTE
4
POWER
The learning process
involves pressing these
four buttons in sequence.
This remote is only an example. Your
remote is probably different. Please
locate these buttons on your remote.
Press both
VOLUME buttons
on the Boundbar
until “Lrn” appears
(about 4 seconds).
Then release both
VOLUME buttons.
࠮ Get ready
to press
VOLUME UP
on the Remote
Control.
When appears, press
VOLUME UP for 1 second.
You should see
.
When
appears, press
VOLUME UP for 1 second, again.
You should see
,
followed by .
When
appears, press
VOLUME DOWN for 1 second.
When
appears, press
VOLUME DOWN for 1 second, again.
You should see
,
followed by .
When
appears, press
MUTE for 1 second.
You should see
.
When
appears, press
MUTE for 1 second, again.
You should see
,
followed by .
When
appears,press
POWER for 1 second.
You should see
.
When
appears, press
POWER for 1 second, again.
You should see
,
followed by .
PREPARE
LEARN BUTTONS
YOU ARE DONE!
If you see the “no change” message (nocH) during the learning routine,
the soundbar system system did not accept the infrared code.
The current step in the learning routine will repeat.
1234
Error Message of
the Soundbar
Learning Routine
You should see
4
3
1
2
volume up volume down
mute
power
© 2016 ZVOX Audio LLC.
6RIW2YDO3DGVIRU=92;$XGLR6RXQGEDUSURGXFWV
7KHVHSDGVVHUYHWZRLQVWDOODWLRQIXQFWLRQV
$1RWH$ERXW6XUIDFH)LQLVKHV
,WLVWKHVRXQGEDURZQHU·VUHVSRQVLELOLW\WR
SUHVHUYHWKHILQLVKRIDQ\VXSSRUWLQJVXUIDFH
$Q\KLJKTXDOLW\VXUIDFHILQLVKHVSHFLDOO\RQH
UHFHQWO\ILQLVKHGRUDWKLFNILQLVKFDQEH
DIIHFWHGE\DQREMHFWSUHVVLQJGRZQRQWKH
VXUIDFHIRUDORQJSHULRGRIWLPH3ODFHD
EDUULHUEHWZHHQWKHVRXQGEDURUWKHSDGVDQG
DVXSSRUWLQJVXUIDFHWRSURWHFWWKH
DSSHDUDQFHRIWKHVXUIDFH
6RXQGEDUZDOOPRXQWHG
6RPHPRXQWLQJKDUGZDUHPD\UHTXLUHDVSDFHUWRVQXJO\
DWWDFKWRWKHNH\KROHEUDFNHWVRQWKHEDFNRIWKHVRXQGEDU
6RXQGEDUIDFLQJIURQW
3ODFHWKHSDGVXQGHUQHDWKWKHVRXQGEDUWRSUHYHQW
WKHVRXQGEDUIURPVOLGLQJRQDVPRRWKVXUIDFH
Height 144.5 mm
(5 11/16")
SB500
SB400
Depth 84.5 mm
(3 5/16")
743 mm (29 1/4")
90 mm
input
panel
(3 9/16")
1114 mm (43 7/8")
Depth 84.5 mm
(3 5/16")
Height 144.5 mm
(5 11/16")
743 mm (29 1/4")
90 mm
(3 9/16")
902 mm (35.5")
Back view with dimensions of the ZVOX Audio Soundbars SB700, SB500 and SB400
front
front
Height 144.5 mm
(5 11/16")
SB700
Depth 84.5 mm
(3 5/16")
input
panel
front
input
panel
90 mm
(3 9/16")
743 mm (29 1/4")
1451 mm (57 1/8")
© ZVOX Audio LLC 2016 r3
1-Year Limited Warranty
To the original purchaser of a ZVOX Audio system in the United States of America, ZVOX Audio
warrants the ZVOX Audio system to be free of defects in material and workmanship for a period of one (1)
year from date of purchase.
To make a warranty claim with ZVOX Audio, a Return Authorization must be obtained from ZVOX
Audio. The ZVOX Audio system should be shipped to ZVOX Audio to the address provided in the Return
Authorization. The repair of a ZVOX Audio product must be done by ZVOX Audio in our facility. A repair
of a ZVOX Audio system by an independent service agency is not supported. With respect to defects,
ZVOX will, at its option, repair any defect in the product or replace the product at no charge to the original
purchaser for parts or labor. If ZVOX Audio elects to replace a system, the replacement system will be
equivalent to the condition of the ZVOX Audio system as received by ZVOX Audio for service.
This ZVOX Audio warranty applies to a ZVOX Audio system purchased in the USA and used by a
customer in the United States of America. ZVOX Audio cannot provide service to an owner of ZVOX
Audio system outside the United States of America.
This warranty does not extend to any defect, malfunction, physical damage or failure caused by
misuses, abuse, accident, faulty hookup, improper electrical source, defective associated equipment or use
of the system with equipment for which it is not intended.
The only acceptable method of establishing warranty status is a copy of the original proof of purchase
indicating customer’s name and purchase date. The warranty period starts from the date on the proof of
purchase of the ZVOX Audio product.
Obtaining service on a ZVOX Audio product: The owner of the ZVOX Audio product should first
contact the ZVOX Audio retailer that sold the ZVOX Audio system to inquire about warranty service. If
the dealer does not provide service for ZVOX products, please contact ZVOX Audio directly at
info@zvoxaudio.com
or (866) 367-9869 to obtain a Repair Authorization number and return instructions.
A Repair Authorization from ZVOX Audio does not include the cost of shipping the ZVOX Audio system
to ZVOX Audio.
The Repair Authorization number should be included inside the carton. The Repair Authorization
number should be marked on the return shipping label on the outside of the carton.
Shipping carton and cushions: This 1-year limited warranty does not cover the cost of a replacement
shipping carton and set of cushions. A replacement shipping carton and cushion set can be purchased from
ZVOX Audio if you elect to discard the original carton and cushions. The correct ZVOX Audio carton and
cushions must be used to ship your unit to ZVOX Audio.
ZVOX Audio advises you to keep your system’s shipping carton and all the corner and side cushions.
Shipment to ZVOX Audio: The ZVOX Audio system owner is responsible for shipping charges to
ZVOX Audio using the shipping method of their choice. ZVOX Audio is not responsible for physical
damage sustained by a product in shipment back to ZVOX Audio, or during shipment back to the ZVOX
Audio system owner, regardless of the nature of the Return Authorization. ZVOX Audio suggests using a
shipper that provides you a tracking number.
Once the repair has been performed, ZVOX Audio will then ship the unit back to the customer with
no charge for shipping.
For a ZVOX Audio system owner outside the United States of America: A ZVOX Audio system
owner outside the United States of America should contact the ZVOX retailer in their country where they
purchased the ZVOX system to inquire about warranty service. You may then be referred to the authorized
ZVOX Audio distributor in that country.
This is the sole and express warranty. This warranty is in lieu of all other warranties, expressed or
implied, of merchantability, fitness for purpose or otherwise. In no event shall ZVOX Audio LLC be liable
for incidental or consequential damages or have any liability with respect to defects other than the
obligations set forth as stated. Except as provided herein, ZVOX Audio LLC shall have no liability or
responsibility to the purchaser or any other person or entity with respect to any liability, loss or damage
caused directly or indirectly by use of the product, including, but not limited to, any incidental or
consequential damages.
  • Page 1 1
  • Page 2 2
  • Page 3 3
  • Page 4 4
  • Page 5 5

Zvox Audio SB700 Quick Setup

Type
Quick Setup
This manual is also suitable for

Ask a question and I''ll find the answer in the document

Finding information in a document is now easier with AI