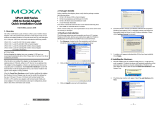
UPort 1100 Series User’s Manual Introduction
Overview
The UPort 1110, UPort 1130, and UPort 1150/1150I are part of Moxa’s UPort line of
USB-to-serial converters. The UPort line provides a range of easy-to-use solutions for adding
COM ports through a PC’s USB port. Simply install the drivers, connect the UPort to your
computer, plug in your serial devices, and you’re ready to go. Programming is not required, and
you do not need to worry about IRQs, configuring a board, power requirements, or connection
schemes.
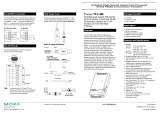
The UPort 1100 series provides single COM port expansion. The UPort 1110 adds one RS-232
port to your computer, which is the same type of COM port that is built into most PC
motherboards. The UPort 1130 adds one port that is configurable for RS-422, 2-wire RS-485, and
4-wire RS-485 modes. The UPort 1150/1150I adds one RS-232, RS-422, 2 wire RS-485, or 4 wire
RS-485 port to your computer. All of these models can operate at speeds of up to 12 Mbps, which
is much faster than the current maximum serial transfer rate. In addition, the UPort
1130/1150/1150I support ADDC™ (Automatic Data Direction Control) for RS-485 transmission.
The converter is bus-powered, so no external power supply is required.
ADDC™ (Automatic Data Direction Control) for RS-485
ADDC™ (Automatic Data Direction Control) makes it easier to manage 2-wire RS-485
half-duplex connections, eliminating the need for software interference. This means that it is not
necessary to write extra code for Windows applications to control the half-duplex protocol.
ADDC™ intelligence is built into all UPort products that support RS-485 transmission.
ARDC (Automatic Recovery Data Communication)
ARDC (Automatic Recovery Data Communication) makes it easier to recover data transmission,
even if the cable is accidentally unplugged. This means that you do not need to worry about
reconfiguring complex settings to ensure smooth data transmission. If the USB cable is
accidentally unplugged, simply plug it back into the same port and the converter will automatically
reconnect with the host and continue to transfer data. This feature not only eliminates the need for
reconfiguration, but also reduces the probability of data loss.
Package Checklist
The following items are included in your UPort package:
y UPort 1100 Series USB-to-serial converter
y UPort Documentation and Software CD
y UPort 1100 Series Quick Installation Guide
y 5-year Warranty Statement
The UPort 1130/1150/1150I also come with the following item:
y Mini DB9F-to-Terminal-Block Converter
NOTE: Please notify your sales representative if any of the above items are missing or damaged.
1-2