Page is loading ...

QUICK SETUP GUIDE
Thuraya IP

Thuraya IP
Quick Setup Guide
www.thuraya.com
Quick Setup Guide
Setting up
1. Obtaining a GPS fix
2. Connecting to the computer
3. Pointing to the satellite
4. Connecting to the network
Readiness
Prerequisites
1. Location readiness
2. Thuraya IP+ readiness
3. Computer readiness

Quick Setup Guide
Setting up
1. Obtaining a GPS fix
2. Connecting to the computer
3. Pointing to the satellite
4. Connecting to the network
Readiness
Prerequisites
1. Location readiness
2. Thuraya IP+ readiness
3. Computer readiness

Location Readiness
Location with a clear line of sight is critical
Be aware of the location of the satellites.
Obtain a clear line of sight with the satellite.
Avoid obstruction of any objects in front of the
Thuraya IP+ terminal or the external antenna (if
used).
Though the Thuraya IP+ is a battery operated device,
please have enough power supply & sockets or power
extension ready, just in case.
Service available
Service possible
This map represents Thuraya expectations of coverage. For further information, please contact Thuraya Customer Care at customer.care@thuray a.com or visit www.thuraya.com
/thurayatelecom
Follow us on
Thuraya Coverage Map
Thuraya IP+ Readiness
Appropriately provisioned and active SIM Card is vital
1 - Charge the Thuraya IP+ battery for 3 hours.
2 - Ensure the Thuraya IP+ has the latest firmware. Check
www.thuraya.com/product_upgrades/927 for the latest release.
3 - Power adapter and cable (included in package).
4 - Ethernet cable (included in package).
5 - Appropriately provisioned and active Thuraya IP+ SIM card to be inserted
into the SIM slot of the Thuraya IP+ terminal.
6 - Be aware of the details of the Thuraya IP+ terminal and the SIM Card (you
shall need these for any troubleshooting).
IMEI number of the Thuraya IP+ terminal
Firmware version
MSISDN and serial number of the SIM card

1 - Desktop PC/laptop with any standard internet browser and Java installed
2 - Ensure the proxy server settings in your browser are disabled
(If using Internet Explorer, select Tools > Internet Options > Connections > LAN
Settings and uncheck the box labeled ‘Use a proxy server for your LAN’).
3 - Disconnect any other active LAN connection on your PC
(Control Panel>Network and Dial-Up Connections>Local Area Network>Click on
Internet Protocol (TCP/IP)>Select ‘Obtain an IP address automatically’ and
‘Obtain DNS server address automatically’>OK).
Ensure that the browser is Java-enabled and the proxy settings
are disabled
Computer Readiness
Setting up – Step-by-Step Guide
Follow each step to obtain a fix on the satellite and connect to the network
Obtaining a GPS fix
Connecting to the computer
Pointing to the satellite
Connecting to the network

1 - Place the Thuraya IP+ terminal outside on a flat surface with a clear view of the sky (avoid
buildings, trees and other objects that may cause obstruction).
2 - Power on the Thuraya IP+ terminal by pressing the power button.
3 - Thuraya IP+ will automatically attempt to locate itself using GPS. This may take up to five
minutes. The small GPS satellite icons on the display (shaded area in the illustration)
illustrate how many GPS satellites are in view at any given time. You need all three satellite
icons to be solid to obtain a GPS fix.
If any of the GPS satellite icons are missing or flashing, then the GPS signal is being
blocked. When the GPS icon stops flashing, then the Thuraya IP+ terminal has successfully
updated the GPS position.
Step 1 - Obtaining a GPS Fix
Clear line of sight with no obstructions is essential to obtaining a GPS fix
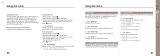
Step 2 - Connecting to the Computer
Connect Thuraya IP+ to a computer via Ethernet or WLAN
1 - Using Ethernet
Connect the Ethernet cable to your laptop’s network interface and
insert the other end of the cable into the Thuraya IP+ terminal as
illustrated.
2 - Using WLAN
Press and hold the WLAN button on the Thuraya IP+ terminal until the
WLAN icon is displayed.
Switch on Wi-Fi on your computer and refresh the “Available Wireless
Networks”. Once Thuraya IP+ is displayed, press “Connect” to Thuraya
IP+.

1 - Place the Thuraya IP+ terminal outside on a flat surface with a clear view of the sky (avoid
buildings, trees and other objects that may cause obstruction).
2 - Power on the Thuraya IP+ terminal by pressing the power button.
3 - Thuraya IP+ will automatically attempt to locate itself using GPS. This may take up to five
minutes. The small GPS satellite icons on the display (shaded area in the illustration)
illustrate how many GPS satellites are in view at any given time. You need all three satellite
icons to be solid to obtain a GPS fix.
If any of the GPS satellite icons are missing or flashing, then the GPS signal is being
blocked. When the GPS icon stops flashing, then the Thuraya IP+ terminal has successfully
updated the GPS position.
Step 1 - Obtaining a GPS Fix
Clear line of sight with no obstructions is essential to obtaining a GPS fix
Step 2 - Connecting to the Computer
Connect Thuraya IP+ to a computer via Ethernet or WLAN
1 - Using Ethernet
Connect the Ethernet cable to your laptop’s network interface and
insert the other end of the cable into the Thuraya IP+ terminal as
illustrated.
2 - Using WLAN
Press and hold the WLAN button on the Thuraya IP+ terminal until the
WLAN icon is displayed.
Switch on Wi-Fi on your computer and refresh the “Available Wireless
Networks”. Once Thuraya IP+ is displayed, press “Connect” to Thuraya
IP+.

1 - Open the internet browser on your
laptop/computer and enter
http://192.168.128.100.
(Compass direction)
The above is displayed in the browser (wMMI).
Step 3 - Pointing to the Satellite
Location with a clear line of sight is critical for a successful setup
Step 3 - Pointing to the Satellite
Location with a clear line of sight is critical for a successful demo
2 - You must have a valid GPS location for the compass direction and antenna angle
to be displayed. If the GPS is not valid, go back to step 1 and allow Thuraya IP+ to
obtain GPS fix.
3 - Observe the wMMI home page display and note the compass direction and
elevation for both the satellites in the “Satellite Location” section. The recommended
satellite for your location will be highlighted in green. With the Thuraya IP+ terminal
upside down, use the integrated compass to determine the
direction of the recommended satellite that will be highlighted in
green. You must be able to obtain a clear view of the satellite in
the sky for Thuraya IP+ to connect to the network. If the view to
the recommended satellite is obstructed from your location,
consider using the alternate satellite instead. If neither satellite
is accessible from your location, you will need to move to a
location that has visibility to at least one of the satellites.

Step 3 - Pointing to the Satellite
Location with a clear line of sight is critical for a successful setup
4 - Once you have determined the best satellite to use, shift the antenna stand to the
correct elevation angle using the integrated protractor. Refer to the
elevation angle as indicated on the wMMI home page. With the
elevation angle correctly set, place the Thuraya IP+ on a flat
surface with the antenna facing in the direction of the satellite as
determined in step 1. The protractor fine-tunes the pointing of the
antenna to the direction of the Thuraya IP+ satellite.
5 - You can optimize the receive signal strength by observing the signal strength dis-
play on the terminal while slowly turning it a few degrees clockwise and counter
clockwise. Find the direction that maximizes the signal strength. Likewise, slowly
raise and lower the antenna a few degrees and find
the elevation that maximizes the signal strength.
This step fine tunes the pointing of the antenna in the direction of the satellite.
Step 4 - Connecting to the Network
Once an optimal signal is obtained, automatic network connection follows
1 - Once the Thuraya IP+ terminal obtains sufficient signal strength from the satellite, it will
automatically connect and establish a Standard IP data session. Check this on the wMMI home
page by confirming that the “Network
Status” line shows “Connected”.
Congratulations! Your Thuraya IP+ is
successfully connected. You should
now be able to send and receive data
from your laptop to the internet using
Standard IP.

1 - If you are unable to successfully connect to the Internet, ensure that nothing but open sky
is between the Thuraya IP+ terminal and the satellite. If the view is blocked by trees,
mountains, buildings, metalized glass or similar objects, you must relocate the Thuraya IP+.
2 - Additional assistance can be found in the troubleshooting section towards the end of the
Thuraya IP+ user guide.
3 - For further assistance, please contact Thuraya Customer Care at +88216100100
information from the Properties’ page on the wMMI.
Troubleshooting
There are various steps to review in the event connection is unsuccessful
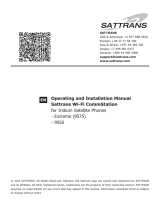
Streaming IP Connection
Thuraya IP+ by default will connect using Standard IP unless the
default configuration is changed to Streaming IP
1 - Connecting to Streaming IP:
On the wMMI, press the desired Symmetric
Streaming IP connection speed. The network
status changes to “Acquiring” and then to
“Connected”.
2 - To connect at Asymmetric Streaming IP
rates, go to “Change Data Rate” and select
the desired rates and then connect.
Streaming IP

/