
ASTM
TEMPERED
LOGO
Rev:
Part No:
Page:
E.C.O. No:
CUSTOMER SERVICE PHONE: 1-800-426-8562
2420-126 1 of 4 7029-9923
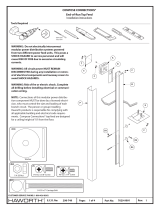
Tools Required
Multi Material Territory Screen
Installation Instructions
BELONG®
1
3/32"
Allen Wrench
Isopropyl
Alcohol
AScreen
BScreen
Tape Strip
D
Nut Plate
Assembly
ECover
FBase
G
Double Sided Tape
H
Retainer
CEnd Cap
IF REUSING RETAINER (H)
MAKE SURE THE MARKED
SIDE IS FACING AWAY
FROM THE GLASS.
CAN CAUSE FAILURE OF
GLASS SCREENS
CAUTION
Foam Tape
D1
1
ISOPROPYL
ALCOHOL
ISOPROPYL
ALCOHOL
A1
A1
3
4
1
2
G
NOTE: Wipe mounting surface area
with Isopropyl Alcohol to ensure
area cleaned and achieve full bond.
CAUTION: TAPE (G) IS VERY
AGGRESSIVE. DETERMINE
FINAL POSITION OF SCREEN
BEFORE ADHERING TO
WORKSURFACE. ALLOW 72
HOURS TO FULLY CURE.
FOR
FABRIC
FOR
SOLID
H
Scale 1 : 1
011/2
1/4 1/4

Rev:
Part No:
Page:
E.C.O. No:
CUSTOMER SERVICE PHONE: 1-800-426-8562
2420-126 2 of 4 7029-9923
ASTM
TEMPERED
LOGO
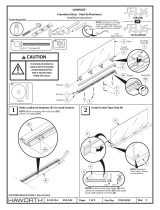
1Use tape (B1) to mark location
2Install Screen Tape Strip (B)
3
B
NOTE: Center screen tape strips (B)
with center of tape (B1) and apply ush
with bottom of screen (A).
NOTE: Locate tape (B1) centering with
each tab shown on base (F1).
A
B
B1
0.0” 0.01”
NOTE: Tempered
Glass Logo is always
on the bottom.
B1
F1
REMOVE TAPE (B1)
ONCE TAPE STRIPS (B)
ARE INSTALLED!
ASTM
TEMPERED
LOGO
Install Nut Plate Assembly (D) and Foam Tape (D1)
4
D
D
D1

Rev:
Part No:
Page:
E.C.O. No:
CUSTOMER SERVICE PHONE: 1-800-426-8562
2420-126 3 of 4 7029-9923
1
PLUMB SCREEN (A)
A
A
F
IF REUSING RETAINER (H)
MAKE SURE THE MARKED
SIDE IS FACING AWAY
FROM THE GLASS.
CAN CAUSE FAILURE OF
GLASS SCREENS
CAUTION
WARNING! WARNING!
TIGHTEN FIRMLY OR UNTIL
ALLEN WRENCH FLEXS.
(NOT TO EXCEED 15in lbs)
Install screen (A)
5
2 SNUG ALL SET SCREWS
F
NOTE: Make sure retainer (H)
is in between screen and set
screws of nut plate (D).
H
BD
(No Gaps) 0.0"
H

Rev:
Part No:
Page:
E.C.O. No:
CUSTOMER SERVICE PHONE: 1-800-426-8562
2420-126 4 of 4 7029-9923
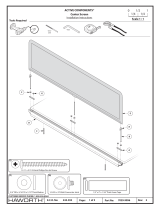
A
A
HINT: Make sure the screen (A)
is aligned, plumb, and centered
BEFORE installing covers (E).
6
7
E
F
C
2
1
E
C
-
 1
1
-
 2
2
-
 3
3
-
 4
4
Haworth 7029-9923 Installation guide
- Type
- Installation guide
- This manual is also suitable for
Ask a question and I''ll find the answer in the document
Finding information in a document is now easier with AI
Related papers
-
 Haworth 7029-9922c Operating instructions
-
 Haworth 6100-0189 Operating instructions
-
 Haworth 7029-9903a Operating instructions
-
 Haworth 7029-9996 Operating instructions
-
 Haworth 7029-9991 Operating instructions
-
 Haworth 7021-8213b Operating instructions
-
 Haworth 6100-0232 Operating instructions
-
 Haworth 7029-9929 Operating instructions
-
 Haworth 7029-9887 Operating instructions
-
 Haworth 7029-9930 Operating instructions
Other documents
-
 Atwood Mobile Products 94605 User manual
-
 Atwood Mobile Products GC10A-3E User manual
-
Intex ECO 15110 Owner's manual
-
Tektronix PHASER 360 User manual
-
White Rodgers 36C03 User manual
-
White Rodgers 36C53 User manual
-
State Industries SRT80 User manual
-
White Rodgers White-Rodgers 36C03U Installation guide
-
Dometic WH-6GA, WH-6GEA, WH-9GEA Operating instructions
-
Bacharach Fyrite® Classic User manual


