Page is loading ...

Version 1
RN
/ 2008
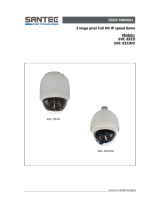
USER MANUAL
IP
-
Camera
Model
SNC
-
240 / SNC
-
360

Dear Customer!
We are thankful, that you have decided to use our SANTEC product.
Please read this manual carefully and follow the instruction before the first usage of the product.
Should you require any technical assistance, please contact your SANTEC reseller or call our hot
line.
Further Information is available on our web site: www.santec-video.com
Impressum:
The Copyright of this manual belongs to SANYO VIDEO Vertrieb AG. Any duplication even on a digital data medium requires an
approval in writing of SANYO VIDEO Vertrieb AG. Reprint – even in extracts – is forbidden.
Errors and technical alterations are omitted.
SANTEC is a registered trade mark of SANYO VIDEO Vertrieb AG Germany. Other names of firms or products are trade marks or
registered trade marks of particular owner. They are not in any coherence with SVV AG.
© copyright by SANYO VIDEO Vertrieb AG
SANTEC Service Hotline in Germany:
+49 / (0) 900 / 1 72 68 32
+49 / (0) 900 / 1 SANTEC
(0,89 €/Minute from the fixed network of German Telekom AG.)
support@santec-video.com

3
Table Of Contents
SAFETY PRECAUTIONS .......................................................................... 5
1. PRODUCT FEATURES ......................................................................... 6
1.1 PRODUCT INSTRUCTIONS .................................................................. 6
1.2 PRODUCT FEATURES ........................................................................ 7
1.3 TECHNICAL SPECIFICATIONS .............................................................. 8
2. DESCRIPTION OF THE FRONT/REAR VIEWS .................................. 10
2.1 FRONT PANEL AND REAR PANEL ...................................................... 10
2.2 RS-232 PORT & ALARM I/O .......................................................... 11
2.3 FLANK PANEL ................................................................................ 13
2.4 THE USB FUNCTION ....................................................................... 14
3. INSTALLATION .................................................................................. 16
3.1 CONNECTING WITH AN NVR ..................................................... 16
3.2 CONNECTING WITH A DVR ........................................................ 17
3.3 CONNECTING WITH A MULTIPLEXER ....................................... 17
3.4 UPDATING SYSTEM SOFTWARE ............................................... 17
3.5 NETWORK CAMERA SD CARD TROUBLESHOOTING ............................. 20
4. Network Configuration ...................................................................... 22
4.1 CABLE CONNECTIONS .................................................................... 22
4.1.1 Connect to a computer ..........................................................................................................22
Normal or crossover cable .............................................................................................................22
4.1.2 Connect to a LAN Hub (INTRANET).................................................................................23
4.2 CONFIGURE YOUR NETWORK CAMERA NETWORK SETTINGS ............... 24
4.2.1 Enable DHCP Function .........................................................................................................24
4.2.2 Set IP Address ........................................................................................................................24

4
4.3 TCP/IP COMMUNICATION SOFTWARE ............................................... 26
4.4 TCP/IP INSTALLATION .................................................................... 28
4.5 TCP/IP CONFIGURATION SETTING .................................................... 28
4.6 CONNECTION TESTING ................................................................... 30
5. Operating Instructions for Image Software and Network................. 33
5.1 MICROSOFT INTERNET EXPLORER ................................................... 34
5.1.1 Connecting the Network camera .........................................................................................34
5.1.2 Change Image Setting ..........................................................................................................36
5.1.3 Change the Network Setting ................................................................................................39
5.1.4 Change the System Setting ..................................................................................................49
5.1.5 Change the Application Setting ...........................................................................................58
5.1.6 Change the SD card Setting .................................................................................................66
5.1.7 Change the Pan/Tilt setting ..................................................................................................67
5.1.8 PPPoE & DDNS ...................................................................................................................68
5.2 SANVIEW SOFTWARE .................................................................. 69
7. SPECIFICATIONS ............................................................................... 70
APPENDIX 1. –The ARP function .......................................................... 72
APPENDIX 2. –Register as a DDNS member ........................................ 74
APPENDIX 3. –MPEG4 Bit Rate Lookup Table of IP cameras .............. 78

5
SAFETY PRECAUTIONS
All the following safety and operational instructions to prevent harm or injury to the operator(s) or
other persons should be read carefully before the unit is activated.
WARNING
To prevent fire or shock hazard, avoid exposing this unit to rain or moisture.
Do not block ventilation openings.
Do not place anything on top of the unit that might spill or fall into it.
Do not attempt to service this unit yourself, as opening or removing covers may
expose you to dangerous voltage or other hazards. Please refer all servicing to
your distributor / retailer.
Do not use liquid cleaners or aerosols for cleaning.
To prevent fire or electric shock, do not overload wall outlets or extension cord.
This unit must be grounded to reduce the risk of electric shocks.

6
1. PRODUCT FEATURES
1.1 Product Instructions
This user-friendly device combines cutting-edge sophistication with practical reliability and
convenience. It features the self-downloading automatic video codec and other components, and is
very easy to set up. The SNC-360 has especially high resolution as well as 480 TV lines, a built-in
web server and a Network interface to connect you with the Internet securely and fast.
You can access the network to get smooth images through the real-time and synchronized audio /
visual stream provided by the device, because it supports two compression modes, the MJPEG
and the MPEG4 -- you can change from one to the other as you wish. The MPEG4 file format is a
very small size file, so it can save more images over a longer time and can be set extremely fast.
The device also has a built-in website server providing many Internet functions and protocols,
including the MDIX protocol which recognizes both the normal and the crossover cables, either of
which can connect up with a Network camera.
We hope this device makes it easier for you to get your IP address information. This unit supports
the USB interface which helps you to very easily get an IP address to open the IE browser: just type
in your IP address to the browser and you can access your Network camera.
The device can hopefully provide the advanced motion detection function to improve your network
surveillance with both the powerful and enhanced multi-zone and multi-sensitivity modes of
detection. We believe this unit is the right answer to all your network surveillance problems. Try it
and you'll see.

7
1.2 Product Features
SNC-240:
The installation of a Codec or execution file is not necessary. The Network camera will
automatically send the Codec or any component to a PC if the latter requires it.
Supports two compression modes, the Motion - JPEG and the MPEG4. You can change
from one to another as you wish.
The MPEG4 is a very small size file, so it can save more images over a longer time and can
be sent extremely fast.
Real - time synchronization of the video and audio functions.
No latency. The unit will directly power on and run.
Built-in Web Server and network connection.
Position a camera any place you want – no PC is required for operation.
Supports the SD card as a local storage.
Supports the VGA play mode.
See live images in any network -connected PC.
Surveill your house or office via the Internet.
Supports the MDIX protocol that recognizes both the normal and the crossover cables,
either of which can connect up with a Network camera.
SNC-360:
1/3” Sony Super HAD CCD sensor.
480 TV lines.
Built-in web server.
Our comprehensive Plug & Play features-PnP video codec–installation of automatic video
codec or any component. PnP IP address–supports UPnP protocol. PnP configuration–USB
interface for setup. PnP recording–built-in SD card for recording.
Auto white balance (AWB) & auto tracing white balance for color temperatures from 2500°k
to 9500°k.
Advanced motion detection–multi-zone & multi-sensitivity.
Privacy- guarding image masking with free position and size.
CIF up to Full D1 resolution.
Low Lux: Employing a high sensitivity image sensor and low noise circuit design produces
the 0.5 lux.
Auto Iris Control (AIC), Auto Gain Control (AGC), Auto Back Light Compensation (ABLC),
and Flicker less (FL)
Fixed shutter speed: 1/1000 sec.
Supports the SD card as a local storage.
Dual codec---MPEG4/MJPEG for various applications.
Real-time and synchronized A/V stream.
No latency. Synchronized Analogy / Digital signal.
Position a camera any place you want–No PC is required for operation.
Supports pre-alarm & post-alarm functions.
Supports the MDIX protocol. Recognizes both the normal and the crossover cables, either of
which can connect up with a Network camera.

8
1.3 Technical Specifications
General:
‧Built-in Web Server and network interface. You don’t need a PC to operate.
Installation:
‧Fast and simple installation – connect to your network and assign an IP address within a
minute. The null modem cable enclosed helps you to set up without a network.
Camera:
‧Digital, 24-bit color.
Image sensor:
‧1/4 inch Sony progressive scan RGB CCD.
‧MPEG4 resolution (pixels): 640×480, 320x240
Exposure:
‧Automatic AGC.
‧White Balance: Indoor installation.
‧Exposure times: 1/30-1/27,000s.
Sensitivity:
‧Minimum Illumination: 1.5 Lux. F1.2
Image:
‧Image frame rate: up to 30 frames/second.
‧Supports two compression modes, the Motion - JPEG and the MPEG4.
‧5 levels of compression provided. The file size of a M-JPEG compressed image depends
on the image’s actual content. Images with a lot of detail will generate bigger files. The level
of compression determines the image quality. High compression requires smaller files while
low compression gives you finer image quality along with bigger files. The table below
contains the average file size in Kbytes, derived from real life tests.
General I/O:
‧Input/Output connector to trigger the camera vis-a-vis external events, for instance a door
sensor with a solenoid.
‧Event triggered remote image storage through e-mail and FTP.
System Requirements:
‧Compatible with operating systems such as Windows 2000 and Windows XP.
‧Internet Explorer 6.x.
‧Non-network modem installation needs Windows PC.
Supported Protocols:

9
‧TCP/IP, DHCP, HTTP, UDP, FTP, SMTP, SNTP, ICMP, DDNS, DNS, UPnP
Security:
‧Password protection available, unless exposure is preferred.
Connections:
‧RJ 45 twisted pair cable, 10/100 Mbit Ethernet network connection.
‧Modem connection: RS-232 modem connector for dial-up use. Supports most V90
modems.
‧Input/Output connector to trigger the camera vis-a-vis external events.
Operating Environment:
‧Operation temperature: 41-122° F (5-50° C).
‧Humidity: 20-80% RHG, non-condensing.
WARNING: Avoid aiming the camera at the sun or other extremely bright lights.
Irrespective of whether the camera is used or unused, the CCD image sensor may be
damaged if exposed to very bright objects. Dimensions and weight are as follows.
Dimensions / Weight:
‧Height: 55 (mm)
‧Width: 95 (mm)
‧Length: 62 (mm)
‧Weight: 306 g
(Not including power supply and mini-tripod.)
Accessories Included:
‧CD-R x 1
‧Power supply: 5V DC/2A.
‧Instruction manual.

10
2. DESCRIPTION OF THE FRONT/REAR VIEWS
2.1 Front Panel and Rear Panel
-- Front Panel -- -- Rear Panel --
1. MICROPHONE:
The Network camera has an additional audio function. The device has a microphone built
into
its front panel which records sound.
2. ALARM I/O & RS-232 Port:
The RS-232 communication port functions as a connector to an external control device. This
port includes ALARM OUT, GROUND, ALARM IN, and ALARM RECOVER
for connecting with
external devices.
WARNING: You can't use general RS-
232 cables to link up with the I/O connectors in the rear
panel of the device (please see the next page for further details).
3. VIDEO OUT Connector:
The connector provides the unit’s composite video signals to a monitor.
4. Plug Inlet:
A DC 5V inlet that connects to an external power supply.
5. ETHERNET 10/100 Connector:
This is a standard RJ-45 connector for 10/100 Mbps Ethernet networks.
1
I/O
DC5V
ETHERNET
VIDEO
4
2 3
5

11
2.2 RS-232 Port & ALARM I/O
1. RS-485 D-
2. RX: This pin is one of the RS-232 pins. It connects with the TX pin of another device.
3. TX: This pin is one of the RS-232 pins. It connects with the RX pin of another device.
Please refer to the note below on the standard RS-232 9 Pin Cable with Pin 2 and
Pin 3 exchanged; see the pin configuration chart below for details.
4. RS-485 D+
5. GND: Ground contact.
6. ALARM RESET (INPUT): This pin connects to an alarm-clear device for clearing an
alarm. ( )
7. ALARM IN (INPUT): This is an alarm input that can be programmed in the menu system
to active low. ( )
8. ALARM OUT (OUTPUT): This is an alarm output trigger. Connect this to external
devices such as buzzers or lights. ( )
9. AUDIO OUT: This provides the unit’s audio signal to a speaker.
The pin configuration chart:
1 2 3 4 5
9876
5V, 20mA
0V(Active)
5V, 20mA
0V(Active)
5V, 20mA
0V(Active)
Camera
RS232
PC
RS232

12

13
2.3 Flank Panel
-- Right Flank Panel -- -- Left Flank Panel --
1. Lens Mount: This Network camera is used with either a C or a CS mount lens.
2. ALC VR: Iris control VR.
When an auto iris (DC Drive) lens is used, this VR is used to adjust the iris for different
lighting environments. Adjust the VR clock-wise to open the iris and counter-clockwise
to close the iris of the camera.
3. RESET: Recover to factory default.
4. IRIS: Auto iris connector.
This camera works with a DC drive auto iris lens. Please refer to the pin assignment
marked on the camera when connecting the auto iris lens.
5. DIP Switch:
1. AES: Auto electric shutter.
2. DC IRIS: Use an auto iris (DC drive)
3. DHCP: Turn On / Turn Off to use the DHCP protocol. If the switch
points upwards, the device can change the setup of
network function (enable/disable) via the network.
4. STATIC IP: If the switch points down, the device can’t obtain
an IP
address from the DHCP server. This option is needed
to configure the network communication settings.
6. POWER Indicator: Indicates the power status of the unit. The green light indicates the
unit is activating. The red light indicates the power is on, the SD card cannot be
removed.
7. LAN Indicator: Indicates the LAN status of the unit. The green light indicates the 100
Mbps Ethernet network is activating. The red light signals the LAN is data linking.
8. RS-485 Port: The RS-485 communication ports function as connectors when two or
more units are serially connected to an external control device.
9. 5pin MINI B Port: The user can use a USB device cable to connect the Network camera
to the USB port on the PC.

14
10. SD CARD Slot: This is used for system software updating and archiving / accessing
critical images
2.4 The USB function
By connecting the Network camera with a PC via the USB connector, the Network camera can
provide two different functions.
1. Insert an SD card: As a card reader.
Insert an SD card into the Network camera, then connect to the PC. You might transfer files
between the SD card and the PC. Once you've connected your Network camera to your
computer, the Windows system will detect the connection and ask you what you want to do
with your SD card.
In other words, if the user connects the Network camera with an SD card and the PC via the
USB connector, the Network camera can be used as a normal card reader.
2. Remove an SD card: As a configuring tool.
Before using the USB configuration setting page, please remember to remove the SD card or
your PC will read the SD card and won’t show this window.
DHCP ON DHCP OFF
Network
Setting
PPPoE
Setting

15
WARNING: After changing the settings, please click the “Apply” button. All of the
options will be effective after removing the USB connector.

16
3. INSTALLATION
Please follow the instructions and the diagram below to set up the system.
NOTE: The Network camera is linked by its Video Out connection via a BNC connector to a
monitor's Video In connection. If this connection is there, you can see some information
on the monitor screen, such as the Network camera factory default Static IP
address(192.168.1.168). But the Network camera Static IP address can only appear if
there is a connection between the Network camera and another device. If there is no
such connection, the Network camera factory default Static IP address will not appear on
the monitor screen.
3.1 CONNECTING WITH AN NVR
Use a cable to connect directly to an NVR.
SD Card
RS-232
ALARM
DC12V
AUDIOVIDEO
OUT
OUT
I/O
RS-485
ETHERNET
10/100
LAN CAMERA
CONNECT TO ETHERNET
RJ45 CONNECTOR
CONNECT TO NVR
ETHERNET PORT

17
3.2 CONNECTING WITH A DVR
3.3 CONNECTING WITH A MULTIPLEXER
3.4 UPDATING SYSTEM SOFTWARE
If the system software of the Network camera needs to be upgraded, please take the following
steps to safely process it.
Important: Before carrying out the following procedures, please ensure the SD card is
working and the file of the system firmware is intact
1. Format an SD card using the FAT16 format if it is unformatted; there are no limitations to an SD
card’s capacity.
SD Card
RS-232
ALARM
DC12V
AUDIO
IN
IN
OUT
OUT
VIDEO
TO
MONITOR
TO
MUX'S VCR IN
FROM MUX
MAIN MONITOR
I/O
RS-485
ETHERNET
10/100
LAN CAMERA
CONNECT TO VIDEO OUT
BNC CONNECTOR
CONNECT TO DVR
VIDEO IN
LAN CAMERA 1
LAN CAMERA 2
LAN CAMERA 16
TO LAN CAMERA VIDEO OUT BNC CONNECTOR

18
2. Create a directory named LANCAM in the SD card if it does not exist.
3. Copy the file of UPDATE.BIN to the LANCAM-directory.
4. If the Network camera is running, please power it off first.
5. Insert the SD CARD into the Network camera.
6. Remove the Ethernet cable from the RJ-45 port and then power on the Network camera.
7. In 5 to 10 seconds, a message reading "UPDATE PROCESSING" will show up on the screen on
a blue background; if not, please check out steps 1 to 6 carefully or else inform your technical
support while ignoring the following steps.
8. DO NOT power off the Network camera while this update process is running until the message
"UPDATE OK RESET PLEASE" appears on the screen; it might take 15 to 30 seconds to
appear.
9. If the message "UPDATE NG RESET PLEASE" appears rather than "UPDATE OK RESET
PLEASE", please write down the error messages shown on the screen and inform your
technical support, while ignoring the following steps.
10. Power off the Network camera when this update process is finished, then remove the SD card
from the Network camera.
11. Reconnect the Ethernet cable to the RJ-45 port if necessary.
12. Power ON the Network camera and it will work normally if the entire update procedure goes
correctly.
13. Verify the version of the system software.
WARNING:
1. Don’t use FAT32 or NTFS or other file formats in step 1.
2. Steps 1 to 3 have to be done on a PC.
3. Make sure the file of UPDATE.BIN is a correct one in step 3, or the Network camera will
not work normally after being updated.
4. If the power of the Network camera is suddenly lost in step 8, please remove the SD card
first and turn on the Network camera next to test its operation. If the Network camera
remains working normally, please go back to step 4; otherwise, please inform your

19
technical support.
5. In step 10, if the SD card is not removed and the Network camera does not get online as
well, the updating process must be repeated again after rebooting the Network camera.
6. Make sure that the SD card is inserted in a correct position in step 5, or the Network
camera will suffer permanent physical damage.
7. If the message "CSUM ERROR" appears in step 8, it implies a problem in the file of
UPDATE.BIN.
8. Don’t interrupt the process while the unit is updating itself; proceed with an SD card
not including any system software of the unit, or else the unit will crash.

20
3.5 Network camera SD card Troubleshooting
1. Check if the SD card position is correct or not. Please refer to the manual for the related
information.
2. After powering the Network camera on, correctly insert the SD card, and a little icon of "SD" will
show up in the upper-right corner of the monitor screen. If not, it means the device detection has
failed. Please contact your technical support and ignore the following steps.
3. If no cross sign appears beside the "SD" icon, please go on to the next step. If a cross sign
appears, please check the following:
a. Is it really an SD "Memory" Card?
b. Is this SD card formatted in the FAT16 format?
c. Connect the SD card with a PC and test to see whether the PC can read the data or not.
d. Does this SD card still have the capacity for storing data?
e. Is the SD card set to write?
If all the answers are "yes" but the cross sign still persists, please contact your technical support
and ignore the following steps.
4. Please make sure the function of "SD CARD ENABLE" is activated in the ALARM and
SCHEDULE pages if no cross sign appears beside the "SD" icon on the screen.
5. After recording, read the data on the web page of "sdget.htm". If the data cannot be read through
the network, please read it instead in a PC, check the data stored in the "Network camera"
directory and contact your technical support regardless of whether there is data or not.
WARNING:
1. Performing this troubleshooting process may need a monitor, a PC, a card reader and
some cables.
2. If the SD card is removed while storing or accessing data, the data will be lost.
3. If there is a cross sign beside the "SD" icon, it means the SD card has been inserted into
the Network camera but cannot perform its writing function. Possible reasons are:
a. It is not an SD memory card.
b. The SD card is unformatted or formatted in a non-FAT16 or non-FAT12 format.
c. The file system is damaged.
d. The capacity of the SD card is full.
e. The SD card is set to be read only.
/