Page is loading ...

Version 1.0sfi/0115/engl/A5
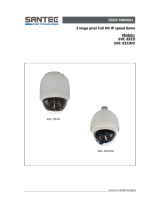
SANTEC IP Cameras
Models:
SNC-211RSIA
SNC-311FSNF
USER MANUAL
SNC-311FSNF
SNC-211RSIA

Dear customer,
Thank you for purchasing a high quality SANTEC device.
We recommend that you read this manual thoroughly before operating your new system for
the first time. Please follow all instructions and observe the warnings contained in this
manual.
Please contact your local dealer or SANTEC directly if you have any questions or if you wish
to claim for a service or warranty.
You will find further information on our website:
www.santec-video.com
Imprint:
All rights reserved. This publication may not be reproduced, stored in a retrieval system or
transmitted, in any form or by any means (electronic, mechanical, photocopying, recording or
otherwise), without the written prior permission of SANTEC BW AG.
No reproduction of any part or excerpts thereof are permitted.
Errors excepted. Specifications are subject to change without notice for quality improvement.
SANTEC is a registered trademark of SANTEC BW AG. All other companies or products
mentioned in this publication are trademarks, registered trademarks or brands of the
respective company.
© Copyright: SANTEC BW AG
An der Strusbek 31
22926 Ahrensburg
Germany
www.santec-video.com

User manual
SNC-211RSIA, SNC-311FSNF
_________________________________________________________________________________
- 3 -
Table of contents
Safety precautions 6
Safety instructions 6
About this user manual 8
Items included in the delivery 8
PART I: CAMERA DESCRIPTION, TECHNICAL SPECIFICATIONS, INSTALLATION
1. SNC-211RSIA 9
1.1 Special features 9
1.2 Technical drawing 9
1.3 Connections 10
1.4 Access 11
1.5 Technical specifications 12
2. SNC-311FSNF 13
2.1 Special features 13
2.2 Technical drawing 13
2.3 Connections and access 14
2.4 Technical specifications 15
3. Installation 16
4. Web access via ConfigTool 17

User manual
SNC-211RSIA, SNC-311FSNF
_________________________________________________________________________________
- 4 -
PART II: CAMERA CONFIGURATION AND CONTROL VIA THE WEB
1. Live view 18
2. PTZ 22
2.1 PTZ control 22
2.2. Calling-up the PTZ functions 23
3. Playback 25
3.1 Preparations 25
3.1.1 Manual recordings/snapshots 25
3.1.2 Alarm-based and schedule based recordings/snapshots 26
3.2 Playback of videos and snapshots 26
4. Setup 29
4.1 Setup Camera Conditions 29
4.1.1 Setup Camera Conditions Conditions 29
4.1.2 Setup Camera Conditions Profile management 37
4.2 Setup Camera Video 38
4.2.1 Setup Camera Video Video 38
4.2.2 Setup Camera Video Snapshot 39
4.2.3 Setup Camera Video Overlay 40
4.2.4 Setup Camera Video Path 44
4.3 Setup Camera Audio 45
4.4 Setup Network 46
4.4.1 Setup Network TCP/IP 46
4.4.2 Setup Network Connection 48
4.4.3 Setup Network PPPoE 49
4.4.4 Setup Network DDNS 49
4.4.5 Setup Network IP Filter 51
4.4.6 Setup Network SMTP (E-Mail) 52
4.4.7 Setup Network UPnP 53
4.4.8 Setup Network SNMP 54
4.4.9 Setup Network Bonjour 55
4.4.10 Setup Network Multicast 55
4.4.11 Setup Network 802.1x 56
4.4.12 Setup Network QoS 57
4.5 Setup PTZ 58
4.5.1 Setup PTZ Protocol 58
4.5.2 Setup PTZ Function 58
4.6 Setup Peripheral 63
4.7 Setup Event 64
4.7.1 Setup Event Video detect 64
4.7.2 Setup Event Abnormality 67

User manual
SNC-211RSIA, SNC-311FSNF
_________________________________________________________________________________
- 5 -
4.8 Setup Storage 68
4.8.1 Setup Storage Schedule 68
4.8.2 Setup Storage Destination 69
4.8.3 Setup Storage Record control 72
4.9 Setup System 73
4.9.1 Setup System General 73
4.9.2 Setup System Account 73
4.9.3 Setup System Default 74
4.9.4 Setup System Import/Export 74
4.9.5 Setup System Auto Maintain 74
4.9.6 Setup System Upgrade 74
4.10 Setup Information 75
4.10.1 Setup Information Version 75
4.10.2 Setup Information Log 76
4.10.3 Setup Information Online user 76
5. Alarm 77
6. Setup Assistance 78
7 Logout 79

User manual
SNC-211RSIA, SNC-311FSNF
_________________________________________________________________________________
- 6 -
Safety precautions
Caution
Description of symbols
Danger: This symbol is intended to alert the user to the presence of uninsulated
"dangerous voltage" within the product’s enclosure that may be of sufficient
magnitude to constitute a risk of electric shock to a person.
Warning: This symbol is intended to alert the user to the presence of important
operating and maintenance (servicing) instructions in the literature accompanying
the appliance.
CE compliance
This appliance complies with the CE guidelines.
If you require an EC Declaration of Conformity for this device, please send a request to:
CE@santec-video.com
Attention:
Any changes or modifications to this appliance which have not been explicitly approved of by
the respective regulatory authority, may lead to a prohibition of usage of this appliance.
Important: Legal note
Monitoring, recording and storage of video surveillance data (images, sound),
is subject to strict legal regulations. Please respect the Data Privacy Act which
applies to your country.

User manual
SNC-211RSIA, SNC-311FSNF
_________________________________________________________________________________
- 7 -
Safety instructions
Before operating the appliance, please read this manual carefully and retain it for further
reference.
Before cleaning the appliance, it has to be switched off and unplugged from the power
outlet. Wipe the appliance with a soft damp cloth.
Do not use harsh cleansers or aerosols for cleaning. The type label may not be replaced.
Do not use attachments unless recommended by the manufacturer as they may affect
the functionality of the appliance and result in the risk of fire, electric shock or injury.
Never install the appliance in areas exposed to water or other liquids.
The appliance has to be installed in a safe and stable location according to the
instructions of the manufacturer. Care should be used when moving heavy equipment.
Quick stops, excessive force, and uneven surfaces may cause the appliance to fall
causing serious injury to persons and damage to objects.
Openings in the appliance, if any, are provided for ventilation to ensure reliable operation
of the appliance and to protect if from overheating. These openings must not be covered
or blocked. Please make sure that the appliance does not overheat.
The appliance should only be operated from the type of power source indicated on the
marking label. If you are not sure of the type of power supplied at the installation location,
please contact your local dealer.
An appliance which is powered through a polarized plug (a plug with one blade wider
than the other) will fit into the power outlet only one way. This is a safety feature. If you
are unable to insert the plug into the outlet, try reversing the plug. Do not defeat the
safety purpose of the polarized plug.
If the appliance is powered through a grounding-type plug, the plug will only fit into a
grounding-type power outlet. This is a safety feature. If your outlet does not have the
grounding plug receptacle, contact your local electrician.
Route power cords and cables in a manner to protect them from damage by being
walked on or pinched by items places upon or against them.
For protection of the appliance during a lightning storm or when it is left unattended and
unused for a longer period, unplug the appliance from the wall outlet. Disconnect any
antennas or cable systems that may be connected to the appliance. This will prevent
damage to the appliance due to lightning or power-line surges.
Do not overload wall outlets and extension cords as this can result in a risk of fire or
electric shock.
Never insert items into the openings of the appliance. They may touch parts under
electric current which may cause an electric shock.
Never pour any liquids over the appliance.
In case of any operating interruption or a complete operating failure please switch off the
appliance and disconnect it from the wall outlet. Never attempt to service or repair the
appliance yourself, as opening or removing covers may expose you to dangerous voltage
or other hazards. Refer all servicing to qualified service personnel.
When replacement parts are required, be sure that the service technician uses
replacements parts specified by the manufacturer or that have the same characteristics
as the original part. Unauthorized substitutions may result in fire, electric shock or other
hazards.

User manual
SNC-211RSIA, SNC-311FSNF
_________________________________________________________________________________
- 8 -
Upon completion of any service or repairs to the appliance, ask the service technician to
perform safety checks to verify that the appliance is in proper operating condition.
The appliance should only be installed by qualified service personnel and has to comply
with local specifications and regulations.
Never point the camera at an object with a high degree of luminance. Bright vertical or
horizontal lines can result in a distortion (outshine) of the entire image on the monitor.
This artifact is not an error but a particularity of semiconductor CCDs when they are
directly exposed to a powerful light source.
If the camera is operated in locations with extremely differing light conditions, the
aperture has to be adapted.
Please respect the local legal regulations on waste if you need to dispose of discarded
appliances.
This symbol means that electrical appliances need to be disposed of properly
and not simply with unsorted household refuse. Please respect local
regulations on waste disposal.
Camera with IR-LEDs:
Please make sure to always keep a distance of > 1m to avoid damages to
your health. Never look directly into the IR-LEDs – this may cause eye
damages!
About this user manual
This manual aims at assisting the user on how to operate the described cameras.
This manual is subject to rigid quality control. However, no guarantee can be given that
mistakes are not present. We reserve the right to make changes to the manual without prior
notice.
Before operating the appliance, please read this manual carefully and retain it for further
reference.
Verify that all appliance items are included in the delivery. Should items be missing, do not
operate the appliance and contact your local dealer.
Never attempt to repair the appliance yourself. This should only be done by qualified service
personnel.
Improper handling of the appliance will invalidate the warranty.
Subject to technical changes without prior notice. Errors excepted
Items included in the delivery
1x IP camera
1x CD (ConfigTool)
1x Stancil sticker
1x Mounting set
1x Quick installation guide
Additionally for SNC-211RSIA:
1x Wall bracket (SNCA-WM-4642)
1x Adapter for additional accessories (SNCA-MK-4830)

User manual
SNC-211RSIA, SNC-311FSNF
_________________________________________________________________________________
- 9 -
Part I: Camera description, technical specifications, installation
1. SNC-211RSIA
1.1 Special features
IP speed dome camera for outdoor applications
Excellent image quality, even under poor light conditions
Easy to use thanks to intuitive user interface
3x streaming, dual streaming, multicast
Digital Wide Dynamic Range (DWDR)
OnePush lens setting
P2P capable
1/2.8“ Progressive Scan CMOS Sensor
25 fps at 2 MP
Motorzoom lens
Integrated IR LEDs with max. 100 m range
24 V AC, PoE voltage
IP-66 classified
24 privacy zones
Micro SD card slot
Audio input/output
Including wall bracket and accessory adapter
1.2 Technical drawing
All dimensions in mm. Drawings not true to scale.
Subject to technical changes. Errors excepted.

User manual
SNC-211RSIA, SNC-311FSNF
_________________________________________________________________________________
- 10 -
1.3 Connectors
The camera is equipped with the following connectors:
Note:
If the camera’s cable length is not long enough for your installation purpose, we recommend
to use junction box SNCA-JB-4640 (can be ordered via the SANTEC webshop).
Network
Power supply:
Red: 24 V AC
Black : 24 V AC
Yellow-green: Earth
Alarm connectors:
Red: Alarm Com
Brown: Alarm Out
White: Alarm In 1
Blue: Alarm In 2
Gray: Audio Out
Black: GND
Green: Audio GND
Purple: Audio In

User manual
SNC-211RSIA, SNC-311FSNF
_________________________________________________________________________________
- 11 -
1.4 Access
On the rear of camera SNC-211RSIA, there is a service lid. Screw it off to have access to the
reset button and the product label (serial number etc).
Press this button for a few seconds to reset the camera.
If you screw off the entire housing from the camera module, you will have access to the SD
card slot.
Here you can insert a micro SD card (not included in the deliver), e.g. to store snapshots.
(If you also use SANTEC network recorder SNVR-1412P or SNVR-1812P, you can use the
ANR (Automatic Network Reproduction) function.)
Reset button
Product label
Reset button
SD card slot
(max. 32 GB)

User manual
SNC-211RSIA, SNC-311FSNF
_________________________________________________________________________________
- 12 -
1.5 Technical specifications
Model
SNC-211RSIA
Camera type
2 MP IP IR speed dome
Installation
Outdoor applications
Video norm
PAL / NTSC
Image sensor
1/2.8” Progressive Scan CMOS
Resolution
2 MP (1920 x 1080)
Video codec (compression)
H.264 / MJPEG
Max. frame rate
2 MP: 25 fps (PAL)
Number of video streams
3 (individually configurable)
Lens
5.5 – 110 mm F1.6 – F3.5 motorzoom lens
Zoom
20x optical, 16x digital
Angle of view (horizontal)
2.6° - 51°
Sensitivity
0.05 (colour), 0.005 (bw)
IR cut filter
Mechanical
IR LEDs
Up to 100m range*
Digital Noise Reduction (DNR)
Ultra 3DNR
Digital Wide Dynamic Range (DWDR)
Multi-level, digital
Rotation radius, Tilt angle
360°, -15°-180° (Auto Flip)
Preset positions, rotation speed
300, 400°/s
Privacy zones
Yes, 24 zones
Switch contacts I/O
2/1
Audio input/output
1/1
Supported protocols
UPNP, BONJOUR, DHCP, FTP, HTTP,
HTTPS, SMTP, RTSP, SSL, ONVIF
Classification
IP-66
Vandal-proof
No
Voltage
24 V AC, PoE
Power consumption
23 watt
Operating temperature
-20° to +50° C
Dimensions (D x H)
186 x 309 mm
Weight
3500 g
Certification
CE
Internal storage(slot for micro SD card)
Yes (micro SD card not included)
Recommended network recorders
SANTEC SNVR-1412P (4-channel)
SANTEC SNVR-1812P (8-channel)
Recommended accessories
SNCA-CM-4670: Corner mount adapter
SNCA-PM-4660: Pole mount adapter
SNCA-JB-4640: Junction box
* Note:
The range of the built-in IR-LEDs depends on the location and the surroundings. Strongly
absorbent surfaces, e.g. dark, rough structures (floor, lawn or asphalt), may lead to a
considerable reduction of the maximum range.
Subject to technical changes without notice. Errors excepted.

User manual
SNC-211RSIA, SNC-311FSNF
_________________________________________________________________________________
- 13 -
2. SNC-311FSNF
2.1 Special features
IP mini PT dome for outdoor applications
Excellent image quality, even under poor light
conditions
Easy to use thanks to intuitive user interface
1x main and 2x sub stream, dual-streaming,
multicast
Digital Wide Dynamic Range (DWDR)
OnePush lens setting
P2P capable
1/3“ Progressive Scan CMOS Sensor
20 fps at 3 MP, 25 fps at 2 MP (PAL)
Fix lens
12 V DC, PoE voltage
IP-66, IK10 classified
24 privacy zones
Micro SD card slot
2.2 Technical drawing
Alle Angaben in mm. Zeichnung nicht maßstabsgerecht.
Subject to technical changes without notice. Errors excepted.
Ø 130

User manual
SNC-211RSIA, SNC-311FSNF
_________________________________________________________________________________
- 14 -
2.3 Connectors and access
The camera is equipped with the following connectors:
On the bottom of camera SNC-311FSNF, there is service lid. Screw it off to have access to
the micro SD card slot.
It is recommended to insert a micro SD card prior to the installation because it will not be
accessible anymore once the camera is installed (SD card not included in the delivery).
Power
Network

User manual
SNC-211RSIA, SNC-311FSNF
_________________________________________________________________________________
- 15 -
2.4 Technical specifications
Model
SNC-311FSNF
Camera type
3 MP IP mini PT dome
Installation
Outdoor applications
Video norm
PAL / NTSC
Image sensor
1/3” Progressive Scan CMOS
Resolution
3 MP (2048x1536)
Video codec (compression)
H.264 / MJPEG
Max. frame rate
3 MP: 20 fps
2 MP: 25 fps (PAL) / 30 fps (NTSC)
Number of video streams
3 (1x main, 2x sub)
Lens
3.6 mm, F1.2 Fix lens
Zoom
3x digital
Angle of view (horizontal)
72.5°
Sensitivity
0.01 (colour)
IR cut filter
Mechanical
IR LEDs
No
Digital Noise Reduction (DNR)
3DNR
Digital Wide Dynamic Range (DWDR)
Multi-level, digital
Rotation radius, tilt angle
180°, 0°-90°
Preset positions, rotaiton speed
25, 100°/s
Privacy zones
Yes, 24 zones
Switch contacts I/O
0/0
Audio input/output
0/0
Supported protocols
UPNP, BONJOUR, DHCP, FTP, HTTP,
HTTPS, SMTP, RTSP, SSL, ONVIF
Classification
IP-66
Vandal-proof
Yes, IK10
Voltage
12 V DC, PoE (802.3af)
Power consumption
3 watt
Operating temperature
-20° to +50° C
Dimensions (D x H)
130 x 57.5 mm
Weight
250 g
Certification
CE
Internal storage(slot for micro SD card)
Yes (micro SD card not included)
Recommended network recorders
SANTEC SNVR-1412P (4-channel)
SANTEC SNVR-1812P (8-channel)
Recommended accessories
SNCA-WM-4643: Wall bracket
Sanpower-MS01B: 1-channel PoE power
supply
VCA-12V-1.5ASA: Power adapter with plug
Subject to technical changes without notice. Errors excepted.

User manual
SNC-211RSIA, SNC-311FSNF
_________________________________________________________________________________
- 16 -
3. Installation
1. Firmware update:
On our website, we post the most up-to-date firmware version for this camera. Therefore
we recommend to always update the camera with the latest firmware version. You will find
the firmware here:
www.santec-video.com Products & Shop Camera part number
Downloads Firmware/Software
2. Insert SD card:
It is recommended to insert a micro SD card prior to the camera installation.
3. Installation:
Install the camera in the desired location.
Mount the camera on a solid surface which is capable of carrying the camera weight.
Please only use suitable screws to ensure a safe camera mounting.
Only for camera SNC-211RSISA:
If the camera’s cable length is not long enough for your installation purpose, we
recommend to use use junction box SNCA-JB-4640 (can be ordered via the SANTEC
webshop).
Connect the camera via a network cable directly to your computer or a switch/router.
Then connect the camera to power using a suitable power adapter.
When unmounting the camera, please proceed in the reverse order, i.e. disconnect the
camera first from power and then from the network.
Connection via a network recorder:
As mentioned above, you can access the camera directly via the web by connecting it to a
router or your computer.
It is also possible to connect the camera to a network recorder and then access it via the
web. In this case, however, you accessing the recorder interface and not the camera
interface. Depending on the type of connected recorder, you can make some camera
settings here, too. The scope of available camera settings may vary depending on the used
recorder.
Note:
Due to the various camera setting options available at different recorder models, the focus of
this user manual is to describe the web access to the camera directly and not via a recorder.
Please refer to the respective recorder user manual to learn more about its camera setting
options.

User manual
SNC-211RSIA, SNC-311FSNF
_________________________________________________________________________________
- 17 -
4. Web access via ConfigTool
Once you have connected the camera to your computer/router, please install the „BW IP
ConfigTool“ (configuration tool) on your computer which you will find on the supplied CD.
Notes:
When you use the ConfigTool for the first time, you will be prompted to install the
plugin. Please accept the plugin installation.
The latest version of the ConfigTools can be downloaded in the SANTEC webshop in
the product section of the respective camera model (www.santec-video.com).
Start the ConfigTool and click on „Refresh“.
All IP devices in this network will be found automatically and listed here with their IP address.
Click the Explorer symbol . Your standard web browser (e.g. Internet Explorer) will be
opened automatically.
Alternatively, you may also enter the camera’s IP address manually in the address field of
your web browser, e.g. http://10.1.1.52
The web login window is displayed:
Factory default login:
Username: admin
Password: 9999
You are now logged in and you will be able to see the live view of the camera.
Note:
It is highly recommended to change the default user name and password here
(see chapter 4.9.2):
Setup System Account

User manual
SNC-211RSIA, SNC-311FSNF
_________________________________________________________________________________
- 18 -
Part II: Camera configuration and control via the web
Once you have connected the camera and accessed it using the web browser (ConfigTool),
the live view of the camera along with the configuration menu and some setting options are
displayed.
1. Live-view
1. Language setting:
You can set the language to German or English. Click on the flag to switch languages
immediately.
Alternatively, you may also change the language here (see chapter 4.9.1):
Setup System General
2. Question mark (help):
If you click on the questions mark, a help window pops up giving you further explanations
about the current site. I.e. when you are on the live site, the help window gives
explanations about this site. If you are on the setup site, the help window gives
explanations about the setup, and so on.
3. Encoding / streaming settings:
Here you can set the Main Stream, Sub-Stream1 and Sub-Stream2. As protocol, you can
select TCP, UDP or Multicast.
5
1
2
4
3
6
6

User manual
SNC-211RSIA, SNC-311FSNF
_________________________________________________________________________________
- 19 -
4. Configuration mneu:
Live
PTZ (only available for camera model SNC-311FSNF)
Playback
Setup
Alarm
Setup Assistance
Logout
Each menu topic will be further explained in the following chapters.
5. Function fields:
Note:
Depending on the used camera model, the following function fields may vary and may not
be available for all camera models.
Symbol
Description
Only available for camera model SNC-211RSIA:
Click on the pencil symbil to draw a line in the video image to mark a certain
area.
If you click on the litte arrow next to the pencil, additional pencil colours
(green, blue, red) are available.
Digital zoom:
Click on this symbol. It turns blue when activated.
Click again to deactivate it (will turn white). Alternatively, you may right-click
with the mouse to deactivate the zoom.
Zoom options:
Click the zoom symbol. Move the mouse into the live image and use the
mouse wheel to zoom in and out.
Click the zoom symbol. Left-click and hold to draw an area in the live
image (red frame) which you wish to zoom. Use Drag & Drop to move
the selected area. Use the mouse wheel to further zoom in/out.
Snapshot:
Click this symbol to make a snapshot of the current image. This snapshot
will be stored at the path which you have defined here (see chapter 4.2.4):
Setup Camera Video Path
Triple snapshot:
Click this symbol to make 3 snapshots at 1 fps of the current image. These
snapshots will be stored at the path which you have defined here (see
chapter 4.2.4):
Setup Camera Video Path

User manual
SNC-211RSIA, SNC-311FSNF
_________________________________________________________________________________
- 20 -
Symbol
Description
Record:
Click on the record symbol. It will turn blue and the recording of the live
image starts. Click again to stop the recording (turns white).The recordings
will be stored at the path which you have defined here (see chapter 4.2.4):
Setup Camera Video Path
Audio:
Click this symbol to activate the sound (audio) during the live image (symbol
turns blue).
Click again to turn the audio off (symbol turns grey).
Setting options for audio can be made here (see chapter 4.3):
Setup Camera Audio
Audio (sound) is only available if:
A microphone (not included in the delivery) is connected to the audio
input of the camera
Audio function is enabled on your computer (sound card, speaker)
You have been granted audio permission by your administrator
Talk:
By clicking the talk function you can turn it on and off, e.g. if you need to
make annoucements.
Setting options for the microphone can be made here (see chapter 4.3):
Setup Camera Audio
Audio (sound) is only available if:
A speaker (not included in the delivery) is connected to the audio output
of the camera
Audio function is enabled on your computer (microphone)
You have been granted talk permission by your administrator
/