Page is loading ...

OPERATIONS GUIDE
A Guide for Operators

TABLE OF CONTENTS
—
WELCOME TO ENTRÉ .................................. 1
System Overview and Requirements ............................................... 1
Languages ................................................................................................. 2
LEARN ENTRÉ FUNDAMENTALS ...............3
Start Entré ................................................................................................. 3
User Interface ........................................................................................... 3
Menu Navigation .....................................................................................4
Search .........................................................................................................4
Configure Columns ................................................................................4
Upgrade Entré..........................................................................................4
NAVIGATE ENTRÉ ........................................5
Start Page Module .................................................................................. 5
Set Up Quick Launch............................................................................. 5
ADD AND MANAGE A PANEL .....................7
Add a Panel ............................................................................................... 7
Panel Status .............................................................................................13
Swap a Panel ...........................................................................................13
Delete a Panel (Four Options) .......................................................... 13
ADD AND MANAGE AN OUTPUT ............ 22
Add an Output ....................................................................................... 22
Output Status ......................................................................................... 22
Delete an Output ..................................................................................22
ADD AND MANAGE A KEYPAD ............... 23
Add a Keypad.........................................................................................23
Keypad Status ........................................................................................23
Delete a Keypad ....................................................................................23
ADD AND MANAGE AN AREA ................. 24
Add an Area ............................................................................................24
Area Status .............................................................................................. 24
Assign an Area to a User Code Profile .........................................24
Delete an Area .......................................................................................24
ADD AND MANAGE A ZONE ................... 25
Add a Zone ..............................................................................................25
Add an Arming Zone ........................................................................... 25
Zone Status ............................................................................................. 25
Edit a Zone ..............................................................................................25
Delete a Zone .........................................................................................25
ADD AND MANAGE A 24-HOUR ZONE .. 26
Add a 24-Hour Zone ............................................................................26
Edit a 24-Hour Zone ............................................................................26
Delete a 24-Hour Zone .......................................................................26
ADD AN IMAGE CAPTURE DEVICE ........ 27
CONFIGURE SOFTWARE.......................... 28
Configure Time Change .....................................................................28
Add and Manage a Calendar ............................................................28
Add and Manage Schedules .............................................................29
Customize the User Interface ......................................................... 30
Configure Password Policies ........................................................... 30
CONFIGURE AUTOMATION ...................... 31
Set Up Automated Tasks ....................................................................31
Automatically Generate Card Numbers ....................................... 32
CONFIGURE MAPS .................................... 33
Add a Map ...............................................................................................33
Images in Map Editor ..........................................................................33
Configure a Map ................................................................................... 34
Navigate the Map................................................................................. 34
Device Status..........................................................................................35
Monitor Facilities Using Maps ..........................................................35
CONFIGURE EVENTS AND ALARMS ...... 36
Event Types .............................................................................................36
Alarm States ...........................................................................................36
Configure Alarm Instructions ........................................................... 37
Set Up Event and Alarm Priorities .................................................37
Create a Report .....................................................................................38
Enable Video Report ...........................................................................38
IMPORT PERSONNEL USING CSV
IMPORT ....................................................... 39
Enable CSV Personnel Import Wizard .........................................40
Configure the CSV File ......................................................................40
CONFIGURE PERSONNEL AND USERS ..44
Configure Departments..................................................................... 44
Configure Organizations ................................................................... 44
Add Organizations to Personnel ................................................... 44
Enroll Personnel ................................................................................... 45
Customize Personnel Records ........................................................ 46
Edit Personnel Records ..................................................................... 46
Import Personnel and Badges .........................................................47
Assign Badges .......................................................................................47
Set Up Chroma Key ............................................................................ 48
Set a User Code Profile ..................................................................... 48
Add Privileges to User Code Profiles ........................................... 48
Create Restricted Profiles................................................................. 49
Create a Profile for Events and Alarms .........................................51
Create an Operator Login and Profile ..........................................53
Sync User Removal with Profile Removal ...................................53

CONFIGURE BADGES ............................... 54
Design a Badge .................................................................................... 54
Create a Badge Template ..................................................................55
Use a Badge Template ........................................................................55
Add a Badge ...........................................................................................55
Assign a Badge to a Personnel .......................................................56
Edit Badge Information ......................................................................56
Add Eective or Expiration Times for Badges .........................56
Badge Status ..........................................................................................57
Edit Badge Group .................................................................................57
Configure Badges to Allow Null Pin ..............................................57
Customize Text Links ...........................................................................57
Delete a Badge or Credential ..........................................................58
Delete Personnel with a Badge .......................................................58
Verify that Badge Changes Were Sent ........................................58
Set Up Automatic Badge Disabler ................................................60
Assign a Temporary Badge ................................................................ 61
Return a Temporary Badge................................................................61
Set Up Badge Printing ........................................................................62
Assign Key Fobs to Badges ..............................................................63
CONFIGURE MORE ADVANCED
OPTIONS .....................................................64
Using Filters ........................................................................................... 64
Program Templates ............................................................................. 66
Set Up Locations...................................................................................67
Bind Profiles to Locations ................................................................ 68
Manage Partitions ................................................................................ 68
Add a Custom Alert Sound .............................................................. 70
Add a Credential .................................................................................. 70
Create Credential Watch Levels .......................................................71
Add and Configure the Historical Events Driver ......................72
Maintain the Historical Events Driver ............................................74
Prune the Database .............................................................................75
Program Card Formats ....................................................................... 76
Set Up a Cell-Only Panel .................................................................... 77
Set Up a Panel with a Remote Key ................................................78
Configure Single Sign-On .................................................................. 79
Edit Network Encryption Passphrase ...........................................79
Audit Trails and Reports ................................................................... 80
Set Up Secure Lightweight Directory Access Protocol ..........81
TROUBLESHOOT ENTRÉ .......................... 82
Client Not Connecting ........................................................................82
Using the Log Files ..............................................................................82
ENTRÉ NOC FEATURES ............................ 83
Manual User Number Assignment .................................................83
Panel Auto-Start ...................................................................................83
Pre-Loading Modules ..........................................................................83
ENTRÉ GLOSSARY .................................... 84

WELCOME TO ENTRÉ
—
This guide provides operators with a top-notch, intuitive interface where they can:
• Configure hardware and access rights
• Enroll and manage personnel
• Monitor alarms, device status, and system activity
• Search data and generate reports
• Manage security at a granular level
Additionally, Entré is flexible at the hardware level. It offers support for a variety of access control readers and other
devices. It also allows for multiple methods of communication to controllers, including network. At the software level,
Entré is designed to be flexible and extensible with a modular open architecture.
For more information about the capabilities of Entré, contact your DMP dealer or representative.
System Overview and Requirements
The host PC runs the application and the database. The database contains the hardware configuration, personnel, badge
holder, privilege information, and historical information (events).
The server communicates with XR150/XR550 Series panels and downloads information about configuration, badge
holders, and user privileges. This allows panels to completely control all points in the system and make intrusion and
access control decisions even if communication with the server is down. The server stores these transactions in the Entré
database that are displayed in real-time and are available for reporting.
XR150/XR550 Series panels communicate with the following Entré devices:
• DMP Driver
• Panel
• 24-Hour Zone
• Area
• Zone
Minimum Software Requirements
Hardware requirements depend on the type and size of your Entré configuration. For complete server architecture
recommendations, refer to Entré Server Recommendations (LT-1639).
• Server OS: Windows Server 2012 R2
• Client OS: Windows 10
• Microsoft SQL: All Microsoft Supported SQL Server Operating Systems
• Apache Tomcat 8.5
Java Requirements
Entré Access and Security Management has Java built-in and does not require users to download Java.
Panel Compatibility
Entré supports all panel versions but not all panel features. See LT-2233 Entré Compatibility Chart.
1

Languages
Entré Access and Security Management offers translations for two languages. When multiple languages are enabled, you
can choose a language during the login process. A dual-language mode is also available, where all text is shown using
both English and the language chosen at login. This mode is useful for technical support and training across linguistic
boundaries.
Ocially Supported Languages
• English
• Spanish
• Dutch
• French
2

LEARN ENTRÉ FUNDAMENTALS
—
Start Entré
When you start Entré, you will see a splash page displaying start-up progress.
When prompted, log in with a valid username and password.
• The system administrator username is: admin
• The factory default password is: pass
You should change the factory default password after installing Entré. Username and password are case-sensitive.
Valid Login
• Yes: Entré displays the start page or the modules that were open during the operator’s previous session.
• No: An error displays. Repeat the steps above, making sure that the username and password are correct and in
the correct case. If problems continue, contact your system administrator. If the system administrator cannot
resolve the issue, contact the Entré distributor or system installer.
User Interface
The typical user interface consists of the following components.
• Window Title Bar: Shows the module and application name.
• Toolbar: Contains a set of button functions that are specific to the module being used.
• Status Bar: Appears at the bottom of each module window and is divided into four panes.
êPane 1: If there are any uncleared alarms, this pane displays a colored or blinking icon showing the alarm
status.
êPane 2: If there are any uncleared alarms, this pane displays text describing the number of alarms, as well as
their state.
êPane 3: Shows the number of items in the table.
êPane 4: Displays the username of the logged-in operator, as well as the IP address or hostname of the
workstation.
• Table Columns: Column visibility and order may be edited using the Columns button. Column width may be
adjusted by dragging the edge of the column header. Selecting a column header will cause the column to be
sorted either alphabetically or numerically. Selecting the column header a second time reverses the order.
• Table: Shows a list of items. Selecting an item within the table enables the use of certain buttons. Right-clicking
an item will bring up a menu of actions performable upon that item. Each module has a different table.
• Menu Bar: From here, you can open new modules, close modules and/or the application, and retrieve Entré
application help. The menu bar is the same for all modules.
3

Menu Navigation
Each Entré module has the same menu bar at the top of the window. The following options are in the menu bar.
• File: Manage application activities, such as closing windows, exiting the application, logging in or out, and
password management.
• Edit: Configure peripheral tools specific to the workstation, such as capture devices, printers, and information
scanners.
• Navigation: Access navigation features and capabilities.
• Monitoring: Manage alarms, events, and device status.
• Management: Administrate personnel within the Entré system.
• Configuration: Administrate system logistics.
• Advanced: Lists modules intended for advanced operators. Advanced modules allow the system to be
customized.
• Window: Configure the display of windows and menus. For changes to take effect, restart Entré.
• Help: Application help and information.
Search
Use the Search option to search the rows currently displayed. Select the drop-down arrow and select Edit Search Fields
to customize sorting.
Configure Columns
You can configure column visibility and order in most table-based modules.
1. In the toolbar, select Columns.
2. Next to each column name, toggle the column visibility as needed.
3. To change the column order, select a column and select Up or Down.
4. Select OK.
5. To adjust column width, drag the edge of the column header.
6. To sort table data by a specific column, select a column header. Data will be sorted in descending order, either
alphabetically or numerically. To reverse the order, select the column header again. A directional arrow shows the
currently sorted column as well as its direction.
Upgrade Entré
Software updates are available from DMP dealers and representatives. All events and configurations are preserved
throughout the upgrade. To see if you qualify for an update, contact your dealer or representative. For more information
on the upgrade process, visit DMP.com/products/entré-software.
4

NAVIGATE ENTRÉ
—
Start Page Module
The Start Page module provides easy access to all modules from its main window. It is the default module that opens
when starting the application. Modules may be opened using the buttons on the left. Categories such as Management
and Configuration contain additional modules that are visible when the categories are expanded. Multiple modules can
be opened and viewed simultaneously. The available modules will vary depending on the software license purchased, as
well as operator privileges.
Set Up Quick Launch
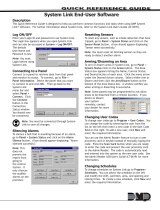
The Quick Launch module provides easy access to common modules and device commands. Go to Navigation > Quick
Launch to open the module. To use the Quick Launch module, you must create a panel in the Quick Launch Editor. For
this example, you will create a panel and add device command and report widgets.
Create a Panel
1. Go to Configuration > Quick Launch Editor > New Panel.
2. Name the panel and define the number of columns and rows to be displayed. Assign a location if applicable. Use
the following for this tutorial:
êName: Test
êNumber of columns: 1
êNumber of rows: 2
3. Press OK.
Add Device Command Widget
1. In the first cell, select Add.
2. Select Device Command, then press OK.
3. Enable Multiple (by filter) of type, then select Device.
4. In Device, select Filter, then select Choose.
5. Choose the doors that will respond to this command and press OK.
6. To close Filter - Device, press OK.
7. In Command, select Choose.
8. Select Lock. Press OK. Some commands require the Parameters to be filled in. If this field is required, select
Choose, then select a parameter.
9. To close the Add - Device Command Widget, press OK.
5

Add Report Widget
1. In the second cell, select Add.
2. Select Report, then press OK.
3. In Report, select Choose.
4. Select a report to add to the panel.
5. Press OK.
6. To close Add - Report Widget, press OK.
7. In the toolbar, press Save.
Edit Widgets
• To edit a widget’s location, select Edit below the cell. Select Location to redefine the cell’s row and column
location.
• To change the panel’s name or modify the panel’s number of columns and/or rows, select Properties in the
toolbar.
Utilize the panel by navigating to the Quick Launch module, located in the Navigation drop-down menu. The panel
should appear as configured in the previous steps.
To modify the panel, return to the Quick Launch Editor module.
6

ADD AND MANAGE A PANEL
—
Add a Panel
To add a panel, you can use the Hardware Tree or the Hardware List. Follow one of the options below, depending on
what you want to use:
• Option A: Using the Entré Hardware Tree
• Option B: Using the Entré Hardware List
• Option C: Using the Entré NOC Hardware List
For information about connecting a cell-only panel to Entré, see “Set Up a Cell-Only Panel”.
For information about setting up a panel with a Remote Key, see “Set Up a Panel with a Remote Key”.
Option A: Using the Entré Hardware Tree
1. Open the Configuration menu, hover over Hardware, and select Hardware - Tree.
2. Right-click the DMP Driver and select New Panel Wizard.
7

3. Enter the panel’s information in the DMP Panel Wizard window.
êName: Format the panel name to include the panel number in the name. For example, Panel 1234.
êHost: Enter the IP address.
êPort: Leave the default as 2011. This should only be changed if the default is changed in the panel under
Remote Options.
êAccount Number: Enter your panel’s account number.
êSerial Number: If adding a persistent connected panel, enter the serial number. Otherwise, leave blank.
êEntré Passphrase: If an Entré passphrase was entered into the panel under Remote Options and in the DMP
Driver in Entré, enter the Entré Passphrase. Otherwise, leave blank.
4. Select Next. Entré will attempt to connect to the panel.
êIf connection was successful, continue through the prompts and select Finish to complete the import
process.
êIf an Unable to discover controller message appears, there is an issue connecting. In Remote Link, confirm
the connection in Remote Options, the panel account number, and the IP address.
8

Option B: Using the Entré Hardware List
Follow these steps to add a new panel to the hardware list.
1. Open the Configuration menu, hover over Hardware, and select Hardware - List.
2. Select the drop-down beside Search and select Quick Search All.
3. Enter DMP Driver into the search box and select Search.
4. Right-click DMP Driver and select New Panel Wizard.
9

5. Enter the panel’s connection information:
êName: Format the panel name to include the panel number in the name. For example, Panel 1234.
êHost: Enter the IP address.
êPort: Leave the default as 2011. This should only be changed if the default is changed in the panel under
Remote Options.
êAccount Number: Enter your panel’s account number.
êSerial Number: If adding a persistent connected panel, enter the serial number. Otherwise, leave blank.
êEntré Passphrase: If an Entré passphrase was entered into the panel under Remote Options and in the DMP
Driver in Entré, enter the Entré Passphrase. Otherwise, leave blank.
6. Select Next.
7. Continue to select Next through the prompts. Then select Finish.
10

Option C: Using the Entré NOC Hardware List
Follow these steps to add a new panel to the hardware list in Entré NOC.
1. Open the Configuration menu, hover over Hardware, and select Hardware - List.
2. Search for DMP Driver. Be sure to turn o all options except for Name.
3. Right-click DMP Driver and select New Panel Wizard.
11

4. Enter your panel’s connection information.
êName: Format the panel name to include the panel number in the name. For example, Panel 1234.
êHost: Enter the IP address.
êPort: Leave the default as 2011. This should only be changed if the default is changed in the panel under
Remote Options.
êAccount Number: Enter your panel’s account number.
êSerial Number: If adding a persistent connected panel, enter the serial number. Otherwise, leave blank.
êEntré Passphrase: If an Entré passphrase was entered into the panel under Remote Options and in the DMP
Driver in Entré, enter the Entré Passphrase. Otherwise, leave blank.
5. Select Next.
6. Continue to select Next through the prompts. Then select Finish.
12

Panel Status
Panels have seven different device status values.
• Disabled: Driver remains in the software but no real-time events are displayed. The driver can be added back into
the software without re-programming it. Only operators can disable a driver.
• Failed: Driver has encountered an unrecoverable error and has failed.
• Started: Driver has started and is running.
• Starting: Driver is in the process of starting.
• Stopped: Driver has stopped.
• Stopping: Driver is in the process of stopping.
• Unknown: State of the driver is not known to the system because the parent device is in a state such as unknown,
stopped, or failed.
Swap a Panel
The process below shows you how to swap panels within Entré by deleting an old panel and then adding a new panel.
1. Delete the old panel, following the steps in “Delete a Panel (Four Options)”.
2. Add the new panel, following the steps in “Add a Panel”.
Delete a Panel (Four Options)
In this section, choose one of the following to fit your specific needs to delete a panel:
• Option 1: Using the Entré Hardware Tree with Version 8.8.1 and Higher
• Option 2: Using the Entré Hardware Tree with Version 8.8.0 and Lower
• Option 3: Using the Entré Hardware List with Version 8.8.1 and Higher
• Option 4: Using the Entré NOC Hardware List with Version 8.8.1 and Higher
Option 1: Hardware Tree (8.8.1 and Higher)
For Entré versions 8.8.1 and higher, to delete a panel using the Hardware Tree:
1. Right-click the panel to display a drop-down menu.
2. Hover over Panel Control.
3. Select Stop.
4. Right-click the panel in the Hardware Tree and select Delete. This deletes all associated hardware and
disassociates any attached profiles, automation rules, etc.
13

Option 2: Hardware Tree (8.8.0 and Lower)
For Entré versions 8.8.0 and lower, to delete a panel in the Hardware Tree, disable all of the programming associated
with the panel in Entré.
Enable Deletion
1. Open the Configuration menu, select System Configuration.
2. Select Miscellaneous.
3. Enable Allow deletion of terms that normally may only be disabled.
4. Enable Allow deletion of devices with events.
Stop the Panel
1. Right-click the panel to display a drop-down menu.
2. Hover over Panel Control.
3. Select Stop.
a
b
c
a
b
c
d
14

Disassociate Programming
1. Right-click the panel and select Edit.
2. Check that System Reports, Display Keypads, and Status List are cleared.
3. Select Clear to fully verify.
Acknowledge and Clear Alarms
1. Go to Configuration > Hardware Tree > Monitoring > Alarms.
2. Select Ack All.
3. Select Clear All.
15

Delete Components and the Panel
1. In an area, right-click the following components in and select Delete. Components must be deleted in this order:
Zones, Outputs, and Devices.
2. Right-click the area and select Delete.
3. Repeat these steps for each area and its components.
4. After each of the panel’s areas are depleted, you may delete the panel from Entré. Right-click the panel and select
Delete.
c
d
16

Option 3: Hardware List (8.8.1 and Higher)
For Entré versions 8.8.1 and higher, to delete a panel using the Hardware List:
1. Turn on deletion.
êGo to Configuration > System Configuration.
êUnder Miscellaneous, turn on Allow deletion of items that normally may only be disabled.
êIf this was not previously turned on, close out of the client and reopen so that this change will take effect.
2. Go to Configuration > Hardware > Hardware List.
a
b
b
17
/