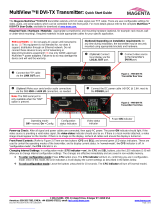
Page is loading ...

MultiView™ II DVI-TX Installation and User Guide ii
© 1998-2011 by Magenta Research, Ltd. All rights reserved.
Magenta Research, Ltd.
128 Litchfield Road
New Milford, CT 06776 USA
This document and the Magenta Research Ltd. products to which it relates, and the copyright in each, is the property of Magenta Research Ltd. Neither
the document nor the products may be reproduced by any means, in whole or in part, without the prior written permission of Magenta Research. Magenta
Research makes no warranty or representation, either express or implied, with respect to this software or documentation, including their quality,
performance, merchantability, or fitness for a particular purpose. As a result, this software or documentation is licensed "as is" and you, the licensee, are
assuming the entire risk as to their quality and performance.
In no event will Magenta Research be liable for direct, indirect, special, incidental, or consequential damages arising out of the use of or inability to use
the hardware, software or documentation.
Magenta Research and the Magenta Research logo are trademarks of Magenta Research, Ltd.
All other brands, product names, and trademarks are the property of their respective owners.
Magenta Research reserves the right to change product functionality and/or specifications at any time without prior notification.

Precautions
MultiView™ II DVI-TX Installation and User Guide iii
Precautions
Safety Instructions ● English
This symbol calls attention to important information.
This symbol is intended to alert the user of important maintenance (servicing) and operating information.
This symbol is intended to alert the user to the presence of un-insulated dangerous voltages or other
conditions in or around the product enclosure which may present a risk of electric shock, damage to
equipment or facilities.
Caution:
Read instructions: Read and understand all operating, installation and safety instructions before using this
equipment.
Avoid Attachments: Do not use accessories, attachments, tools or materials that are not recommended by the
equipment manufacturer. Doing so may compromise operating performance, create an unsafe condition,
damage equipment, or violate the terms of usage or warranty.
Follow Warnings: Always follow all instructions and warnings marked on the equipment or as detailed in the
related user documentations.

Contact Information
MultiView™ II DVI-TX Installation and User Guide iv
Contact Information
For sales or technical support, contact your nearest Magenta Research sales office.
REGION CONTACT DETAILS
North, Central and South
Americas:
Magenta Research, LTD
Corporate Headquarters
128 Litchfield Road
New Milford, CT 06776 USA
Main: 800-805-0944 (USA only) or +1 860-210-0546
Fax: 1-860-210-1758
Web: www.magenta-research.com
Sales: [email protected]
Support: [email protected]
Sales/Support phone hours: 8:30-17:30 (EST: GMT-0500)
Asia:
Magenta Research Asia Limited
Unit 1 21/F Cheung Tat Centre
Chai Wan, Hong Kong
Main: 852.3105.1493
Fax: 852.3105.1491
Contact: [email protected]
Sales: [email protected]
Pan European Office:
Magenta Research, LTD
Main: +44 7708-850582
Contact: [email protected]
Sales: [email protected]
For all RMA return shipments, use
this address unless you are
advised otherwise:
Magenta Research, LTD
RMA Department
128 Litchfield Road
New Milford, CT 06776 USA
Prior to returning any products, please contact Magenta’s support line
to obtain an RMA number. This RMA number is essential for tracking
your returns and for ensuring they are processed in a timely manner.
Support Phone: 800-805-0944 (USA only) or +1 860-210-0546
Support e-mail: [email protected]
Support phone hours: 8:30-17:30 (EST: GMT-0500)

Table of Contents
MultiView™ II DVI-TX Installation and User Guide v
Table of Contents
Page
Chapter 1About this Manual ...................................................................................................................... 1
Chapter 2Product Overview ....................................................................................................................... 2
2.1Front Panel interfaces ..................................................................................................... 2
2.2Rear Panel interfaces ..................................................................................................... 2
Chapter 3Specifications ............................................................................................................................. 3
3.1General Specifications .................................................................................................... 3
3.2DVI Interface ................................................................................................................... 4
3.3DDC/EDID Support ......................................................................................................... 5
3.4Auxiliary Signal Support .................................................................................................. 6
3.4.1Auxiliary Signal support: (A) and (S) versions ................................................ 6
3.4.2Auxiliary Signal support: (232) version ........................................................... 7
3.4.3Auxiliary Signal support: (SA) version ............................................................ 7
3.4.4Auxiliary Signal support: (SAP) version .......................................................... 8
3.5CAT5 Cable Compatibility ............................................................................................... 8
Chapter 4Installation .................................................................................................................................. 9
4.1Prerequisites ................................................................................................................... 9
4.2Installation Procedure ................................................................................................... 10
4.3Configuration ................................................................................................................. 12
4.3.1User-Configurable Settings........................................................................... 12
4.3.2DDC/EDID Settings ...................................................................................... 13
4.4Sync Settings ................................................................................................................ 14
4.54th Pair Settings ............................................................................................................. 15
Chapter 5Troubleshooting ....................................................................................................................... 16
Appendix AConnector Pinouts ................................................................................................................... 18
Appendix BOption Module Settings: DVI-TX-232 ....................................................................................... 23
Appendix COption Module Settings: DVI-TX-SAP ..................................................................................... 25
Appendix DMounting Kits ........................................................................................................................... 28
Appendix ESystem Design Drawings ......................................................................................................... 29
Appendix FRegulatory Compliance Information ......................................................................................... 30
INDEX 31

About this Manual
MultiView™ II DVI-TX Installation and User Guide 1
Chapter 1 About this Manual
This manual contains information about the Magenta MultiView™ II DVI-TX transmitter (hereafter referred to
simply as “DVI-TX”). This includes:
Product overview (Chapter 2).
Product specifications (Chapter 3).
Installation and configuration instructions (Chapter 4)
Troubleshooting (Chapter 5).
Additional information (Appendices).
The Magenta MultiView™ II family of products introduces greater compatibility for handling HD video standards,
as well as making nearly all user-configurable options “jumperless” via a digital front-panel user-interface.
The DVI-TX is available in five factory-configured versions:
MVII-DVI-TX-A:
o Supports L+R summed audio (user-configuration setting).
MVII-DVI-TX-S:
o Supports simplex serial (user-configuration setting).
MVII-DVI-TX-232:
o Supports 9-wire RS-232 serial (simplex or duplex TX/RX with hardware handshaking).
o Contains the (232) option module.
MVII-DVI-TX-SA:
o Supports 3-wire RS-232 serial (simplex or duplex), and true stereo audio.
o Contains the (SA) option module.
MVII-DVI-TX-SAP:
o Supports 3-wire RS-232 serial (simplex or duplex), and true stereo audio.
o The serial feature is POLLABLE, so that multiple receivers on a daisy-chained link can be
addressed individually for display control or status-query.
o Contains the (SAP) option module.
This equipment is not intended for, nor does it support, distribution through an Ethernet
network. Do not connect these devices to any sort of networking or telecommunications
equipment!
Use only Magenta Research LTD approved MultiView™ II power adapters. Failure to do so may
damage this device and will void the warranty.

Product Overview
MultiView™ II DVI-TX Installation and User Guide 2
Chapter 2 Product Overview
The DVI-TX is a video transmitter compatible with the entire Magenta MultiView™ family of products. This is the
first device capable of effectively bridging the digital-to-analog gap. Previously, MultiView™ video extension
and distribution systems were only compatible with analog video standards. The DVI-TX allows high-resolution
DVI digital video to be fed into an otherwise purely analog system, not only for new systems, but also enabling
digital-video upgrades to existing MultiView™ extension and switching systems.
2.1 Front Panel interfaces
The front panel of the DVI-TX has the following ports, controls, and indicators:
There are two buttons (COPY/CFG and DDC MODE/SEL) and several green LED status indicators. All are used
to display and control the operating modes of the transmitter, with the LEDs having multiple functions.
In “normal mode”, the CFG indicator is off. In “configuration mode”, the CFG indicator is on.
2.2 Rear Panel interfaces
The rear panel of the DVI-TX has the following ports:
DB9 serial port
(optional)
Auxiliary signals
Power-on
indicator
Video-status
& DDC-copy
indicator
CFG mode
indicator
COPY/CFG
button
DDC
MODE/SEL
button
DC input
power port
Video input
(from source)
Local video output
to display (optional)
UTP (link)
output port

Specifications
MultiView™ II DVI-TX Installation and User Guide 3
Chapter 3 Specifications
3.1 General Specifications
Item Description
Cable Required Category 5, 5e, 6 cable. Shielded or unshielded twisted pair. Low-skew.
Compliance CE, FCC Class A, IC Class / Class A, UL listed I.T.E Device, RoHS.
Video Support DVI-D, and HDMI by using a connector adapter for unprotected content only (non-HDCP).
Resolution &
Refresh Rate
See DDC/EDID chart located in section 3.3.
Interface Signal
Details
V
ideo-input:
Standard DVI-D interface specifications apply. DDC/EDID is supported.
Standard auxiliary Signals (including -A and –S versions):
L+R summed audio input: 47K ohms input impedance. A source device with 600 ohms
maximum output impedance is recommended.(analog audio input mode).
Simplex RS-232 input: 4.75K ohms input impedance (RS-232 mode).
SPDIF input: 75 ohms input impedance (S/PDIF input mode).
Duplex (232) option module:
Audio: Not supported.
Duplex input: 4.75K ohms input impedance.
Duplex (SA) or (SAP) option modules:
Stereo L/R audio input: 10K ohms input impedance. A source device with 600 ohms
maximum output impedance is recommended.
RS-232 input: 4.75K ohms input impedance.
Local-output port
drive impedance
Standard DVI interface specifications apply (at local video-output port).
DDC/EDID is supported.
Audio
Characteristics
Standard (A) version: Left+Right summed audio.
(232) version: This option module does not support audio.
(SA) & (SAP) versions: Left/Right true stereo audio.
Serial
Characteristics
Standard (S) version: Simplex-serial, any speed up to 115.2K baud. Transparent to format
and protocol.
Duplex (232) version: Any speed up to 115,200 baud (depending on application).
Transparent to format and protocol. Refer to Appendix-B for more information.
Duplex (SA) version: Speed fixed at 9600 baud. Transparent to format and protocol.
Duplex (SAP) version: Speed is adjustable in 9 steps from 1200 to 115K BAUD; format is
fixed to 8 data no parity; transparent to protocol.
Connectors Standard connectors:
(2) DVI-female: Video in/out.
(1) RJ-45: MultiView CAT5 link output.
(1) 4 position phoenix: Auxiliary signal input.
(1) Coaxial (5.5mm OD, 2.5mm ID, 11mm L) jack: DC power input.
For (232), (SA) or (SAP) versions:
(1) DB9-F: Serial I/O.
Temperature
Tolerance
Operating: 32 to 104°F (0 to 40°C)
Storage: -4 to +140°F (-20 to +60°C)
Humidity Tolerance Up to 80% noncondensing
Enclosure Steel, black powder-coat finish.
Power Input voltage: +5 VDC @ 1.2 Amps max.
Consumption: 6 watts maximum
Size 1.2"H x 4.2"W x 4.3"D (3.1 x 10.4 x 10.9 cm)
Weight 1.0 lb. (0.45 kg)
MTBF 100,000 hours

Specifications
MultiView™ II DVI-TX Installation and User Guide 4
3.2 DVI Interface
The DVI interfaces (video-in and local video-out) have the following characteristics:
Item Description
Video Support Video input formats (video input port):
Maximum resolution supported = 1080p or 1920x1200.
Maximum color-depth = 24 bits per pixel (8 bits per color).
Maximum refresh rate = 60Hz @ 1920x1200.
Preferred image aspect ratio: 16:9.
Video output formats (local output port):
The local port is essentially a direct copy of the video input port.
Video Connectors (1) DVI-I input connector, (1) DVI-I output connector.
* Note: The analog VGA signals on the DVI-I connector are not supported.
Audio
Characteristics
Embedded digital audio is not supported.
* For summed L+R analog-audio input, please select the 4th-pair configuration
setting accordingly.
* For stereo analog-audio input, please use an SA or SAP option module.
EDID/DDC This module supports the EDID/DDC connections on the DVI-I connectors.
HDMI It is usually possible to connect to HDMI devices (via a plug-adapter or cable-adapter)
if the source device is providing un-protected content only (non-HDCP). Embedded
HDMI audio is not supported.
HDCP Not supported, even if a “HDMI-to-DVI” plug-adapter or cable-adapter is used.
CEC Not supported, even if a “HDMI-to-DVI” plug-adapter or cable-adapter is used.

Specifications
MultiView™ II DVI-TX Installation and User Guide 5
3.3 DDC/EDID Support
For best compatibility with source devices (ex: a PC), an extension device (DVI-TX in this case) should provide
an appropriate DDC/EDID profile with the proper resolution and timing information. This helps ensure best
compatibility with display devices connected at the remote end.
The DVI-TX supports a simple yet very flexible DDC/EDID management scheme:
The built-in factory-default DDC/EDID profile supports a number of standard resolutions and timing
information that is widely compatible with many displays.
A specific DDC/EDID profile can be copied from a particular display and stored inside the DVI-TX’s non-
volatile memory. This method enables the best possible compatibility with a specific display that would
otherwise not work properly if simply using the factory-default DDC/EDID profile.
Finally, the DVI-TX supports a “pass-through” mode, where the DDC/EDID profile of a locally attached
display is passed directly to the video source. This can be very helpful in diagnosing certain resolution or
timing related display issues, but generally is not used on a permanent basis (though it is safe to do so).
DDC/EDID Parameter: Presented to the source when using the DVI-TX transmitter:
Manufacturer name string MRI
Monitor name string Magic Display
Established timings
640x480@60Hz 800x600@60Hz 1024x768@60Hz
1280x1024@60Hz 1360x768@60Hz 1600x1200@60Hz
1680x1050@60Hz 1920x1080@60Hz 1920x1200@60Hz
Detailed timings 1920x1080@60Hz
CEA video formats
720x480p@(59.94,60Hz)@4:3 720x576p@50Hz@4:3
1280x720p@50Hz@16:9 1280x720p@(59.94,60Hz)@16:9
1920x1080p@50Hz@16:9 1920x1080p@(59.94,60Hz)@16:9

Specifications
MultiView™ II DVI-TX Installation and User Guide 6
3.4 Auxiliary Signal Support
The DVI-TX is available in five factory-configured models, which allow different types of signals to be passed
over the 4th-pair on the CAT5 cable. These are configured differently by a front-panel setting, or may include an
internal hardware option-module.
MVII-DVI-TX-A:
o Supports L+R summed audio (user-configuration setting).
MVII-DVI-TX-S:
o Supports 2-wire RS-232 serial in simplex mode (user-configuration setting).
MVII-DVI-TX-232:
o Supports 9-wire RS-232 serial (simplex, or duplex with hardware handshaking).
o Contains the (232) option module.
MVII-DVI-TX-SA:
o Supports 3-wire RS-232 serial (simplex or duplex), and true stereo audio.
o Contains the (SA) option module.
MVII-DVI-TX-SAP:
o Supports 3-wire RS-232 serial (simplex or duplex), and true stereo audio.
o The serial feature is POLLABLE, so that multiple receivers on a daisy-chained link can be
addressed individually for display control or status-query.
o Contains the (SAP) option module.
Note: A user-configuration setting allows either the (A) or (S) versions to support digital S/PDIF audio.
The option module (232/SA/SAP) is a factory-installed option. However, a field upgrade to a (232), (SA) or (SAP)
version is possible. It will require some minor technical skill to install the module. Please contact Magenta
Research for information and assistance for these upgrades.
Note that for each DVI-TX version above, the accompanying receiver device (MV500, AK600, AK1200, XR2000,
etc.) must be similarly configured.
For more specific information on MultiView™ receivers, please refer to the user-guide provided with your desired
receiver.
3.4.1 Auxiliary Signal support: (A) and (S) versions
The DVI-TX models without any option module installed are capable of one of these auxiliary functions at a time,
selected by a user-configuration setting:
(A) Version: Analog L+R summed audio.
(S) Version: Simplex RS-232 support.
o Provides simplex (TX-only) serial data, even with daisy-chained receivers.
o Data is transmitted to all attached receivers. No data can ever be received.
o Receivers are not individually addressable.
o RS-232 interface supports a 2-wire interface: TX/GND.
o Baud rates up to 115.2K is supported. No settings required.
o Transparent to format and protocol.
User-configurable option: S/PDIF digital audio.

Specifications
MultiView™ II DVI-TX Installation and User Guide 7
3.4.2 Auxiliary Signal support: (232) version
The DVI-TX-232 comes equipped with an internal hardware (232) option module, enabling full-duplex RS-232
serial. This includes hardware handshaking signal support. Note that the (232) module itself does have some
user-configurable settings which must be selected by internal jumpers (not through the front-panel buttons). It is
important to set these internal jumpers correctly for your specific application. See Appendix-B.
Simplex or Duplex RS-232 support.
o Provides simplex serial data to single or daisy-chained multiple receivers.
o Provides duplex serial data for point-to-point links (1 transmitter 1 receiver).
o Data is transmitted and received using “broadcast” mode.
o Receivers are not individually addressable.
o RS-232 interface supports a 9-wire interface: TXD/RXD/RTS/CTS/DTR/DSR/DCD/RI/GND.
Handshaking modes depend on (232) module configuration. See Appendix-B.
o Baud rates up to 115,200 are supported.
Available baud rates depend on (232) module configuration. See Appendix-B.
Audio: No audio is supported when the (232) module is installed. The AUX-I/O connector on the DVI-TX
is ignored.
In applications where a DVI-TX-232 transmitter is routed through a DA (Distribution Amp, such as a MultiView 9D
for example), or a Mondo (or other) video switch, the (232) module will provide simplex serial (TX-only) and
transmit-direction handshaking signals (RTS/DTR). In this configuration, all receive-direction signals
(RX/CTS/DSR/DCD/RI) are ignored.
3.4.3 Auxiliary Signal support: (SA) version
The DVI-TX-SA comes equipped with an internal hardware (SA) option module, enabling full-duplex RS-232
serial (no hardware handshaking signals) and stereo audio. Note that the (SA) module itself does not have any
user-configurable settings.
Simplex or Duplex RS-232 support.
o Provides simplex or duplex serial data, even with daisy-chained receivers.
For duplex support with daisy-chained receivers: It is required that the display
devices have their own “addressing” capability.
o Data is transmitted and received using “broadcast” mode.
o Receivers are not individually addressable.
o RS-232 interface supports a 3-wire interface: TXD/RXD/GND.
o Baud rate is fixed at 9600.
Audio: L/R true stereo audio is supported simultaneously with serial data.
Note that in cases where a DVI-TX-SA transmitter is routed through a DA (Distribution Amp, such as a MultiView
9D for example), or a Mondo (or other) video switch, the (SA) module will provide simplex serial (TX-only) and
audio. In this mode, receive-direction serial data (RX) is ignored.

Specifications
MultiView™ II DVI-TX Installation and User Guide 8
3.4.4 Auxiliary Signal support: (SAP) version
The DVI-TX-SAP comes equipped with an internal hardware (SAP) option module, enabling full-duplex RS-232
serial (no hardware handshaking signals) and stereo audio. Note that the (SAP) module itself does have some
user-configurable settings that can be changed by on-board DIP-switches (not through the front-panel buttons).
Simplex or Duplex RS-232 support.
o Provides simplex or duplex serial data, even with daisy-chained receivers.
o Data is transmitted and received using “broadcast” mode by default.
o If desired, receivers are individually addressable.
o RS-232 interface supports a 3-wire interface: TX/RX/GND.
o Baud rate is adjustable in 9 steps from 1200 to 115K BAUD.
The factory-default speed is 9600 BAUD.
o Note: The SAP transmitter and receivers modules must have their SAP-address configured
correctly.
The factory-default setting for all (SAP) modules is address-0. This is the “broadcast”
address.
Note: All SAP-address configuration changes (via DIP switches, see Appendix C)
should be done before making any cable connections and applying power.
Audio: L/R true stereo audio is supported simultaneously with serial data.
o Audio gain/mute settings are under serial control.
The (SAP) module provides many additional user-configurable settings, available through the serial port.
Please refer to the SAP-II Programmer’s Guide for additional details.
Note that in cases where a DVI-TX-SAP transmitter is routed through a DA (Distribution Amp, such as a
MultiView 9D for example), or a Mondo (or other) video switch, the (SAP) module will provide simplex serial (TX-
only, though the addressable-receiver feature still works), and audio. In this mode, receive-direction serial data
(RX) is ignored.
3.5 CAT5 Cable Compatibility
The MultiView™ family of products enable the highest quality video extension over common Category 5 (CAT5)
cable. In some applications, system design or environmental factors can require the use of CAT5e and CAT6
cabling (with and without optional shielding). Each installation may have special requirements, and it is up to the
system designer to determine the most appropriate type of cable to deploy with MultiView™ products. In any
case, if there is any doubt with regards to a specific type of cable it is strongly advised that actual testing be
performed using an appropriate length of the desired cable – BEFORE that cable is specified and installed.
The DVI-TX transmitter supports a daisy-chain CAT5 connection to multiple receivers. This allows one video
source to be sent to many displays at the same time – with the absolute minimum amount of signal degradation
possible.
Magenta Research products are compatible with standard CAT5/5e/6 data cabling as well as specialized “low
skew” cabling manufactured primarily for video applications. Note that some “low skew” cabling is specific to a
particular equipment vendor or application and may not compatible with MultiView products. Please ensure any
“low-skew” CAT5 cable is non-proprietary prior to purchase/installation.
Standard CAT6 cable, due to the manufacture method, can exhibit much greater skew than standard CAT5/5e
and may require skew compensation beyond what the standard product offers. Please contact Magenta
Research for assistance.
The CAT5/5e/6 cable should be suitably rated Listed cable (DUZX) communication cables, TYPE CMP, CMR,
CMG or CM as designated in the NEC. Cables are to be installed in accordance with the NEC and local building
and electrical codes. This is the responsibility of the end user/installer of this product.

Installation
MultiView™ II DVI-TX Installation and User Guide 9
Chapter 4 Installation
CAT5/5e/6 cabling for the Magenta MultiView™ II Series must be pinned to the TIA-EIA T568B wiring
specification.
Figure 1 T568B CAT5 Specification
We also highly recommend that all CAT5 cables be pre-terminated and tested. Cables terminated on-site or in
an existing infrastructure should be tested before use to ensure compliance with the TIA-EIA T568B
specification. Using incorrectly terminated CAT5 cables can damage the Magenta MultiView™ II Series.
This equipment is not intended for, nor does it support, distribution through an Ethernet network. Do
not connect these devices to any sort of networking or telecommunications equipment!
Do not connect DC power until instructed to do so.
4.1 Prerequisites
Depending on the specific installation requirements, some common tools (screwdrivers, nut-drivers) and related
hardware (mounting screws) may be required. These are not provided with Magenta products.
The following items may be necessary, which are available from Magenta Research:
Appropriate audio cabling.
DVI video cable and/or HDMI/DVI connector adapter, as needed.
Serial cable with DB9 connectors.
Of course, you will need appropriate CAT5 cable, as previously described, to connect the DVI-TX to MultiView
receivers and other MultiView devices.

Installation
MultiView™ II DVI-TX Installation and User Guide 10
4.2 Installation Procedure
All units must be the same type for all supported features to function correctly. For example, a “DVI-
TX-232” transmitter must be connected to a MultiView “-232” type receiver for the serial interface to
function properly. You cannot mix one version of a DVI-TX with a different version of a MultiView
receiver. Video modes may function normally, but 4th pair options will not.
Ensure all connectors are clean and free of contaminants prior to making the connections.
Appropriate connector locking hardware (screws/latches) should be used to prevent cables from
disconnecting or causing intermittent operation.
At the DVI-TX transmitter end:
1. Connect the source video to the Magenta MultiView™ II Series transmitter video input
port, which is a standard DVI connector labeled DVI IN.
2. If desired, attach a local monitor to the DVI connector labeled LOCAL OUT.
3. Connect the CAT5 cable to the transmitter LINK OUT port.
4. Make your audio or serial connections via the phoenix AUX I/O connector or DB9
“IOIO” serial connector, as appropriate for your DVI-TX transmitter model.
5. Apply power on the transmitter.
a. The power-on LED should turn on. All other LEDs should execute a power-up
test sequence.
b. If the video source is providing a valid video signal, the Video status indicator
should turn on.
c. If there’s a local monitor attached, a video image should appear on the
monitor’s screen.
6. Remember to make any required configuration changes via the LED/button user-interface.
Connect the CAT5 cable to
the LINK OUTOUT port.
(Optional) Connect
local display to the
LOCAL OUT port.
Connect a video
source to the
DVI IN port.
Note: The DB9 serial
port is only available
when the “232”, “SA”
or “SAP” option is
present.
(Optional) Make your serial and/or audio
connections via the DB9 IOIO or AUX I/O
connectors, as needed.
Connect the DC power cable (+5VDC @ 3A. max)
to the POWER port.
Power-on indicator
DVI-TX Transmitter
Rear View
DVI-TX Transmitter
Front View
Video status and DDC-copy indicator

Installation
MultiView™ II DVI-TX Installation and User Guide 11
At the receiver end (these steps are generic - refer to the appropriate receiver manual):
1. Connect the VIDEO OUTPUT connector to the display, and attach any audio (AUX I/O)
and/or serial connections (IOIO) depending on the model of MultiView™ receiver and
option module installed.
2. Connect the CAT5 cable to the LINK IN connector. If you are daisy-chaining multiple
receivers, also connect the downstream CAT5 cable to the LINK OUT port on the
receiver.
3. Apply power to the receiver.
a. The power-on LED should turn on.
b. The status-LED should turn on (Green).
4. Make any required configuration changes via the LED/button user-interface, if the
receiver is equipped with this capability.
5. Adjust the receiver’s EQ and/or SKEW (optional) settings. If this adjustment is not
made, it can result in a poor or no image on the display.

Installation
MultiView™ II DVI-TX Installation and User Guide 12
4.3 Configuration
4.3.1 User-Configurable Settings
The DVI-TX has a number of configurable operating parameters, and the factory-default settings will work in
most applications. However, some applications may require configuration changes. Nearly all settings are
available from the front-panel buttons/LEDs. The enclosure does not need to be opened unless an option
module is being installed or removed, or settings specific to the option module need to be changed.
The DDC MODE selection is done in NORMAL operating mode (CFG indicator is off).
Just press the DDC MODE button to change the DDC operating mode.
For all other configuration settings, the DVI-TX must be in CONFIG mode (CFG indicator is on). Once in
CONFIG mode, any changes are effective immediately and are saved in non-volatile memory.
To enter configuration-mode: Press CFG button once. The CFG indicator will turn on, confirming
you are in configuration-mode. Once in this mode, the LED indicators 1-8 will display the current
settings as described in the tables below.
To exit configuration-mode: Leave the buttons untouched for 10 seconds. The CFG indicator will
turn off (normal-mode).
To quickly reset all user-configurable options back to factory-default settings:
Disconnect the DC power cable (or AC power).
Press and hold the CFG button.
Connect the DC power cable (or AC power). All LEDs blink 3 times, indicating all settings are now changed
back to factory-defaults.
Release the CFG button.

Installation
MultiView™ II DVI-TX Installation and User Guide 13
4.3.2 DDC/EDID Settings
These settings are accessed in NORMAL operating mode (CFG indicator is off).
The MultiView™ II DVI-TX features the ability to send DDC/EDID display identifiers to the video source in order
to determine display capabilities. The DDC/EDID interface is a data communication channel used between plug
and play devices to accurately report a display's capabilities and identify the manufacturer. If this data is not
available, the video source may revert to a low resolution or not display at all.
The DVI-TX unit has three DDC/EDID modes of operation. When the DVI-TX is operating in “normal mode” (CFG
indicator is off), it is possible to quickly select between the three operating modes simply by using the DDC
MODE button at any time.
STD: Selects the Magenta Magic DDC/EDID profile
This is the factory default mode which uses generic DDC/EDID information stored within the
transmitter. It is also referred to as the Magenta Magic profile, and it is comprised of a set of
common video resolutions which are intended to support the most popular VESA standards in
standard or widescreen formats.
To activate STD mode, press the DDC MODE button until the STD indicator is on.
LOCAL: Selects the DDC/EDID profile from a locally-connected display
The DDC/EDID information is transferred from a display connected to the local port of the
transmitter back to the video source. This is only effective if a display is connected to the “local out”
port - and it must remain connected at all times. This mode does not store any DDC profile
information inside the DVI-TX device.
To activate LOCAL mode, press the DDC MODE button until the LOCAL indicator is on.
COPY: Selects a previously stored copy of a DDC/EDID profile
In this mode, DDC/EDID information comes from a DDC profile that was previously copied into the
DVI-TX’s non-volatile memory from a display device.
To use this mode, a DDC/EDID profile must already have been stored into the DVI-TX.
To perform a DDC-copy operation:
Set the DDC mode to “COPY” using the DDC MODE button.
Connect a display to the LOCAL OUT port. The display must be powered on.
Push and hold the COPY button until the copy-status indicator flashes 3 times, indicating
the operation was successful.
If it only flashes once, the operation failed and the previously stored DDC profile (if any)
will remain unchanged.

Installation
MultiView™ II DVI-TX Installation and User Guide 14
4.4 Sync Settings
The DVI-TX is factory-configured for auto-detecting the proper sync-mode (RepliSync-I normal/stretched). This
mode is generally compatible with all existing MultiView™ receiver products that support RepliSync (if they are
also using their factory-default settings). However, some video sources may require a custom sync-mode setting
(most especially at 1080p and 1920x1200 video resolutions). For these cases, one of the other available sync-
modes can be selected.
Note that any connected MultiView™ receiver should generally be set to the same sync-mode and may require
other configuration adjustments (such as sync-polarity). Otherwise, you may not get a proper video display
output at that receiver, or none at all.
Perform the procedure below while the transmitter is in the normal operating state (CFG indicator is off):
Press and release the CFG button once to access configuration-mode (CFG indicator = on).
Press and release the SEL button once. You will now be able to change sync-mode settings.
LED indicators 1-3 should be illuminated (either DIM or ON); all others (indicators 4-8) should be off.
Press the CFG button repeatedly to step through the available sync-mode settings as shown below.
To leave configuration-mode step through all the options OR leave the buttons untouched for 10 seconds.
LED1 LED2 LED3 FRONT PANEL VIEW SYNC-MODE SETTING
dim dim dim The DVI-TX will auto-detect the required RepliSync-I
mode (“normal” or “stretched”). This is the factory-
default setting.
dim dim ON Force RepliSync-I normal Horizontal sync-pulse
encoding.
dim ON dim Force RepliSync-I “stretched” Horizontal sync-pulse
encoding.
dim ON ON Force RepliSync-II.
ON dim dim
Force fixed-sync mode. NOTE: A connected MultiView
receiver must also be in fixed-sync mode and with H/V
polarities selected at the receiver.

Installation
MultiView™ II DVI-TX Installation and User Guide 15
4.5 4
th
Pair Settings
The DVI-TX provides several options for using the 4
th
-pair signals (pairs 1-3 are generally used for video). Note
that any connected MultiView™ receiver must be configured with a matching 4
th
-pair operating mode. Otherwise,
the desired 4
th
-pair signal will not work as expected.
If an optional daughterboard is installed (232, SA or SAP options), then the 4
th
-pair utilization is
defined by the installed daughterboard. It will not be possible to change any of the 4
th
-pair settings
as described below.
Perform the procedure below while the transmitter is in the normal operating state (CFG indicator is off):
Press and release the CFG button once to access configuration-mode (CFG indicator = on).
Press and release the SEL button twice. You will now be able to change 4
th
-pair option settings.
LED indicators 4-6 should be illuminated (either DIM or ON); all others (indicators 1-3, 7 and 8) should
be off.
Press the CFG button repeatedly to step through the available 4
th
-pair settings as shown below.
To leave configuration-mode step through all the options OR leave the buttons untouched for 10
seconds.
LED4 LED5 LED6 FRONT PANEL VIEW 4
TH
-PAIR OPERATING MODE
dim dim dim
The 4
th
-pair operating mode is defined by presence of
option-module. This setting cannot be changed because
an option-module is installed (232, SA or SAP).
Note: If an option module is not installed, this setting will
effectively “mute” the 4
th
-pair signals. This can be useful
sometimes for diagnostic purposes.
dim dim ON Direct pass-through of 4
th
-pair wires (custom
applications).
dim ON dim
External analog (L+R summed) audio.
This is the factory-default mode for an (A) model
transmitter.
dim ON ON External S/PDIF digital audio. Input-impedance = 75-
ohms.
ON dim dim
Simplex-serial.
This is the factory-default mode for an (S) model
transmitter.
/

