Page is loading ...

699 Keypad Deskstand
Description
The 699 Keypad Deskstand is a mounting stand congured for all DMP LCD keypad models. The 699 is constructed
of smoked plexiglass or metal and provides a sturdy keypad mounting option for any location. Designed to provide
access to all DMP keypad wiring headers allows quick and easy keypad wire connections.
What is Included
• 699 Keypad Deskstand
• Wiring Block
• Wire Harness 4 ft.
• Four round head self-tapping Phillips mounting screws
Note: When using the 7760 Clear Touch Keypad a 778 Keypad Backplate is needed to enhance the keypad display.
Mounting Keypads
Standard Keypad Mounting
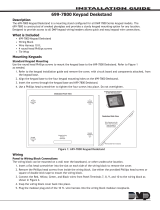
Use the round head self-tapping Phillips screws to mount the keypad base to the 699 Deskstand. Refer to Figure 1 as
needed.
1. Refer to the keypad installation guide and remove the cover from the keypad base.
2. Align the keypad base to the four keypad mounting holes on the 699 Deskstand.
3. Insert the screws through the keypad base and 699 Deskstand.
4. Use a Phillips head screwdriver to tighten the four screws into place. Do not overtighten.
5. Replace the keypad cover.
Wire Harness wire tie
strain relief mounting
holes located in
Deskstand base.
Premounted feet (4 places)
Deskstand Front View
Deskstand Side View
Thin Keypad
on 699 Deskstand
Optional Wire
Harness wire
tie strain relief
mounting hole.
690 and 790 Series
Keypad mounting holes.
Use self-tapping Phillips
head screws.
Keypad wiring
harness
openings
Clear Touch
Keypad
mounting hole.
Clear
Touch
Keypad
mounting
hole.
Clear Touch Keypad wiring harness opening.
778 Backplate ush mounting holes.
778 Backplate ush mounting holes.
Figure 1: 699 Keypad Deskstand
InstallatIon GuIde

Clear Touch Keypad Mounting
The 778 Backplate comes with four at head screws and nuts and two round Phillips head screws and nuts. Use the
four at head screws and nuts to ush mount the 778 Backplate to the 699 Deskstand. Use the two round Phillips
head screws and nuts to mount the keypad base. When mounting is complete the Clear Touch Keypad legs rest on the
lower ush mounted screws. Refer to Figure 2 as needed.
1. Align the 778 Backplate to the ush mounting holes and insert the ush mount screws through the backplate
and 699 Deskstand.
2. Place a nut on the end of each ush mount screw, hold the nut in place, and use a at head screwdriver to
tighten the four screws in place.
3. Refer to the glass keypad installation guide and remove the cover from the keypad.
4. Align the keypad base to the two keypad mounting holes on the 778 Backplate.
5. Insert the round Phillips head screws through the keypad base, 778 Backplate, and 699 Deskstand.
6. Place a nut on the end of each screw, hold the nut in place, and use a Phillips head screwdriver to tighten the
keypad base in place.
7. Replace the keypad cover.
Clear Touch
Keypad
mounting hole.
Premounted feet (4 places)
Clear Touch Keypad wiring harness opening.
778 Backplate
778 Backplate
side view.
Deskstand and 778 Backplate Front View
Deskstand and 778 Backplate Side View
Clear
Touch
Keypad
mounting
hole.
Flush mounting holes.
Wire Harness wire tie
strain relief mounting
holes located in
Deskstand base.
Figure 2: 699 Keypad Deskstand with 778 Backplate Installed
Wiring
Panel to Wiring Block Connections
The wiring block can be mounted on a wall near the baseboard, or
other unobtrusive location.
1. Insert a at head screwdriver into the slot on each side of the
wiring block to remove the cover.
2. Remove the Phillips head screws from inside the wiring block.
Use either the provided Phillips head screws or square of double
stick tape to mount the wiring block.
3. Connect the Red, Yellow, Green, and Black wires from Panel
Terminals 7, 8, 9, and 10 to the wiring block as shown in
Figure 3.
4. Snap the wiring block cover back into place.
5. Plug the modular plug end of the 4 ft. wire harness into the
wiring block modular receptacle.
B
K
R
D
Y
L
G
R
B
L
O
R
S
L
B
R
WH
To Panel Terminal 7 - Red
To Panel Terminal 8 - Yellow
To Panel Terminal 9 - Green
To Panel Terminal 10 - Black
Black Yellow
Red Green
Modular
Receptacle
Mounting
holes
(2 places)
Cover
Removal
Slot
(2 places)
Figure 3: Wiring Detail
Digital Monitoring Products 699 Installation Guide
2

Wiring Block to Keypad Connections
As needed, refer to the specic keypad installation guide. Plug the terminal end of the 4 ft. wire harness onto the
4-pin header in the back of the keypad through the back of the 699 Deskstand.
RED YEL GRN BLK
7 8 9 10
XT30/XT50
XR100/XR500
Panel
Terminals 7-10
Thin Keypad on
699 Deskstand
B
K
R
D
Y
L
G
R
B
L
O
R
S
L
B
R
WH
Black Yellow
Red Green
Mounting
holes
(2 places)
Wiring
Block
Modular
Receptacle
Figure 4: Panel to Keypad Wiring
Keypad Rear Connections
Figure 5 shows the 699 Backplate rear view with the 4-wire connector plugged into the 4-pin header. Run a tie wrap
through the back or base of the 699 Deskstand. Roll the excess length of the 4 ft. Wire Harness into a loop and use
the tie wrap to hold it in place.
Wire Harness with wire
tie strain relief in place.
4-wire
connector
plugged
into keypad
4-pin header.
Deskstand Rear View
RED
To Wiring Block
Optional 4-wire
connector locations
depending on the
specific keypad installed.
Optional Wire
Harness wire
tie strain relief
mounting hole.
4 ft. Wire Harness wire tie strain relief
mounting holes located in Deskstand base.
Figure 5: 699 Backplate Rear View
699 Installation Guide Digital Monitoring Products
3

800-641-4282
www.dmp.com 2500 North Partnership Boulevard
LT-0866 © 2012 Digital Monitoring Products
12175
Specications
Dimensions 6.8" W x 5.25" H x 5" D
Ordering Information: 699 Plexiglass
699-W Metal
Compatibility
The 699 Keypad Deskstand is compatible with all
DMP LCD Keypad models.
Accessories
778 Keypad Backplate
Dimensions 6.57" W x 4.57" H
Wiring Specications
When planning a keypad bus installation, keep in mind the following specications:
1. DMP recommends using 18 or 22-gauge unshielded wire for all keypad and LX-Bus circuits. Do Not use
twisted pair or shielded wire for LX-Bus and keypad bus data circuits. To maintain auxiliary power integrity
when using 22-gauge wire do not exceed 500 feet. When using 18-gauge wire do not exceed 1,000 feet.
Install an additional power supply to increase the wire length or add devices.
2. Maximum distance for any one circuit (length of wire) is 2,500 feet regardless of the wire gauge. This
distance can be in the form of one long wire run or multiple branches with all wiring totaling no more than
2,500 feet. As wire distance from the panel increases, DC voltage on the wire decreases.
3. Maximum number of devices per 2,500 feet circuit is 40.
Note: Each panel allows a specic number of supervised keypads. Add additional keypads in the unsupervised
mode. Refer to the panel installation guide for the specic number of supervised keypads allowed.
4. Maximum voltage drop between the panel (or auxiliary power supply) and any device is 2.0 VDC. If the
voltage at any device is less than the required level, add an auxiliary power supply at the end of the circuit.
When voltage is too low, the devices cannot operate properly.
Refer to the LX-Bus/Keypad Bus Wiring Application Note (LT-2031). Also see the 710 Module Installation Sheet
(LT-0310) for more information.
/

