Page is loading ...

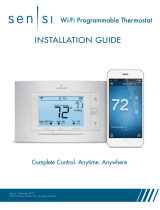
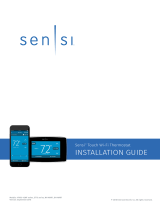
SENSI™ LITE SMART THERMOSTAT
Installation guide
Models: 1F76U-22WFB series, ST25 series
Version: February 2023 R-5664

Sensi Lite smart thermostat | INSTALLATION GUIDE 2
YOU WILL NEED
Gather this information before you begin installation
for a smoother walk through.
- Wi-Fi Network Name/SSID (Make sure this is a 2.4GHz network)
- Wi-Fi Network Password
- Screwdriver
- Hardware in Sensi Lite smart thermostat packaging
DOWNLOAD THE SENSI APP
The Sensi Lite smart thermostat is a Wi-Fi enabled device. To
install and configure your thermostat correctly, you must use the
Sensi app. To start the installation process, download the Sensi
app to your smart phone or tablet. It is a free download.
CREATE AN ACCOUNT
When you download the Sensi app, you will be prompted to create an account.
This is required to access your thermostat remotely and use all the features
Sensi offers. Use a valid email address and a password of your choosing
to create an account. Remember this email address and password. Your
Sensi thermostat will be linked to this email address once it is registered.
Scan the QR code to download the Sensi app
Android, Google Play, and the Google Play logo are trademarks of Google Inc.
DOWNLOADING THE APP AND CREATING AN ACCOUNT

Sensi Lite smart thermostat | INSTALLATION GUIDE 3
STEP 1
Add your thermostat to the Sensi app
INSTALLATION
Once you have downloaded the Sensi app and have created an account, you
are ready to install the thermostat to your wall and connect it to Wi-Fi. If there
are no registered thermostats, tap the plus (+) sign to add a thermostat.
First, choose which thermostat you purchased. The Sensi Lite
smart thermostat option is for the following model numbers:
- ST25 series
- 1F76U-22WFB series
Note: You can check your model number on the back of the thermostat cover.
STEP 2
Is your Sensi thermostat already on your wall?
NEW INSTALLATION
After choosing your Sensi model, tap New Installation. Next, select whether
your thermostat Is Currently Mounted or Not Mounted on the wall.
NOT MOUNTED
This option walks you through a full step-by-step installation process.
You will identify which wires are on your original thermostat, how to label
them for Sensi, how to connect your wires and how to connect to Wi-Fi.
If you did not have this thermostat professionally installed,
choose this option. It will ensure that your thermostat is properly
wired and configured to work with your HVAC system
IS CURRENTLY MOUNTED
This option asks you to identify the wires already installed on your Sensi Lite
to ensure that your HVAC settings are correct and connects you to Wi-Fi.
If you had a professional technician install your
thermostat, choose this option and skip to STEP 5.
Pro Tip:
If you are DIYing your installation, always choose Not Mounted to
make sure your thermostat is wired and configured correctly.
INSTALLING THE SENSI THERMOSTAT

Sensi Lite smart thermostat | INSTALLATION GUIDE 4
STEP 3
Remove the old thermostat from your wall
GATHER TOOLS AND PACKAGE CONTENTS
Gather all the necessary tools for installation.
TURN OFF POWER
Turn off the power to your heating and air conditioning
system before handling your thermostat wires.
REMOVE OLD THERMOSTAT COVER
Remove the cover using a screwdriver or by pushing the pressure latch.
Some covers pull off while others need to be released using a screwdriver.
PHOTOGRAPH YOUR WIRING
THIS IS IMPORTANT. The Sensi app will prompt you to take a picture of
your existing thermostat and old wiring in case you need it later.
This can be helpful for troubleshooting with our technical
support team, if necessary. The picture you take will be
saved to your camera roll or photo gallery.
THROW AWAY ANY JUMPER WIRES
Sensi has a jumper wire built into it, and you will not
need any jumper wires from your old unit.
CHOOSE WIRE TERMINALS
Choose the terminal labels that have wires attached to them on your old
thermostat. The app will tell you if you have a valid configuration.
If you are getting an invalid configuration message you can learn
more about compatibility at sensi.emerson.com/system.
INSTALLING THE SENSI THERMOSTAT

Sensi Lite smart thermostat | INSTALLATION GUIDE 5
FURNACE TYPE
Select what type of system you have.
LABEL YOUR WIRES
Before you disconnect your wires, label your wires using
the label stickers provided one wire at a time.
DISCONNECT WIRES AND REMOVE BASE
After all of your wires are labeled, remove the old thermostat base from the wall.
STEP 4
Secure your new thermostat base
to the wall and connect wires
INSTALL SENSI BASE
Use the mounting screws provided and secure the Sensi base to the wall.
CONNECT THE WIRES
Once the Sensi base is mounted and secured on the wall, insert the
wires into the corresponding terminals, then tighten the screw.
STEP 5
Scan QR code and attach thermostat cover
SCAN QR CODE
On the back of the thermostat or in the Welcome/Get Started
insert found in the box, you will find the QR Code to connect the
thermostat to your Wi-Fi network. Scan this code. You will need
to allow Sensi access to Bluetooth to connect properly.
If you’re having trouble scanning, tap Use PIN to manually
enter the code located under the QR code.
INSTALL BATTERIES AND ATTACH THERMOSTAT COVER
Install the two provided AAA batteries and push
the thermostat cover onto the base
TURN ON POWER
Turn the power to your heating and air conditioning system back on.
INSTALLING THE SENSI THERMOSTAT

Sensi Lite smart thermostat | INSTALLATION GUIDE 6
STEP 6
Connecting to Wi-Fi and registering
your thermostat
Pro Tip:
If the thermostat screen is not turning on after wiring
installation, the batteries may not be installed properly. See the
troubleshooting section on pg. 7 for more information.
WIFI SETUP
On the thermostat, press and hold the Mode Button for four
seconds. You will see the setup and Wi-Fi icons appear.
SELECT YOUR WIFI NETWORK
In the mobile app, select your home Wi-Fi network and
then enter your home Wi-Fi network password.
Pro Tip:
Sensi is only compatible with 2.4GHz networks. If your network does not
show up in the list, it is either hidden or not compatible with Sensi.
NAME THERMOSTAT
You can select a name or choose a custom name for
your thermostat. Press Next to continue.
REGISTER THERMOSTAT
After successfully connecting Sensi, the app will prompt
you to register the thermostat. You can either choose the
Locate Me option or fill in your street address, city, state, ZIP code,
country and time zone manually. Press Next to continue.
CONTRACTOR INFORMATION OPTIONAL
If a contractor professionally installed your thermostat and is registered as
a Sensi partner, they have the option to input their phone number here. If
there is not a registered number available, simply hit Next to continue.
START USING SENSI
Congratulations on successfully installing Sensi.
Press Start Using Sensi to open the main screen of the app.
INSTALLING THE SENSI THERMOSTAT

Sensi Lite smart thermostat | INSTALLATION GUIDE 7
Why isn’t my heating/cooling turning on?
• Ensure that there is power to your HVAC system and there is no error
code on your control board indicating a system issue.
― If there is an error code or no power to your system, contact an HVAC professional to service your equipment.
• Reset breakers.
• Make sure the furnace/air handler door compartments are securely screwed down
and closed. If the door panels are not secure, the system will not start.
• Secure wire connections.
• Ensure the thermostat is wired correctly by following the instructions in the Sensi app.
― You can also try to reinstall your original thermostat to make sure there is not an HVAC system issue
that is preventing the system from turning on. If your heating/cooling doesn’t come on with the original
thermostat, you may need to contact a professional technician to service your equipment.
Connecting to Wi-Fi troubleshooting
If you’re having trouble connecting to Wi-Fi, here are some tips to try:
• Make sure the Sensi app is up-to-date and running the latest version available in your app store.
• Reboot your smartphone.
• Reboot your router by unplugging it from the wall for a few minutes and then plugging it back in.
• Make sure Bluetooth is turned on in your phone settings and is allowed in the Sensi app permissions.
• Make sure Location access is turned on in your phone settings and is allowed in the Sensi app permissions.
• Try another smartphone or tablet. Simply download the Sensi app and sign into the app
using the email address and password you used when you created your account.
Reconnecting to Wi-Fi
If you replaced your router or changed your Wi-Fi network password, you will need to reconnect
your thermostat to Wi-Fi. This process is different depending on what smart device you are
using. Please see our support article for more information on how to reconnect.
sensi.emerson.com/en-us/support/reconnecting-sensi-thermostat-to-wifi
TROUBLESHOOTING

Sensi Lite smart thermostat | INSTALLATION GUIDE 8
HVAC configuration menu
If you want to check that your thermostat’s HVAC
settings were configured correctly or you’re experiencing
a system issue, refer to the chart for equipment
descriptions and options. Learn more about how
to properly configure your thermostat here:
sensi.emerson.com/en-us/support/how-
do-i-configure-my-thermostat
Accessing your Sensi thermostat
from other devices
When you log into your Sensi account with your email
address and password, the app will be able to control
all the thermostats registered to your Sensi account.
If you give someone else your email address and the
password to your Sensi account, they will be able to
log in and control any thermostats registered to that
account. You can change your email address and
password from inside the app. Be aware of this when
giving out your information. There is no limit to the
number of devices that can access the thermostat.
Forgot password
If you forget the password to your Sensi account,
click on Forgot Password on the login screen of
the Sensi app. A temporary password will be sent
to the email address that you use to log in.
NOTES
CONFIGURATION MENU ITEMS REFERENCE
Menu item Description Options
Outdoor
Equipment Select AC or Heat Pump equipment AC/HP/--
Indoor
Equipment Select whether the equipment is
an electric or gas furnace, or fan-
only. Set this to EL for single-stage
electric for GA single-stage gas
systems or FN for fan only systems
GA/FN/EL
Reversing Valve
or Multistage
Position
When configured for O, the reversing
valve is energized in Cooling. This
will cover most applications. Some
manufacturers, such as Rheem or
Ruud, use the B terminal, which would
energize in Heating. For three-wire
zone hydronic systems set this to 6.
O/B/2H/2C/6/--
Multistage
Equipment When configured for 2C, second-
stage cooling is energized. When
configured for 2H, second-
stage heating is energized.
2H/2C/6/--

Sensi Lite smart thermostat | INSTALLATION GUIDE 9
Installing multiple thermostats
If you are installing more than one thermostat, follow the same
installation process in the Sensi app. Once you have one thermostat
installed, open the Sensi app on your phone. At the main screen,
press the + sign to add another thermostat to your account.
Accessing account information
You can use the Account area to access your email preferences and change
your account information and the email address associated with your Sensi.
For iOS: Tap the person icon in the upper right corner.
For Android: Tap the three dots in the upper right corner.
Technical support
For problems installing your Sensi thermostat, visit our support site. We have
a vast collection of troubleshooting articles aimed at helping you install Sensi
and using its features. We also have a support team available to help assist you.
sensihelp.com
(888) 605.7131
NOTES

Sensi Lite smart thermostat | INSTALLATION GUIDE 10
CONVENTIONAL SINGLE-STAGE OR MULTI-STAGE SYSTEMS (NO HEAT PUMP)
System
configuration
Thermostat
Single-stage
(AC, GA, EL) Multi-stage - 2H or 2C*
(AC2, GA2, EL2)
2nd-stage heat, 2nd-stage cool, zone
panel, or 3-wire hot water zone valve
connection (configurable as O, B,
multi-stage or 6 in the installer menu)
1st-stage cool
Indoor blower
(fan)
1st-stage heat
Common wire**
(24V)
24VAC power from HVAC system
*System only capable of multi-stage heating or multi-stage cooling, not both.
**Common connection required on heat-only, cool-only or heat pump systems.
HOT
120 VAC
NEUTRAL
NEUTRAL
24 VAC
HOT
Dots indicate
phased
relationship
Thermostat
HEAT PUMP SYSTEMS
Heat pump changeover (reversing
valve) connection (configure as O or B
in the installer menu). Multi-stage
not available for heat pump
configurations.
1st-stage heat and cool
(compressor)
1st-stage auxiliary/emergency heat
(2nd-stage heat)
24VAC power from HVAC system
*Common connection required on heat-only, cool-only or heat pump systems.
HOT
120 VAC
NEUTRAL
NEUTRAL
24 VAC
HOT
Dots indicate
phased
relationship
Common wire*
(24V)
Indoor blower
(fan)
System
configuration
(Outdoor) HP, (Indoor) GA or EL.
(Reversing valve setup) O or B
NOTES
/