Page is loading ...

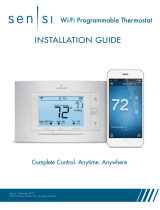
Sensi
TM
Touch Wi-Fi Thermostat
INSTALLATION GUIDE
Models: 1F95U-42WF series, ST75 series, NH-AWIFI, OH-AWIFI
Version: September 2018
© 2018 Emerson Electric Co. All rights reserved.

Sensi
TM
Wi-Fi Programmable Thermostat | INSTALLATION GUIDE 2
Installation guide
Downloading the Sensi app 3
Creating a Sensi account 3
Installing the Sensi thermostat 4
Connecting the Sensi thermostat 8
Notes 10
CONTENTS

Sensi
TM
Wi-Fi Programmable Thermostat | INSTALLATION GUIDE 3
You will need
Gather this information before you begin installation for a
smoother walk through.
• Wi-Fi Network Name/SSID
*Make sure this is a 2.4GHz network.
• Wi-Fi Network Password
• Screwdriver
• Hardware in Sensi Touch Wi-Fi thermostat packaging
Download the Sensi app
The Sensi Touch Wi-Fi Thermostat is a Wi-Fi enabled device. To install and
configure your thermostat correctly, you must use the Sensi app. To start the
installation process, download the Sensi app to your smart phone or tablet.
It is a free download. The Sensi app requires the following Operating System
(OS) software to download:
• Android (Google Play) version 4.2 or later
• iOS (Apple) version 10.0 or later
*Note that in the iOS store, the Sensi App will ONLY appear on an “iPhone only”
search. On an iPad, change the search criteria in the App Store.
Create an account
When you download the Sensi app, you will be prompted to create an
account. This is required to access your thermostat remotely and use
all of the features Sensi offers. Use a valid email address and a password
of your choosing to create an account. Remember this email address and
password. Your Sensi thermostat will be linked to this email address
once it is registered.
*Note that the “Install a device” option is only for installing to HomeKit only.
You will lose available features without creating an account.
DOWNLOADING THE APP AND CREATING AN ACCOUNT

Sensi
TM
Wi-Fi Programmable Thermostat | INSTALLATION GUIDE 4
Installation
Once you have downloaded the Sensi app, and have created an account, you
are ready to install the thermostat to your wall and connect it to Wi-Fi. If no
thermostats are registered yet, tap the plus (+) sign to add a thermostat.
First, choose which thermostat you purchased. The Sensi Touch
Wi-Fi Thermostat option is for the following model numbers:
• 1F95U-42WF series
• ST75 series
• NH-AWIFI, OH-AWIFI
Note: You can check your model number on the back of the thermostat faceplate.
Install path
After creating an account, signing in and choosing your model, the app will
ask you whether or not the thermostat is already on the wall. You will either
choose “No, it needs to be installed,” or “Yes, it is on the wall.”
The first option will walk through the entire installation process. If you
did not have this thermostat professionally installed, choose this option.
The second option is for connecting your thermostat to Wi-Fi only. If you
have had a professional install your thermostat, and you just need to connect
the Sensi thermostat to your home Wi-Fi network, choose this option.
No, it needs to be installed.
This option will walk you through the entire installation process, including
identifying and connecting your wiring, as well as connecting to Wi-Fi. The
Sensi app will walk through a step-by-step process for installation.
Gather tools
and package contents
Gather all the necessary tools for installation.
INSTALLING THE SENSI THERMOSTAT

Sensi
TM
Wi-Fi Programmable Thermostat | INSTALLATION GUIDE 5
Turn off power
Turn off the power to your heating and air conditioning system
before handling your thermostat wires.
Remove old thermostat cover
Remove the cover using a screwdriver or by pushing the pressure
latch. Some covers pull off while others need to be released
using a screwdriver.
Photograph your wiring
THIS IS IMPORTANT. The Sensi app will prompt you to take a picture
of your existing thermostat and old wiring in case you need it later.
This can be helpful for troubleshooting with our technical support
team if necessary. The picture you take will be saved to your camera
roll or photo gallery.
INSTALLING THE SENSI THERMOSTAT

Sensi
TM
Wi-Fi Programmable Thermostat | INSTALLATION GUIDE 6
Throw away any jumper wires
Sensi has a jumper wire built into it, and you will not need
any jumper wires from your old unit.
Choose wire terminals
Choose the terminal labels that have wires attached to them
on your old thermostat here. The app will tell you if you
have a valid configuration.
If you are getting an invalid configuration message you can learn
more about compatibility at sensicomfort.com/compatibility.
System tpe
Select what type of system you have.
INSTALLING THE SENSI THERMOSTAT

Sensi
TM
Touch Wi-Fi Thermostat | INSTALLATION GUIDE 7
Label your wires
Using the provided wire label stickers, label your wires
by removing one wire at a time.
Disconnect wires and
remove base
After all of your wires are labelled, remove the old
thermostat base from the wall.
Install sensi base
Use the provided mounting screws and secure the Sensi
base to the wall.
Connect the wires
Once the Sensi Touch base is mounted and secured on the
wall, insert the wires into the terminals. Simply push the
wires into the terminal slots.
Attach cover
Push the front display onto the thermostat base. If you
used the “Backlight” feature, please make sure the switch
is turned “Off” so you can control it from the display.
Turn on power
Turn the power to your system back on.
INSTALLING THE SENSI THERMOSTAT

Sensi
TM
Touch Wi-Fi Thermostat | INSTALLATION GUIDE 8
CONNECTING THE SENSI THERMOSTAT
Connecting to Wi-Fi
This portion of the installation guide covers how to connect
your thermostat to Wi-Fi. If you chose the first option,
“No, it needs to be installed,” the app will provide instructions
for installing and wiring your thermostat before you con-
nect to Wi-Fi. If you had your Sensi thermostat installed by a
professional or if you have already installed and wired your
Sensi thermostat yourself, but have not yet connected to Wi-
Fi, choose “Yes, it is on the wall.” The app will jump right into
connecting your thermostat to Wi-Fi.
BROADCAST SENSI NETWORK
On the thermostat, press Menu, then Wi-Fi. In the Wi-Fi menu,
press “Set up new network.”
CONNECT YOUR SENSI THERMOSTAT TO YOUR WIFI
NETWORK WITH THE SENSI APP
Follow the step-by-step instructions in the Sensi app. The
Wi-Fi connection process will be slightly different based on
your device’s operating system (iOS/Android) and Sensi app
version. In many cases, the code you need to connect your
thermostat to your Wi-Fi network will appear dynamically on
your thermostat screen. In some cases, Android users will
instead use a printed code found on the back of the welcome
guide.
Name Thermostat
You can select a name or choose a custom name for
your thermostat. Press “Next” to continue.

Sensi
TM
Touch Wi-Fi Thermostat | INSTALLATION GUIDE 9
CONNECTING THE SENSI THERMOSTAT
Register thermostat
After successfully connecting Sensi, the app will prompt you to
register the thermostat. You can either choose the “Locate Me”
option or fill in your street address, city, state, zip code,
country and time zone manually. Press “Next” to continue.
Contractor Information
If a contractor professionally installed your thermostat, and
registered as a Sensi partner, they have the option to input
their phone number here. If there is not a registered number
available, simply hit “Next” to continue.
Start Using Sensi
Congratulations on successfully installing Sensi. Press “Start
Using Sensi Thermostat” to open the main screen of the app.

Sensi
TM
Touch Wi-Fi Thermostat | INSTALLATION GUIDE 10
Accessing your Sensi
thermostat from
other devices
When you log into your Sensi account with your email
address and password, the app or web page will be able to
control all the thermostats registered to your Sensi account.
If you give someone else your email address and password to
your Sensi account, they will be able to log in and control any
thermostats registered to that account. You can change your
email address and password from inside the app or when
you are logged into your thermostat via the Sensi website.
Be aware of this when giving out your information. There
is no limit to the number of devices that can access
the thermostat.
Forgot password
If you forgot the password to your Sensi account, click on
“Forgot Password” on the login screen of the Sensi app or
select “Account” then “My Thermostat” option on the
www.sensicomfort.com website. A temporary password
will be sent to the email address that you use to login.
Installing multiple
thermostats
If you are installing more than one thermostat, follow the
same installation process in the Sensi app. Once you have
one thermostat installed, open the Sensi app on your phone.
At the main screen, press the plus (+) sign to add another
thermostat to your account. The (+) sign will be on the top
left of the screen on an iOS device, and the top right of the
screen on an Android device.
Note: To reconnect an already registered thermostat to a new router,
use the plus sign and choose the second option, “Yes, it is on the
wall,” and run through the connection steps again.
NOTES

Sensi
TM
Wi-Fi Programmable Thermostat | INSTALLATION GUIDE 11
Reconnecting to Wi-Fi
If you replaced your router or changed your Wi-Fi network
password, you will need to reconnect your thermostat to
Wi-Fi. This is different depending on what smart device
you are using.
IOS
If you’re using an iOS device with iOS 10 or later, follow these
steps to reconnect to Wi-Fi:
• Make sure your iOS device is connected to the 2.4GHz Wi-Fi
network that you want to reconnect to.
• Press Menu, then Wi-Fi, and then “Set up new network” on
the thermostat.
• Open your Wi-Fi settings on your iOS device.
• Scroll down to “Set up new device…” and press
Sensi-XXXXXX.
• In Accessory Setup, press “Next.”
• After it has joined, press “Done.”
• You should be able to open the Sensi app and view your
thermostat again.
Note: This process is only for reconnecting to an already
registered thermostat.
ANDROID
If you’re using an Android device, use the plus (+) sign in the
main view of the Sensi app and choose the second option,
“Yes, it is on the wall.” Follow the in app instructions to
reconnect the thermostat to Wi-Fi.

Sensi
TM
Wi-Fi Programmable Thermostat | INSTALLATION GUIDE 12
NOTES
Accessing account
information
You can use the Account area to access your email prefer-
ences, change your account information and email address
associated with your Sensi.
For iOS: Tap the person icon in the upper right hand corner.
(see picture)
For Android: Tap the three dots in the upper right hand corner.
HVAC configuration menu
If you chose the option “No, it needs to be installed” and
walked through the installation process on the Sensi app
the app should have correctly configured your thermostat for
your system type. You can check your system configurations
by accessing the “Menu” on the physical thermostat, and
then pressing “Set Up HVAC Equipment.”
Technical support
For problems connecting your Sensi thermostat, call or email
the Sensi Technical Support team, and they will be happy to
help you or your contractor walk through any steps needed
to troubleshoot the Sensi thermostat.
www.sensicomfort.com/support
(888) 605.7131
Menu item Options
Outdoor Equipment
Configuration
AC1 Conventional Cooling 1
(Single Stage)
AC2 Conventional Cooling 2
(Two-Stage)
HP1 Heat Pump 1 (Single Stage)
HP2 Heat Pump 2 (Two-Stage)
ACO No Cooling
Indoor Equipment
Configuration
For Gas or
Electric Heat
GA 1 Gas, oil, propane furnaces
or boilers (Single Stage)
GA 2 Gas, oil, propane furnaces
or boilers (Two Stage)
EL1 Electric furnaces (Single Stage)
EL2 Electric furnaces (Two-Stage)
FAN No Heating
Reversing Valve Position O Heat pump – O/B
is always energized
in Cool.
B Heat pump – O/B
is always energized
in Heat.
6 Zone valve setting.
* If you have a heat pump,
you’ll most likely have a
wire in O/B.
** If you have two stages,
you’ll have a wire in Y2.
* If you have two stages,
you’ll have a wire in W2.
* If you’ve installed your
Sensi Touch to a heat
pump, and your system
is producing warm air
in “Cool” and cool air in
“Heat,” you may need to
change your Reversing
valve position to either
O or B.
** There must be a wire in the O/B terminal for this configuration to affect
your HVAC system. If there is no wire in the O/B terminal, simply leave the
default setting as “O.”

Sensi
TM
Wi-Fi Programmable Thermostat | INSTALLATION GUIDE 13
NOTES
Heat Pump Systems
Single Stage or Multi-Stage Conventional System with Single Transformer
*Internal jumper between RC and RH, located on back of thermostat above battery compartment.
**Common connection required for Heat- only or Cool- only systems.
***Thermostat wiring does not follow a standardized color code. Label thermostat wires before removing old thermostat from the wall.
HOT
HOT
NEUTRAL
24 VAC
120 VAC
NEUTRAL
Single
stage
AC1
GA1
EL1
24 Volt
(Hot)
Cool
24 Volt
(Hot)
Heat
24 Volt
(Common
)
Cool
Mode 1
st
stage
No
output
Heat
Mode 1
st
stage
No
output
Blower /
circulator
fan
energized on
call for cool
(and heat if
configured
for electric
heat)
O
Energized
constantly
in Cool
Mode
B
Energized
constantly
in Heat
Mode (or
Aux Mode)
Heat Pump
“L” terminal
connection
Multi
-
stage
AC2
GA2
EL2
Cool
Mode 2
nd
stage
Heat
Mode 2
nd
stage
*
SYSTEM
CONFIGURATION
THERMOSTAT
C**
RC
RH
G
W2
W/E
Y2
L
O/B
Y
Dots indicate
phase
relationship.
Heat Pump Systems
*Internal jumper between RC and RH, located on back of thermostat above battery compartment.
**Common connection required on Heat- only, Cool-only or Heat Pump systems.
***Thermostat wiring does not follow a standardized color code. Label thermostat wires before removing old thermostat from the wall.
HOT
HOT
NEUTRAL
24 VAC
120 VAC
NEUTRAL
Single
stage
Heat
Pump
HP1
24 Volt
(Hot)
Cool
24 Volt
(Hot)
Heat
24 Volt
(Common
)
Heat and
Cool
Mode 1
st
stage
(compres-
sor)
NOTE: Dual
Fuel option
de-energizes
Heat Mode
1
st
stage
No
output
Heat
Mode 1
st
stage
No
output
Blower /
circulator
fan
energized on
call for cool
(and heat if
configured
for electric
heat)
O
Energized
constantly in
Cool Mode
(Factory
Default)
B
Energized
constantly in
Heat Mode
(or Aux
Mode)
Heat Pump
“L” terminal
connection
Multi
-
stage
Heat
Pump
HP2
Cool
Mode
2
nd
stage
Heat
Mode 2
nd
stage
*
SYSTEM
CONFIGURATION
THERMOSTAT
C**
RC
RH
G
W2
W/E
Y2
L
O/B
Y
Dots indicate
phase
relationship.

Single Stage or Multi-Stage System (No heat pump) with Two Transformers
*Two transformer systems (separate RC and RH wires), clip interna,RC/RH jumper, located on back of thermostat above battery compartment.
**Thermostat wiring does not follow a standardized color code. Label thermostat wires before removing old thermostat from the wall.
HOT
HOT
NEUTRAL
24 VAC
120 VAC
HOT
120 VAC
NEUTRAL
NEUTRAL
24 VAC
HOT
Single
stage
AC1
GA1
EL1
24 Volt
(Hot)
Cool
24 Volt
(Hot)
Heat
24 Volt
(Common)
Cool
Mode 1
st
stage
No
output
Heat
Mode 1
st
stage
No
output
Blower /
circulator
fan
energized on
call for cool
(and heat if
configured
for electric
heat)
O
Energized
constantly
in Cool
Mode
B
Energized
constantly
in Heat
Mode (or
Aux Mode)
Heat Pump
“L” terminal
connection
Multi-
stage
AC2
GA2
EL2
Cool
Mode 2
nd
stage
Heat
Mode 2
nd
stage
*
Dots indicate
phase
relationship.
Dots indicate
phase
relationship.
THERMOSTAT
C
RC
RH
G
W2
W/E
Y2
L
O/B
Y
NEUTRAL
SYSTEM
CONFIGURATION
Sensi
TM
Wi-Fi Programmable Thermostat | INSTALLATION GUIDE 14
/