Page is loading ...

Installation
Wi-Fi
Thermostat

Table of contents
COMPATIBILITY ................................................................4
WHAT’S IN THE BOX .....................................................6
WHAT YOU’LL NEED ......................................................7
BEFORE YOU BEGIN ...................................................... 8
INSTALLATION OVERVIEW ......................................10
WARNINGS ....................................................................... 11
Need some help?
Visit sensicomfort.com/support for around-the-
clock access to support articles, instructional
downloads and comprehensive support videos.
Our highly-trained Sensi Support Team is available
seven days a week.
1.888.605.7131
support@sensicomfort.com
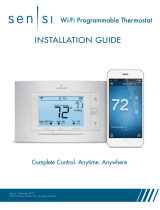
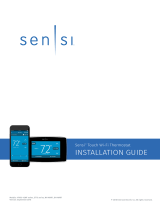
You’re just a few steps
away from complete
comfort control.
Never installed a thermostat before? We’ve got
you covered. Sensi
™
Wi-Fi
®
Thermostat was
designed for a quick and easy DIY installation.
The Sensi app provides step-by-step instructions
and helpful videos to get you up and running in
no time.
3
2

Compatibility
Sensi thermostat is truly universal. Not only does it
work with the HVAC equipment in most homes, but
it also works with most mobile devices and smart
home platforms.
Check out the information below, to make sure
Sensi thermostat will work for you:
MOBILE DEVICE COMPATIBILITY
SMART HOME PLATFORM COMPATIBILITY
OPERATING SYSTEM COMPATIBILITY
iOS 10.0 or later Yes
Android Yes
Amazon Fire Yes
OPERATING SYSTEM COMPATIBILITY
Wink Yes
Amazon Alexa Yes
Apple HomeKit
Yes, but requires a
common wire (c-wire)
SYSTEM TYPE COMPATIBILITY MODIFICATIONS
Conventional heating
and cooling
• Gas furnace
• Air conditioner
• Electric furnace
• Boiler
Yes None
Heat only
• Gas furnace
• Electric furnace
• Boiler
Yes Requires a
common wire
(c-wire)
Cool only
• Air conditioner
Yes Requires a
common wire
(c-wire)
Heat pump Yes Requires a
common wire
(c-wire)
Communicating
proprietary
systems
No Needs standard
HVAC wiring
Line voltage No Requires
low voltage
(20-30VAC)
Millivolt systems No Requires
20-30VAC
Remote sensors,
whole home
humidifiers/
dehumidifiers
No Control of these
accessories is
not currently
supported
HVAC SYSTEM COMPATIBILITY
5
4

What’s in the box?
• Sensi Thermostat
• Screws and Anchors
• Wire Labels
• 2 AA Batteries
• Sensi password
(found on the back of the Welcome Guide)
XXX-XX-XXX
Here’s what you’ll need.
Things you’ll definitely need:
• Small Phillips Screwdriver
• Medium Phillips Screwdriver
• Compatible iOS or Android with the Sensi
App Installed
• Your Email Address
• Your Wi-Fi Network Name (SSID) and Password
Things you might need:
• Needle-Nose Pliers
• Drill with 3/16" Bit
• Wire Stripper
7
6

Download the Sensi app
before you begin.
This document is not meant to be used
independently or to replace the step-by-step
installation procedure found only in the Sensi
app. The app is required for installation to ensure
proper configuration and enable Wi-Fi control of
your thermostat.
The free Sensi mobile app is available on the App
Store
™
and Google Play
™
. Simply search for “Sensi”
and download to your device to get started.
9
8

Installation Overview
CREATE YOUR ACCOUNT.
Open the Sensi app on your device and follow
the prompts to create an account, using a valid
email address.
Your Sensi account can only be linked to one
email address, but you can share your account
information across devices so your whole family
can have access.
INSTALL YOUR THERMOSTAT.
The Sensi app will walk you through removing your
old thermostat from the wall, labeling your existing
wires and installing your new Sensi thermostat.
CONNECT TO WIFI.
After installation the app will walk you through
connecting your new thermostat to your home
Wi-Fi network. Remember to have your Wi-Fi
network name, password and Sensi
password ready.
REGISTER YOUR THERMOSTAT.
Finally, the app will walk you through registration
so you can start controlling your home comfort.
Anytime. Anywhere.
Turn Off Power to Your System
Installing Your Thermostat
Turn off the power to your heating and air
conditioning system by using your fuse box
or the switch next to your furnace.
WARNING:
Confirm power is off before proceeding. To check,
change the temperature on your thermostat. If your
system turns on, it still has power.
11
10

REMOVE EXISTING THERMOSTAT COVER
Remove the thermostat cover by using a
screwdriver or by pushing the pressure latch. Some
covers will detach easily, while others may need to
be released with a screwdriver.
Remove Old Thermostat Cover
TAKE A PHOTO OF YOUR WIRING
Using your phone or digital camera, take a photo of
your existing thermostat wiring in case you need to
reference it later.
Take a Photo of Your Wiring Screen
WARNING:
Do not remove your wires yet—this will be done in a
later step.
13
12

REMOVE ANY JUMPER WIRES
If you see a jumper wire, remove it. Your new Sensi
thermostat has the jumper wire built in. Leave all
other wires connected to the thermostat.
Throw Away Any Jumper Wires
Remove
LABEL YOUR WIRES
Carefully label your wires by removing one wire
at a time from the terminal and applying the
corresponding wire label sticker to it.
Your labels may not match - that’s okay! For
example, if you have a W wire, you will apply
a W/E sticker.
Use the chart on the next page to find the correct
wire label to use with each wire.
Label Existing Wires
W/E Y
W/E
Y
G
C
C
G
15
14

* Two transformer systems (separate RC and RH wires),
clip internal jumper located on back of Sensi above
battery compartment.
** Label B as C only if the old thermostat als had a wire in O.
If there is no wire on O-label the wire B.
*** On heat pump sustem with separate W2 and E wires, label
both wire W/E (2 wire in one terminal)
L, F
X, C
wall
wall
wall
wall
wall
wall
wall
G
R, 5, R5, RC, or RH
W, 4, W1
W2 W-U
Y, Y1
Y2
O, B, O/B
W2
Y L
CY2/*W/E O/B
wall
wall
wall
wall
wall
wall
wall
wall
wall
wall
wall
G
RC
Old thermostat
Sensi
™
thermostat
REMOVE EXISTING BASE
Using a screwdriver, remove the thermostat base
from the wall.
TIP: Wrap your wires around a pencil to keep them from
falling back into the wall.
Remove Old Thermostat Base
W/E
Y
C
G
17
16

INSTALL SENSI BASE
Mount the Sensi base using the supplied screws,
drilling new holes and inserting wall anchors, if
necessary. Carefully pull your wires through the
center opening.
Install New Thermostat Base (Sensi 1.5)
Screws
W/E
Y
C
G
CONNECT THE WIRES
Using your screwdriver, loosen the terminal block
screw, insert the corresponding wire and tighten
the terminal screw. You can check your terminal
connection by giving the wire a gentle tug.
Connect Corresponding T-stat Wires
W/E Y G C
W/E
Y
G
C
19
18

REMOVE BATTERY TAG AND ATTACH FACEPLATE
Make sure to tuck the wires into the wall, keeping
them flush. Push the faceplate until it snaps into
place and is secure.
Remove Battery Tag and Attach Faceplate (Sensi 1.5)
TURN ON POWER
Turn on the power to the heating and air
conditioning system at the furnace or fuse box.
Turn Off Power to Your System
21
20

CONFIGURE THE THERMOSTAT
After installation, configure the thermostat to
the appropriate system type. Press “Menu” on
the thermostat and refer to these menu options
as needed:
Thermostat 1.5
CONFIGURATION MENU ITEMS REFERENCE
No. Menu item Default Options
1 Wireless Setup
Connects Thermostat
to Wi-Fi network
— Connect
2 Fahrenheit
or Celsius
F F
C
3 Outdoor Equipment
Configuration
Cooling or
heat pumps
AC2 AC1 – Conventional
Cooling 1
(Single Stage)
HP1 – Heat Pump 1
(Single Stage)
AC2– Conventional
Cooling 2
(Two-Stage)
HP2– Heat Pump 2
(Two-Stage)
ACO1– No Cooling
4 Indoor Equipment
Configuration
For Gas or
Electric Heat
EL2 GA 1 (Single Stage)
EL1– Electric 1
(Single Stage)
GA2 (Two-Stage)
EL2– Electric 2
(Two-Stage)
5 Reversing Valve
Position
Selects “O”
or “B” Setting
For Heat Pumps Only
O O
B
6 Wireless Radio
Turns Wi-Fi Radio
On/Off
ON On
Off
23
22

CONNECT TO WIFI
On your Sensi thermostat, press (1) Menu, then (2)
Mode to start the wireless radio. When you see
the Wi-Fi icon flash in the top-left corner of the
thermostat, you are ready for wireless setup.
25
24

Warnings
INSTALLER INFORMATION
FAILURE TO READ AND FOLLOW ALL INSTRUCTIONS
CAREFULLY BEFORE INSTALLING OR OPERATING THIS
CONTROL COULD CAUSE PERSONAL INJURY AND/OR
PROPERTY DAMAGE.
WARNING: OUT OF PHASE TRANSFORMERS
On two transformer systems, the transformers MUST
be in phase. Measure the voltage across RC and RH. If
more than 12 Volts AC is present between RC and RH,
then the transformers are NOT in phase.
To correct this condition, reverse the secondary low
voltage connections at either the Heating or Cooling
transformer.
VOLTAGE REQUIREMENTS
Do not use on circuits exceeding specified voltage.
Higher voltage will damage control and could cause
shock or fire hazard.
Thermostat installation and all components of the control
system shall conform to Class II circuits per the NEC code.
To prevent electrical shock and/or equipment damage,
disconnect electric power to system at main circuit
breaker box until installation is complete.
ATTENTION: MERCURY NOTICE
This product does not contain mercury. However,
this product may replace a product that contains
mercury. Mercury and products containing mercury
must not be discarded in household trash. Refer to
thermostat-recycle.org for location to send product
containing mercury.
CAUTION: E5 Alert
If “Call For Service” is displayed on your Sensi
thermostat, and E4 or E5 appears where the room
temperature should be displayed or the backlight is
flashing, please call our support team immediately at
888.605.7131
FOR CALIFORNIA RESIDENTS: WARNING:
This product contains a chemical known to the state
of California to cause cancer and birth defects and
other reproductive harm. .
27
26

www.sensicomfort.com
The Emerson logo is a trademark and service mark and the
Sensi logo is a trademark of Emerson Electric Co.
37-7653001
/