Page is loading ...

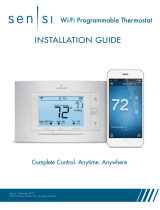
Sensi
TM
Touch Wi-Fi Thermostat
MANUAL OPERATION GUIDE
Models: 1F95U-42WF, ST75
Version: October 2017

2SensiTM Touch Wi-Fi Thermostat | MANUAL OPERATION GUIDE
Manual operation guide
Buttons and Icons 3
Basic Functionality 4
Menu Settings 5
Installation 9
CONTENTS

3SensiTM Touch Wi-Fi Thermostat | MANUAL OPERATION GUIDE
BUTTONS AND ICONS
Current room temperature
The room temperature at
the thermostat.
Time
DIsplays current time.
Current set
temperature
Current set temperature
the thermostat will
maintain.
Mode
Switches system mode
between Heat, Cool, Off,
Aux or Auto.
Fan
Switches fan mode from
Auto or On. Leave the fan
mode on Auto to allow the
thermostat to control the fan
as necessary.
Humidity
Displays current humidity
Menu
Access thermostat
configurations.
(See page 5 for more details).
Up arrow
Adjusts the temperature
set point or thermostat
configuration.
Down arrow
Adjusts the temperature
set point or thermostat
configuration.

4SensiTM Touch Wi-Fi Thermostat | MANUAL OPERATION GUIDE
Switching system mode
Press the mode button (see buttons and icons) to switch
between all available system mode settings. When the mode is
“Off” the thermostat will not bring on your heating or cooling
systems.
Fan mode
If you want to circulate the indoor blower, you can switch fan
mode to “On.” Turn the fan back to “Auto” when you want the
thermostat to control your indoor blower as necessary. Leaving
the fan in “On” will run your blower continuously.
Holding one temperature
If you want to hold one temperature, turn Schedule “Off.” Then,
adjust the set point using the up and down arrow buttons. The
thermostat will hold this temperature, in the set system mode,
until you turn Schedule back “On” or until you adjust the set
point again using the up and down arrow buttons.
Temporary hold
When your Schedule is “On,” your Sensi thermostat controls
your home based on the time and temperature settings in the
current schedule. To temporarily change your temperature, use
the up and down arrows in the app or on the thermostat. Your
Sensi thermostat will display the time it will hold for next to
the set temperature. It will hold your new temperature until
the next scheduled set point with a minimum hold time of two
hours.
BASIC FUNCTIONALITY

5SensiTM Touch Wi-Fi Thermostat | MANUAL OPERATION GUIDE
Menu settings
You can access several settings and options about your thermostat in
the menu.
Note: The “Time Setup” sub menu will only be available when Wi-Fi is
turned “off.”
SLEEP MODE
You have the option to display the room temperature even when the
Sensi Touch screen goes to sleep. Simply toggle your selection from
this menu.
BACK GLOW
This light can be used to help you see your wiring and terminals when
installing the thermostat on the wall. The switch is on the thermostat
base. Be sure to turn the light to “off” before snapping the thermostat
face to the base.
After installation, you have the option to toggle the back glow on and off
from the thermostat menu to help light the area near the thermostat.
Note: The back glow switch on the thermostat base must be in the “off”
position for this feature to work via the thermostat menu.
MENU SETTINGS

6SensiTM Touch Wi-Fi Thermostat | MANUAL OPERATION GUIDE
HOME SCREEN CONTENT
Toggle what you want to see on the display from this menu.
You can display the current time, humidity or change from
Fahrenheit to Celsius.
WIFI
The Sensi app will instruct you how to connect Sensi to
Wi-Fi, and you will use the “Set up a new network” for this.
You can also turn Wi-Fi on or off at any time.
TURN WIFI OFF
If connecting to Wi-Fi is not an option, you can turn off
Wi-Fi on the thermostat and manually set a time and a
schedule from the unit.
• Press Menu.
• Press Wi-Fi.
• Toggle Wi-Fi “Off.”
• Press the back arrow to return to the main screen.
MENU SETTINGS

7SensiTM Touch Wi-Fi Thermostat | MANUAL OPERATION GUIDE
Schedule
If your Sensi Touch is connected to Wi-Fi, the schedule is programmed
based on time and temperature set points from the Sensi app. If you are
not connected to Wi-Fi, you can set a basic schedule with 4 points from
the unit.
Setting a schedule on the unit
• Turn Wi-Fi “Off.” (See page X.)
• Go back to the main menu options.
• Select “Schedule.”
• Make sure “Schedule” is toggled “On.”
• Select which day grouping you want to edit: weekdays or weekend.
• Select which set point you want to edit.
• Adjust the set point using the up and down arrows.
• “Save” when you have the set point to your desired time
and temperature.
• Use the arrow in the upper left hand corner to return to the set points.
• Continue to edit the set points as you desire.
• Use the arrow in the upper left hand corner to return to
“Schedule” screen.
MENU SETTINGS

8SensiTM Touch Wi-Fi Thermostat | MANUAL OPERATION GUIDE
Time setup
If you have Wi-Fi turned “Off” you will be able to set the date and
time on the thermostat. If you’re going to connect Sensi to Wi-Fi,
the date and time will be automatically generated based on your
time zone.
• Select the date or time to edit them.
• Adjust the date or time using the up and down arrow buttons.
• Press “Save” when you’re done.
• Use the arrow in the upper left hand corner to return to the
previous screen.
About thermostat
This menu displays a quick glance at your thermostat information.
It includes your model number, MAC ID (uniquely identifies your
thermostat), build date, firmware version, technical support contact
information, and a factory reset button.
Pressing the factory reset button will change all settings back to
default (except for the HVAC Equipment settings) and clear any
HomeKit pairing so someone else can connect the Sensi Touch
to Wi-Fi.
MENU SETTINGS

9SensiTM Touch Wi-Fi Thermostat | MANUAL OPERATION GUIDE
Set up HVAC equipment
This allows you to change a series of settings to customize the thermostat for your specific system. Refer
to the chart below for a complete listing of thermostat configurations and what they stand for. If you are
installing the thermostat on the wall for the first time, we highly recommend that you download the Sensi
app and follow the installation instructions.
INSTALLATION
Menu item Options
Outdoor Equipment
Configuration
AC1 Conventional Cooling 1
(Single Stage)
AC2 Conventional Cooling 2
(Two-Stage)
HP1 Heat Pump 1 (Single Stage)
HP2 Heat Pump 2 (Two-Stage)
ACO No Cooling
Indoor Equipment
Configuration
For Gas or
Electric Heat
GA 1 Gas, oil, propane furnaces
or boilers (Single Stage)
GA 2 Gas, oil, propane furnaces
or boilers (Two Stage)
EL1 Electric furnaces (Single Stage)
EL2 Electric furnaces (Two-Stage)
FAN No Heating
Reversing Valve Position O Heat pump – O/B
is always energized
in Cool.
B Heat pump – O/B
is always energized
in Heat.
6 Zone valve setting.
* If you have a heat pump,
you’ll most likely have a
wire in O/B.
** If you have two stages,
you’ll have a wire in Y2.
* If you have two stages,
you’ll have a wire in W2.
* If you’ve installed your
Sensi Touch to a heat
pump, and your system
is producing warm air
in “Cool” and cool air in
“Heat,” you may need to
change your Reversing
valve position to either
O or B.
** There must be a wire in the O/B terminal for this configuration to affect
your HVAC system. If there is no wire in the O/B terminal, simply leave the
default setting as “O.”

10SensiTM Touch Wi-Fi Thermostat | MANUAL OPERATION GUIDE
Wiring terminals
TERMINAL OUTPUTS AND WIRING DIAGRAMS
Does wire color correspond to the thermostat terminals?
Wire color does not always correspond to the thermostat letters. A white wire may be attached to the “W”
terminal on the old thermostat, or it may be attached to a different terminal with a different letter. Be sure
to take a photo of the old thermostat that shows the wire colors and terminal letters before labeling and
removing any wires.
INSTALLATION
TERMINAL LABEL DEFINITION
RH* Power for heating, 24V
RC* Power for cooling, 24V
C** Common wire, 24V
G Indoor blower (fan)
Y First outdoor stage cooling on conventional systems or first heat and cool on heat pump
systems
Y2 Second outdoor stage cooling on conventional systems or second heat and cool on two stage
heat pump systems
W/E First indoor stage heat on conventional systems or first stage auxiliary/emergency heat on heat
pump systems
W2 Second indoor stage heat on conventional systems or second stage auxiliary/emergency heat on
heat pump systems
O/B Changeover (reversing valve) connection for heat pump or zone panel systems

11SensiTM Touch Wi-Fi Thermostat | MANUAL OPERATION GUIDE
INSTALLATION
Thermostat base
Back glow switch
Switching this “On” illuminates the thermostat base.
Make sure you switch this to “Off” after installation
so you can still operate this feature from the
thermostat display.
RH/RC jumper
Only clip this if you have separate RH
and RC wires coming out of the wall. This
indicates a two-transformer system.
©2017 Emerson Electric Co. All rights reserved.
/