Page is loading ...

64150WAL15L1-5C Section 61182007L1-5, Issue 3 1
C A U T I O N
C A U T I O N
!
SUBJECT TO ELECTROSTATIC DAMAGE
OR DECREASE IN RELIABILITY.
HANDLING PRECAUTIONS REQUIRED.
Section 64150WAL15L1-5C
Issue 3, February 2002
Total Access
®
1500
Swing-Gate Wall Mount Bay
Installation
Trademarks: Any brand names and product names included in this document are
trademarks, registered trademarks, or trade names of their respective holders.
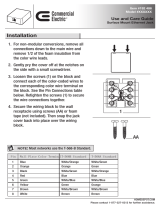
Figure 1. Total Access 1500 Wall Mount Bay
1. GENERAL
This practice provides installation, wiring, and start-
up instructions for the ADTRAN Total Access 1500
Swing-Gate Wall Mount unit, P/N 4150WAL15L1.
This document contains important pre-installation
information. Craft personnel should review the entire
document as part of installation planning.
See Figure 1 for a wall mount installation.
The Total Access 1500 Wall Mount installation
consists of the following components:
• C-frame wall bracket
• Swing-gate equipment bay
• Total Access 1500 chassis with modules, cables,
and documentation
• Power system with power cabinet, rectifiers,
fuses, cables, and documentation (Marconi
V6CAB)
• Backup 12 ampere hour battery pack with cable
• Hardware package
For detailed listing of components and part numbers,
see the Specifications section.
CONTENTS
1. GENERAL ........................................................... 1
2. INSTALLATION ................................................ 1
3. CABLING ............................................................ 4
4. TURNUP.............................................................. 7
5. SPECIFICATIONS .............................................. 8
6. MAINTENANCE ................................................ 8
7. WARRANTY AND CUSTOMER SERVICE .... 8
FIGURES
1. Total Access 1500 Wall Mount Bay.................... 1
2. Wall Mount C-Frame and Swing-Gate Bay
Installation ........................................................... 3
TABLES
1. Hardware .............................................................. 2
2. Local Loop Wiring Chart................................. 5, 6
3. LED Indication .................................................... 8
4. Wall Mount Bay Specifications ........................... 9
Revision History
Issue 3 of this document revises the C-Frame
mounting procedure.
2. INSTALLATION
After unpacking all components, inspect for damage
and missing items. If damage or missing items are
noted, file a claim with the carrier then notify
ADTRAN. Refer to Warranty and Customer Service.
The bay is shipped with the wall mount C-frame and
swing-gate bay separate. The swing-gate bay has the
Total Access 1500 and power & rectifier units factory
mounted and bay wiring factory installed. The battery
pack must be customer mounted and the cable
connected.
LORAIN
®
BATTERY CABINET
STATUS
LOW BATTERY
LVDINHIBIT
BATTERY OK
PCU FAIL
TCU FLIM
PCU OK
PCU FAIL
TCU FLIM
PCU OK
BUSS MANAGEMENT 10A MAX 60V
F1 F2 F3 F4 F5 F6
V3F50
Power
Conversion
Unit
LORAIN
VORTEX
LORAIN
VORTEX
V3F50
Power
Conversion
Unit
VOUT
LOAD
CURRENT
1A= 10mlV
VOUT
ADJ
T
C
F
B
T
C
F
A
A
C
F
O
K
–
+

2 Section 61182007L1-5, Issue 3 64150WAL15L1-5C
Hardware
Field installation hardware required for wall mount
bay assembly is listed in Table 1 and located in the
hardware box.
Wall Mount C-Frame Rack
Determine first if the swing-gate will open from the
left (hinge on the right), or from the right (hinge on
the left). Rotate the C-frame accordingly. Clearance
must be adequate for the swing-gate to open a full 90
degrees. See Figure 2 for wall mount and swing-gate
installation (right-side hinge).
1. The first two pilot holes are vertically 18 1/2
inches apart, center-to-center. If location and
clearances are known, these two pilot holes can
be marked without using the C-frame as a
template, or:
2. Lift and position the C-frame to its designated
location for use as a template for pilot hole
location.
3. Ensuring the C-frame is vertically plumb, mark
where the two keyhole pilot holes will be drilled
for the vertical section of the frame. Set the
C-frame aside.
4. Using a 5/32" bit, drill the two pilot holes at the
marked locations. Ensure the bit penetrates into
the stud behind the backboard.
5. Insert two 1/4" x 1 1/4" lag screws (minus
washers) into the pilot holes until the heads are
3/8" from the backboard.
6. Lift the C-frame into position and capture the
keyhole slots on the two lag screws. Slide the
frame to the end of the slots then slightly tighten
the screws.
7. Hold the C-frame flush against the backboard and
mark the remaining screw holes.
8. Loosen the two lag screws, then remove and set
the C-frame aside.
9. Drill the remaining pilot holes.
10. Reposition the C-frame as in step 6, all screw
holes should align.
11. Secure the C-frame to the backboard with the lag
screws and washers provided.
12. Remove the pilot hole screws, then replace them
including the washers.
NOTE
This document is intended for the installation of
the wall mount bay. Other documentation
included with specific components is not relevant
for the installation process.
Swing-Gate Wall Mount Bay
WARNING
The C-frame wall bracket must be mounted to a
minimum 3/4-inch plywood backboard that has
been securely fastened to wall studs, or secured
to a solid wall, or an arrangement of equivalent
strength.
Customer supplied installation material:
• Appropriate hand tools
• Electric drill
• 5/32" drill bit
Installation includes these main steps:
1. Installing the C-frame wall bracket
2. Mounting the swing-gate equipment bay
3. Mounting the battery pack
4. Wiring
5. Turnup
Specific instructions are provided for each step.
Table 1. Hardware
metIytitnauQ
swercsgal"4/11x"4/19
srehsawtalf"4/19
tlobtovipredluohsxeh"8/32
srehsawtalftlobtovip"8/3*2
swercsdaehnap"2/1x42-21#4
spartseit"45
)dellatsniyrotcaf(TMGpma5.7,sesuF2
.ylnonoitarugifnocdutsllawnidesU*

64150WAL15L1-5C Section 61182007L1-5, Issue 3 3
Swing-Gate Bay
Identify the hinge-side of the bay so it can be lifted in
the correct orientation. Take care not to physically
stress installed wiring during the installation.
WARNING
The swing-gate bay and mounted components,
minus the battery pack, weigh approximately 45
pounds. This may require two personnel to safely
install the bay.
1. Lift and position the swing-gate with the
appropriate hinge pivot bolt holes on the hinge
side.
2. Align the upper and lower hinge pivot bolt
openings and install the upper pivot bolt. No
washer is required. Do not tighten at this time.
NOTE
Both washers install on the bottom pivot bolt.
3. Insert the 2-washer stack between the bottom
swing-gate arm and the bottom angle support. A
small screwdriver can help align the openings.
4. Insert the bottom hinge pivot bolt up through the
bottom angle support, the 2-washer stack, and
screw into the bottom swing-gate arm.
5. Securely tighten both pivot bolts.
6. Check that the rubber latch and latch pin engage.
Battery Pack
The battery pack is designed to install as the bottom
component in the swing-gate bay. It resides about
1/4 inch up from the bottom frame. This correctly
aligns it to the mounting holes and provides the proper
clearance from the power and rectifier unit.
Figure 2. Wall Mount C-Frame and Swing-Gate Bay Installation
Bottom
Pivot
Bolt
2-Washer
Stack
To p
Pivot
Bolt
1/4" x 1-1/4"
Lag Screw
w/Washer*
(Qty 9)
18-1/2"

4 Section 61182007L1-5, Issue 3 64150WAL15L1-5C
WARNING
The battery pack weighs approximately 50
pounds. This may require two personnel to safely
install the battery pack.
1. Fasten the support flanges to the battery pack
chassis at the central location with the small
flange facing towards the rear. Use fasteners
supplied with the battery pack. (ADTRAN
recommends the flanges be positioned at the
center location.)
CAUTION
Ensure a 1-RU high ventilation space (1 3/4"
minimum) exists between the battery pack and
the power & rectifier unit.
2. Manually support the battery pack and insert
from the back of the swing-gate bay.
3. With the battery pack aligned to the mounting
holes, fasten to the backside of the swing-gate
frame with four #12-24 screws.
3. CABLING
Factory Wiring
The units are pre-wired for this installation and
include the following:
WARNING
Fuses should be removed while load connections
are being made.
Power
From the rectifier unit to the Total Access 1500 power
terminals (TB1).
Network
25-foot T1 wire-wrapped cables terminating at five,
8-pin RJ-45 connectors labeled ”A, B, C, D, and P”.
Alarms
From the power & rectifier unit to the Total Access
1500 auxiliary alarm contacts (P14).
Field Installed
For 100-pair cable installation: secure the female
amphenol connectors on the 100-pair cable to their
mating connectors on the Total Access 1500
backplane using supplied tie wraps and the #4
captured screws in the connector.
Local Loop
100-pair, 25-foot cable terminated at four, 25-pair
amphenol connectors on the Total Access 1500
backplane (P1, P2, P3, and P4).
On-Site Wiring
External customer on-site wiring includes the
following:
Local Loop
Connect (punch down) the 100-pair, local loop
customer-side cabling to their designated termination
points. See Table 2 for a complete wiring reference.
Network
Insert the five, network-side RJ-45 modular plugs into
their designated jacks.
Ground
A ground bus bar and ground wire are factory
mounted to the wall-mount bracket. The bus has
multiple terminals for equipment grounding.
WARNING
All grounds must terminate at a known approved
ground location. Check metal-to-metal contact
on all ground connections, ensure ground circuit
continuity. Do not stack terminals.
Local Ground
A #10 ring terminal and fasteners are factory installed
in the ground bus bar for connection to local frame
ground. The ring terminal is sized for crimping a
10-12 AWG stranded ground wire.
Swing-Gate Ground
Connect the trailing end of the installed ground wire
to the swing-gate hinge side vertical support frame. A
masked area on each vertical support frame identifies
recommended ground location. Use an antioxidant
between the terminal and the ground point.

64150WAL15L1-5C Section 61182007L1-5, Issue 3 5
puorGredniBeulB puorGredniBegnarO
riaP
rebmuNroloCR/T
0051AT
#tolS
STOP
lennahC
riaP
rebmuNroloCR/T
0051AT
#tolS
STOP
lennahC
1
etihWT
1A 62
etihWT
7B
eulBR eulBR
2
etihWT
1B 72
etihWT
7C
egnarOR egnarOR
3
etihWT
1C 82
etihWT
7D
neerGR neerGR
4
etihWT
1D 92
etihWT
8A
nworBT nworBT
5
etihWR
2A 03
etihWR
8B
etalST etalST
6
deRR
2B 13
deRR
8C
etihWT eulBT
7
deRR
2C 23
deRR
8D
egnarOT egnarOT
8
deRT
2D 33
deRT
9A
neerGR neerGR
9
deRT
3A 43
deRT
9B
nworBR nworBR
01
deRT
3B 53
deRT
9C
etalSR etalSR
11
kcalBT
3C 63
kcalBT
9D
eulBR eulBR
21
kcalBT
3D 73
kcalBT
01A
egnarOR egnarOR
31
kcalBT
4A 83
kcalBT
01B
neerGR neerGR
41
kcalBT
4B 93
kcalBT
01C
nworBR nworBR
51
kcalBT
4C 04
kcalBT
01D
etalSR etalSR
61
wolleYT
4D 14
wolleYT
11A
eulBR eulBR
71
wolleYT
5A 24
wolleYT
11B
egnarOR egnarOR
81
wolleYT
5B 34
wolleYT
11C
neerGR neerGR
91
wolleYT
5C 44
wolleYT
11D
nworBR nworBR
02
wolleYT
5D 54
wolleYT
21A
etalSR etalSR
12
teloiVT
6A 64
teloiVT
21B
eulBR eulBR
22
teloiVT
6B 74
teloiVT
21C
egnarOR egnarOR
32
teloiVT
6C 84
teloiVT
21D
neerGR neerGR
42
teloiVT
6
D
94
teloiVT
31A
nworBR nworBR
52
teloiVT
7A 05
teloiVT
31B
etalSR etalSR
Table 2. Local Loop Wiring Chart
Continuation on page 6

6 Section 61182007L1-5, Issue 3 64150WAL15L1-5C
Table 2. Local Loop Wiring Chart (continued)
puorGredniBneerG puorGredniBnworB
riaP
rebmuNroloCR/T
0051AT
#tolS
STOP
lennahC
riaP
rebmuNroloCR/T
0051AT
#tolS
STOP
lennahC
15
etihWT
31C 67
etihWT
91D
eulBR eulBR
25
etihWT
31D 77
etihWT
02A
egnarOR egnarOR
35
etihWT
41A 87
etihWT
02B
neerGR neerGR
45
etihWT
41B 97
etihWT
02C
nworBT nworBT
55
etihWR
41C 08
etihWR
02D
etalST etalST
65
deRR
41D 18
deRR
12A
etihWT eulBT
75
deRR
51A 28
deRR
12B
egnarOT egnarOT
85
deRT
51B 38
deRT
12C
neerGR neerGR
95
deRT
51C 48
deRT
12D
nworBR nworBR
06
deRT
51D 58
deRT
22A
etalSR etalSR
16
kcalBT
61A 68
kcalBT
22B
eulBR eulBR
26
kcalBT
61B 78
kcalBT
22C
egnarOR egnarOR
36
kcalBT
61C 88
kcalBT
22D
neerGR neerGR
46
kcalBT
61D 98
kcalBT
32A
nworBR nworBR
56
kcalBT
71A 09
kcalBT
32B
etalSR etalSR
66
wolleYT
71B 19
wolleYT
32C
eulBR eulBR
76
wolleYT
71C 29
wolleYT
32D
egnarOR egnarOR
86
wolleYT
71D 39
wolleYT
42A
neerGR neerGR
96
wolleYT
81A 49
wolleYT
42B
nworBR nworBR
07
wolleYT
81B 59
wolleYT
42C
etalSR etalSR
17
teloiVT
81C 69
teloiVT
42D
eulBR eulBR
27
teloiVT
81D 79
teloiVT
CNCN
egnarOR egnarOR
37
teloiVT
91A 89
teloiVT
CNCN
neerGR neerGR
47
teloiVT
91
B
99
teloiVT
CNCN
nworBR nworBR
57
teloiVT
91C 001
teloiVT
CNCN
etalSR etalSR

64150WAL15L1-5C Section 61182007L1-5, Issue 3 7
Battery Connection
1. Open the battery chassis front panel and ensure
the battery ON/OFF switch is OFF.
2. Remove the rear access panel on the rectifier
shelf. Remove the cable opening dust plug.
3. Connect the 3-foot color-coded battery cable to
the battery terminal (J4) on the rectifier shelf.
4. Connect the opposite end to the color-coded
terminal block on the side panel of the battery
pack chassis.
5. With the cable exiting through the cable opening,
replace the rectifier shelf rear access panel.
Power Connection
1. Connect the supplied power cable to the (IEC
320) AC socket on the rectifier unit rear panel.
2. Secure the cable by tightening the plug clamp
screw.
3. Do not insert the plug into an AC wall outlet at
this time.
4. TURNUP
Turnup assumes that the assigned population of Total
Access 1500 common and channel cards are installed
in the chassis and configured for the designated
network arrangement. If this is not the case then
proceed with accomplishing that task first.
Documentation included with specific components
provides required information.
The following turnup procedure will put the system
online:
1. Check that the power conversion (rectifier) units
(PCUs) are fully inserted in the backplane and
secured with the captured screw on the front
panel.
2. Check or insert the two 7.5 Amp GMT fuses in
fuse positions 1 and 2 in the meter control and
alarm (MCA) front panel.
3. Plug the rectifier unit power cord into a standard
110 Vac grounded wall outlet.
4. Observe the status LEDs on the PCUs. Initially
the red PCU FAIL LEDs will turn ON then go
OFF after about 6 seconds.
5. Listen for a “click” as the alarm relays energize.
6. Observe that the green “OK” LEDs on the MCA
and PCUs turn ON.
7. Open the battery cabinet front panel and switch
the breaker switch to ON. Close the panel.
8. Observe the green Battery “OK” LED ON.

8 Section 61182007L1-5, Issue 3 64150WAL15L1-5C
DELroloCsutatSnoitpircseD
draC)ACM(mralAdnalortnoC,reteM
)KOmetsyS(KOneerGNO.noitarepolamron,sissahcreifitcerotdeilpparewopCA
)liaFCA(FCAdeRNOpukcabfiNOnruttonlliW.wolrodetpurretnitenibacotegatlovtupnI
.dellatsnitonyrettab
)mralAesuF(AFdeRNO.eruliafesufdaolACMynA
sdraC)UCP(tinUnoisrevnoCrewoP
KOUCPneerGNO.noitarepOlamroN
miLruCTwolleYNO.erutarepmetUCPlanretnihgihsetacidnI.timiltnerrucerutarepmeT
.sesaercederutarepmettinulitnutnerrucdecuderedivorplliwUCP
liaFUCPdeRNO.stimiltesrewolroreppusdeecxeegatlovtuptuoUCPsetacidnI
draC)DVL(tcennocsiDegatloVwoLkcaPyrettaB
KOtaBneerGNO.rewopdaolylppusotydaerdna,degrahcylluf,enilnoyrettaB
ssapyBwolleYNO.tcennocsidegatlovwolelbasidotdenoitisophctiwsssapybsetacidnI
liaFtaBdeRNO.timilteserpwolebsllafegatlovyrettabsetacidnI
LED Indication
The documentation included with specific components
includes LED descriptions. Table 3 describes rectifier
unit, and battery LED indication associated with the
turn-up process, and normal or problem operation.
NOTE
Further details for rectifier operations are found
in the Marconi documentation included with the
system.
5. SPECIFICATIONS
See Table 4 for Total Access 1500 Wall Mount Bay
specifications and part numbers.
6. MAINTENANCE
The Total Access 1500 Wall Mount Swing-Gate Bay
does not require routine maintenance after installation.
Check that all mounting fasteners are tight following
any craft action.
7. WARRANTY AND CUSTOMER SERVICE
ADTRAN will replace or repair this product within
ten (10) years from the date of shipment if it does not
meet its published specifications or fails while in
service. Refer to ADTRAN U.S. and Canada Carrier
Networks Equipment Warranty, document
60000087-10.
Contact Customer And Product Service (CAPS) prior
to returning equipment to ADTRAN.
For service, CAPS requests, or further information,
contact one of the following numbers:
ADTRAN Sales
Pricing/Availability
(800) 827-0807
ADTRAN Technical Support
Pre-sales Applications/Post-sales Technical Assistance
(800) 726-8663
Standard hours: Monday-Friday, 7 a.m. - 7 p.m. CST
Emergency hours: 7 days/week, 24 hours/day
ADTRAN Repair/CAPS
Return for Repair/Upgrade
(256) 963-8722
Repair and Return Address
ADTRAN Inc.
CAPS Department
901 Explorer Boulevard
Huntsville, Alabama 35806-2807
Table 3. LED Indication

64150WAL15L1-5C Section 61182007L1-5, Issue 3 9
Table 4. Wall Mount Bay Specifications
lacisyhPstnemelEflehS
NARTDA
rebmuNtraPrebmuNtraP
rebmuNtraP
rebmuNtraPrebmuNtraP
thgieHsehcni61/11-22UILNARTDA1L9010811
htdiWsehcni4/1-62UCSNARTDA1L8000811
htpeDsehcni81UGR/USPNARTDA1L7000811
thgieW.sbL001flehS0051ATNARTDA1L1000811
rewoP 01001231285N/P,BAC6VflehSreifitceRinocraM3013533
stloVzH06,caV02105001231285N/P,pma3,reifitceRinocraM8013533
spmAcaV021@xampmA318001231285N/P,rhpma21,kcaPyrettaBinocraM7013533
latnemnorivnE
erutarepmeTgnitarepOC°56ot°04-
erutarepmeTegarotSC°58ot°04-
ytidimuHevitaleRgnisnednoc-non%59

10 Section 61182007L1-5, Issue 3 64150WAL15L1-5C
/