Page is loading ...

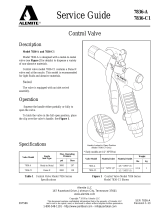
Service Guide
SER 7331
7331
339371
Alemite Corporation
PO Box 473515, Charlotte, North Carolina 28247-3515
www.alemite.com
Copyright
©
1998 by Alemite Corporation
This document contains confidential information that is the property of Alemite Corporation
670768
and is not to be copied, used, or disclosed to others without express written permission.
Revision (9-98)
10 "
(25.4 cm)
8-3/8 "
(21.3 cm)
9-11/16 "
(24.6 cm)
0.53 "
(13.5 mm)
Dia. Typ.
End Panel
Side Panel
9 "
(22.9 cm)
23-1/2 "
(59.7 cm)
Description
Caution
The top surface (mounting
plate) of the shield assembly
must be installed at a height
no greater than 20 feet (6.1 m)
from the floor to comply with
the hose reel warranty.
This shield is designed to
encase heavy-duty hose reel
models 7334-D, 7335-D, and
7336-D. Refer to Service Guide
SER 7334-D
for details on the
reels.
The shield mounts as a single
unit or in banks of as many as
required. Banked shields butt
against one another to utilize the
minimum amount of space. See
Figure 4
.
Models 7331 and 339371
Refer to
Table 1
for details on
the models required for proper
installation.
Shield for Heavy-Duty Hose Reel
Figure 1
Shield Kit Model 7331 and End Panel Kit Model 339371
Model Description Major Components Included
7331 Shield Kit Two (2) side panels, mounting plate, and alignment bracket for multiple reel installation
339371 End Panel Kit Two (2) end panels
339368 Strut *
* Use with single reel installations only
Table 1
Model Description and Components
1-800-548-1191-http://[email protected]

SER 7331
Shield for Heavy-Duty Hose Reel
Revision (9-98) 2 Alemite Corporation
Use with
single reel
only
a
4
3
2
NOTE: Sheave assembly removed
in portions of the illustration for clarity.
1
8
1
6
7
3
4
4
V
4
4
3
THIS SIDE UP
3
Use with
multiple reels
5
Figure 2
Shield Kit Model 7331 (End Panel Kit Model 339371 - Opposite Page) - Exploded Views
1-800-548-1191-http://[email protected]

Shield for Heavy-Duty Hose Reel
SER 7331
Alemite Corporation 3 Revision (9-98)
11
9
A
10
Make sure to orient the Grommet
so it "snaps" into the slot
A
Item No. Part No. Description Qty Notes
Numeric Order
Part # (Item #)
1 339379 Panel, Side 2
Shield Kit
11595
(7)
2 Plate, Mounting 1
339362
(5)
3 Screw, Serrated Washer, 1/4 " -20 x 3/4 " 6 339368 (a)
4 Nut, Serrated, 1/4 " -20 6
339373
(2)
5 Bracket, Alignment 1
339374
(3)
6 Clamp (w/ Label) 1
339375
(4)
7 Bolt, 3/8 " -16 x 7/8 " 2
339376
(8, 11)
8 Screw, Tapping 4
339377
(10)
9
Panel, End
2
End Panel Kit
339379 (1)
10 Grommet, Screw 8
339380
(9)
11 Screw, Tapping 8
339381
(6)
Strut for Single Reel Installation
a 339368 Strut 1
Legend
:
Part numbers left blank (or in
italics
) are not available separately
1-800-548-1191-http://[email protected]

SER 7331
Shield for Heavy-Duty Hose Reel
Revision (9-98) 4 Alemite Corporation
Hold hose reel
firmly and squarely
against stop on
mounting plate while
tightening bolts.
NOTE: Sheave removed for clarity.
Mounting Plate
Reel Assembly
Clamp
Bolt
Hold hose reel
firmly and squarely
against stop on
mounting plate while
tightening bolts.
Access hole
for connecting hose
Figure 3
Reel Assembly Installation into Mounting Plate - Bottom View
Installation
NOTE
: Refer to
Figure 2
for component identi-
fication on the installation procedures.
WARNING
Read each step of the instructions carefully.
Make sure a proper understanding is achieved before
proceeding.
NOTE
: The following is written for a multiple
reel installation unless otherwise noted.
Attachment of Mounting Plates (
2
) to metal fram-
ing channels or other suitable structure will vary.
Refer to
Figure 4
for a typical installation.
The Mounting Plates can be installed with the
connecting hose openings on opposite sides. This
allows the distribution lines to route on both sides
of a bank.
IMPORTANT: Make sure to orient each Mounting
Plate so the connecting hose opening is in align-
ment with the distribution line.
1. Install Mounting Plates (
2
) to metal framing channels or
other suitable structure (mounting hardware not included).
• Do not tighten the hardware at this time
2. Install Screws (
3
) and Nuts (
4
) that align the
Mounting Plates to each other.
• Tighten the Screws securely.
3. Tighten the mounting hardware securely.
4. Slide each reel assembly into the track slots of the
Mounting Plate. See
Figure 3
.
IMPORTANT: Make sure the reel assem-
bly seats squarely against the stop.
5. Install each Clamp (
6
) to the Mounting Plate with
Bolts (
7
).
• Hold the reel assembly firmly against the stop
while tightening each Bolt.
6. Check to ensure the reel assembly is secure to the
Mounting Plate.
NOTE
: The following step is for a single
reel installation only.
7. Secure Strut (
a
) to the Mounting Plate and reel
assembly with Screws (
3
) and Nuts (
4
).
• Tighten the Screws securely.
8. Install Alignment Brackets (
5
) [observe THIS SIDE
UP] between each reel assembly with Screws (
3
)
and Nuts (
4
).
• Tighten the Screws securely.
9. Follow the procedures for assembling the hose reels
within Service Guide
SER 7334-D.
• See the section entitled
In the Shield.
1-800-548-1191-http://[email protected]

Shield for Heavy-Duty Hose Reel
SER 7331
Alemite Corporation 5 Revision (9-98)
V
Typical installations
for a single reel
Framing Channel
Figure 4
Shield Installations - Typical
Changes Since Last Printing
Initial Release
10. Insert the tabs of Side Panels (
1
) into the slots on the
Mounting Plates.
11. Secure the Side Panels to the reel assembly with Screws
(
8
).
• Do not overtighten the Screws.
12. Secure each End Panel (
9
) to the end Side Panels with
Screws (
11
) and Screw Grommets (
10
).
• Make sure to orient the Screw Grommets properly.
See
Figure 2
.
• Do not overtighten the Screws.
1-800-548-1191-http://[email protected]

Revision (9-98) 6 Alemite Corporation
SER 7331
Shield for Heavy-Duty Hose Reel
1-800-548-1191-http://[email protected]
/