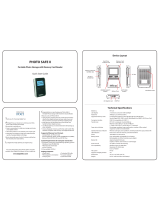
Page is loading ...

Thank you for choosing Digital Foci.
Please use this Quick Start Guide to get started with
your Image Moments 6.
For more detailed explanations on how to use your
Image Moments 6, refer to the included User's Guide.
Let Digital Foci help Optimize your Digital Living.
At Digital Foci, our mission is to enhance your life by
smart usage of digital technology.
We promise to provide you:
Easy-to-use products to help you manage and enjoy
your digital content
Attractive products to accentuate your unique style
Education and support to help you understand the
quickly changing digital technology
We aim to provide you a level of customer satisfaction
that exceeds your expectations.
Congratulations on purchasing your Image Moments 6 -
5.7” High-resolution Digital Photo Frame. Here are some
of the features that make Image Moments truly unique:
Superior image quality
- VGA (600x480) digital LCD with contrast ratio of 300:1
- Leading technology LCD with LED backlight
Absolutely no computer required:
- Copy photos directly from memory card to device
- Manage files with copy, rename, delete functions
Selective playback:
- Select specific photos for unique slideshow playback
- Specify playback from a single or multiple memory sources
- Play selected folder contents in Folder View
- Directly create, edit, and sequence playlists on device
Automatic photo orientation:
- Photos are rotated automatically based on EXIF data
- Automatic adjustment to portrait or landscape placement
For more information about Image Moments 6 and
other products from Digital Foci, please visit our website at:
www.digitalfoci.com
Supported Memory Card Formats:
CompactFlash, Secure Digital, SDHC, MultiMedia Card,
Memory Stick, MS PRO, MS Duo/PRO Duo, xD-Picture Card
(miniSD, RS-MMC, microSD, MMCmicro, M2 with adapter)
Supported File Formats:
Image format: JPEG (up to 35MP), BMP, TIFF, GIF,
RAW (from select DSLR cameras)
Video formats: MJPEG, MPEG-1, MPEG-4 SP
Audio format: MP3, AAC, WMA
Device Layout
Getting Started with Image Moments 6
Package Contents:
Back View
Joystick &
Control Buttons
Stereo Speakers
Memory Card
Slots
USB Port
to Computer
Easel Leg
Image Moments 6
Remote control
AC power adapter
USB cable
User’s Guide
Quick Start Guide
Bottom View
Power LED
Indicator
Audio Out Jack
Power
Adapter Jack
Reset Button
Power Button
Security Lock
Slot
Front View
Remote Control Sensor
Digital LCD Display Area
Remote Control
Go to Setup
Random
Toggle
Directional
Buttons
Repeat Toggle
Power
Go to Playlist
Go to Home
Select/
Enter/Stop
Date/Time
Menu
Transition
Info
Play/Pause
Navigate directory
Skip page
Value change
Volume change
Zoom in/out
4 directional buttons:
Move cursor
Push joystick (ENTER):
Execute action
Select/deselect highlighted item
Stop playback - return to selection
Show/Close
Menu
Start/Pause
Playback
Controls
On-Device Control Buttons & Joystick
Quick Start Guide
Image Moments 6
5.7” Digital Photo Frame

Version 1.0.1-R0
Playing Photos from a Specific Folder
Utilize Folder View to play slideshows of specific collections
organized in different folders.
1. From the Home Screen, select Folder under Browse Mode.
2. Navigate to and select the specific folder you wish to play.
To go into a folder, highlight the folder and press +.
To return to the previous folder level, press – .
To select a folder, highlight that folder and press ENTER.
The selected folder is shown with an X in the checkbox
to the left of the folder name.
3. Next, press + to enter that folder. You will see that all files
in that folder are selected.
4. Press PLAY to start playing all files in the selected folder.
NOTE: With the default setting BACKGROUND MUSIC - ON,
all music files located in the selected folder will play in the
background along with the photo slideshow. If there are no
music files in that folder, Image Moments will play all available
music files stored on the Internal Memory in the background.
NOTE: Only the files located in the level of the selected folder
are available for playback. Files in the subdirectories (files
inside folders within the selected folder) can only be played
by navigating into that subdirectory.
Getting Image Moments Ready for Use
Setting Up the Frame
To set up frame, extend the Easel Leg by rotating it away from
the device. You can position the frame in either landscape or
portrait orientation. If you would like the frame to have a
steeper viewing angle, adjust the Easel Leg towards the device.
Powering Image Moments
1. Plug the AC power adapter into the Power Adapter Jack,
located under the Easel Leg of Image Moments.
2. To turn on Image Moments, press either the Power Button
on the back of the device or on the Remote Control. The
Power LED will turn green and the Digital Foci splash screen
will appear while the device initializes and powers on.
3. To turn off Image Moments, press and hold either the
Power Button on the back of device or on the Remote
Control for 5 seconds.
Activating the Remote Control
1. Slide out the battery tray on the back of the Remote Control.
2. Insert the supplied battery into the battery tray with the
text side facing up.
3. Slide back the battery tray. The remote control is ready to use.
For best results, point the Remote Control towards the
Remote Control Sensor on the front corner of Image Moments.
Copying Photos from Computer to Internal Memory
Connecting Image Moments to your computer:
Connect Image Moments to your computer with the included
USB cable. Image Moments will display a computer “Connect”
icon on its screen. Your computer will automatically recognize
Image Moments and show 4 removable devices.
The devices will be listed in this sequence: (Drive letters may vary)
(E:) CF card slot (shown as a removable disk)
(F:) SD/MMC/xD card slot (shown as a removable disk)
(G:) MS/PRO/Duo card slot (shown as a removable disk)
(H:) Image Moments Internal Memory (labeled ‘FRAME’)
with capacity of 450 MB
Copying files from computer to Image Moments:
You can access these 4 devices just as you would any other drives
on your computer. You can transfer files from your computer to
the Internal Memory of the Image Moments by copying the files
into the drive labeled ‘FRAME”.
Selecting Specific Photos To Play
You can browse through your photos and select specific files to
play in a photo slideshow.
1. From the Home Screen, select Photo Mode to access Photo
Icon View. The selected photos are shown with a solid
blue box around the photo thumbnail.
2. You can also browse through you photos by file name under
List View. Under List View, the selected photos are shown with
an X in the checkbox to the left of the file name. To switch to
List View, press MENU, select View Mode, and select List View.
3. To select or deselect a photo, use the directional buttons or
joystick to move the cursor over to that photo and press ENTER.
4. To select/deselect all photos, press MENU, select Selection,
and select Select All/De-Select All.
5. Press + / – to skip to the next / previous page.
6. Once you have made the selection of the photos to you want to
view, press PLAY to start the slideshow of the selected photos.
Make sure to press PLAY with the cursor highlighting a selected
file.
Playing a Photo Slideshow
The default setting on Image Moments is AUTO START - PHOTO.
This means that Image Moments will automatically start playing
all photos stored on the Internal Memory in a slideshow when the
device is powered on.
You can also start the slideshow manually. To do so:
1. Press the ENTER/STOP button or HOME on the Remote Control
to go to the Home Screen.
2. Under Playback Sources, select the memory source(s) you wish
to play from. By default, all available sources (Internal Memory
and inserted cards) will be automatically selected.
3. Next, select Photo under Browse Mode.
4. The screen will display thumbnail images of all your photos in
alphabetical order regardless of which memory location they
are stored. By default, all photos will be selected.
5. Press PLAY to start the slideshow of all the photos.
NOTE: To add background music for the slideshow, simply copy
your own music files to the Internal Memory or memory card.
With the default setting BACKGROUND MUSIC - ON, all music
files available will play in the background along with your photo
slideshow.
Changing Slideshow Options
To change the slideshow settings on-the-fly during a slideshow:
Press RIGHT/LEFT to increase/decrease the time interval
between each photo from 1 second up to 24 hours.
Press TRANSITION on the Remote Control to change the
screen transition effect. You can also press MENU and select
Transition Effects to make your selection.
Press RANDOM on the Remote Control to toggle between
Random On and Random Off.
Press REPEAT on the Remote Control to toggle between
Slideshow Repeat On and Repeat Off.
Press MENU and select Display Settings to show or hide each
of the following: EXIF Information, File Counter, and File Name.
You can also press INFO on the Remote Control to toggle the
File Counter and File Name settings.
Press PLAY/PAUSE to pause/resume the slideshow.
Press DOWN/UP to manually scroll to the next/previous photo.
Press ENTER/STOP to stop the slideshow and return to
Photo Icon View or Photo List View.
Browse Mode: Select Photo, Video, Photo/Video, Music, or Folder Mode.
Photo Mode, Video Mode, Photo & Video Mode, Music Mode
When Photo, Video, Photo/Video, or Music Mode is selected, Image Moments will scan through the selected
Playback Sources and show only the Photo, Video, Photo and Video, or Music files. By default, all of the files will
be listed in alphabetical order regardless of of which memory location they are stored.
From the Icon/List View, you can then press PLAY to play all the Photo, Video, Photo and Video, or Music files.
You can also browse through the files and select specific files to play.
Folder Mode
When Folder Mode is selected, Image Moments will show the Folder View screen.
In Folder View, you can navigate through the directory on the Internal Memory and inserted memory cards.
Utilize Folder View to play slideshows of specific collections organized in different folders.
Playback Sources: Select desired memory source(s) to playback.
You can select to playback from a specific memory source, or any combination of memory sources (Internal Memory
and inserted memory cards) at the same time. By default, all available memory sources will be automatically selected
and shown with an X in the checkbox next to its corresponding icon.
Home Screen Navigation Keys:
Press UP/DOWN to jump to Previous/Next Navigation Section
Press LEFT/RIGHT to move cursor within each Navigation Section
Press ENTER to select/deselect item
Device Management: Access File Copy Mode, Playlist Manager, and Setup Screen.
Copy to Frame: Copy files/folders from memory card to Internal Memory, from Internal Memory to memory card,
or from one memory card to another memory card.
Playlist Manager: Create, edit, sequence playlists and select a playlist to play.
Setup: Set auto-start options, slideshow settings, screen brightness, system clock, and on/off timer.
Main Navigation Screen & Overview
Inserting a Memory Card for Playback
By default, Image Moments is set to play an automatic photo
slideshow of photos stored on its Internal Memory. To stop
the slideshow, press the ENTER/STOP button or HOME on
the Remote Control to go to the Home Screen.
Insert your memory card in the designated memory card slot
with the label side facing towards the back as shown below.
Once recognized by Image Moments, the inserted card will
automatically be added and shown with an X in the checkbox
next to its corresponding icon under Playback Sources.
Note: To eject the CF card from the card slot, press the square
black button at the bottom of the CF card slot.
To eject the SD/MMC/xD card from the card slot, press down
on the card and the card will pop-up for easier removal.
1
3
2
1
3
2
CF Card
Eject Button
Compact Flash
SD/MMC xD
Memry Stick /
MS Pro / MS Duo
Get Technical Support
Visit www.digitalfoci.com/support to get answers to FAQs,
email [email protected], or call toll-free 1-888-669-3624.
Learn More
Read the User’s Guide to learn about other features, such as how to:
Set Auto-Start and Slideshow Options
Set system clock and on/off timers
Zoom, pan, and rotate photos
Copy, delete, rename files/folders, create new folders
Copy between memory cards and Internal Memory
Create, edit, and select playlist
Connect Image Moments to external speakers
Utilize security lock slot
Register your Product
Visit www.digitalfoci.com/registration to register your product.
You will be notified about any available firmware updates and
other important information about your Image Moments.
/