Front console W/o Floor Shift
A professional is recomened for
all TMI Products installs
Chevy Bel Air 55-57
Tools needed:
PN 99-0704-000
QP 09-317 REV. 01
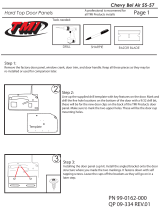
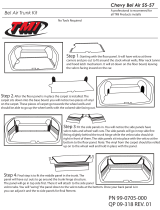
Step 1: The TMI Products
Center console will simply sit in
between your two bucket seats.
It will slide up underneath
the dash. If you have a oor shifter
please see page 2.
Step 2: Once your TMI Products center console is located
in it nal position you will lift and remove the bucket in the
center console storage compartment. There you will see a tab
Resting on the transmission tunnel/oor pan. You will drill
two metal screws through the holes in that tab into the trans
tunnel/oor pan. Please make sure you have clearance on
the other of the tunnel/pan for the screws.
PHILLIPS SCREWDRIVER
TAPE
RAZOR BLADE
Cut Off wheel
1
2

Front Console W/ Floor Shift
A professional is recomened for
all TMI Products installs
Chevy Bel Air 55-56
Page 2
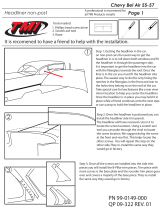
Step1: You will rst have to remove your shifter. This is so
that we can lay the console over the shifter location.
Step 2: Using masking tape you will mark the shifter hole
location on the oor board. You will then set the console back
down over the shifting linkage. You will use the tape on the
tunnel to trace into the topside of the console. Double check
with the supplied shifter boot on length your diminsions should
be no more than 8 1/2 front to back and 5 1/2 left to right. If the
boot is longer than your lines the lengthen you lines for the cup.
Just remeber the tape on the oor board is there to give the
minimal length needed for your linkage.
Step 4: Once the guide holes are drilled, cut an “X” on the vinyl to
each guide hole so you can peel the vinyl back and tape each vinyl
triangle into place reveling the ber glass
Step 3: Next you will need to drill guide holes. using your
masking tape lines drill holes at the corner of your
measurment. Start with a 1/8th inch bit the go up to a 1/4 inch
bit. Hold the vinyl at each side so the drill bit does not pull the
vinyl from the berglass.
TAPE
TAPE
TAPE
TAPE
Tape
Tape
Tape
Tape
1
2
3
4
Floor
Board

Step 5: Once you have pulled back the vinyl
you will need to cut the ber glass. The best way
to do this is to use a cut o wheel to cut at all four
corners where your guide holes should be drilled you
will cut from each guide hole to the other.
Step 6: after the ber glass has been cut
you can now Re-Install your shifter linkage.
You will put the TMI Products center
console over your shift linkage. Then with the
center console in you will stick your shifter
through the console and attach it to the linkage.
Then slide the shift boot down the
shifter into place on the console. Installing your shift
knob last. View page 1 step 2 for nal step.
Tape
Tape
Tape
Tape
5
6
Front Console W/ Floor Shift
A professional is recomened for
all TMI Products installs
Chevy Bel Air 55-56
Page 3
/
