Page is loading ...

Headliner non-post
A professional is recomened for
all TMI Products installs
Chevy Bel Air 55-57
Tools needed:
PN 99-0149-000
QP 09-322 REV. 01
Step 1: Getting the headliner in the car.
on non-post cars the easist way to get the
headliner in is to roll down both windows and t
the headliner in through the passenger side.
It is important to get the headliner into the car
with the berglass towards the roof. Once the
liner is in the car you must t the headliner into
place. The easiest way to do this is by lining the
notches in the berglass in the front and rear to
the holes they belong to on the roof of the car.
Take special care for key features like a rear view
mirror location to help you center the headliner.
Once the headliner is in place you may hold it in
place while a friend continues onto the next step
or use a prop to hold the headliner in place.
Step 2: Once the headliner is postioned you can
install the headliner side trim panels.
The headliner will have recessed cuts in it to
locate the screw locations. Using a scratch awl
tool you can poke through the vinyl to locate
the screw location. We suggest doing the screw
at the front and rear rst. This helps locate the
other screws. You will repeat this step on the
other side.They re-install the same way they
would go in factory
Step 3: Once all the screws are installed into the side trim
pieces you will install the B-Pillar trim pieces. Trim piece with
more curves is the base plate and the rounder trim piece goes
over and covers a majority of the base piece. They re-install
the same way they would go in factory
Page 1
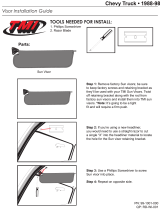
1. Phillips head screw driver
2. Scratch awl tool
3. Razor
1
2
3
It is recomened to have a friend to help with the installation.

Headliner non-post
A professional is recomened for
all TMI Products installs
Chevy Bel Air 55-57
Page 2
Step 4: After the B-Pillar
trim pieces are installed
you can now re-install the
rear window trim piece.
This piece goes in the
same way it would from
factory. Like the side trim
pieces we recommend that
you use a scratch awl tool to nd the screw holes. Once the
holes is found start at the two corner screws and work your
way inward. Doing it out side to inside helps line up the
other screw holes.
Step 5: Once the rear window trim
piece is installed you can install
the A-Pillar trim piece. They
re-install the same way they would
go in factor securing the bottom
screw rst. The top screw you will
need to use scratch awl tool to
locate the screw hole location on
the other end of the vinyl.
Step 6: The nal piece of trim work to
install is the trim pieces at the front of
the headliner that will be placed in
between the A-Pillar trim pieces and
the rear view mirror area. They re-install
the same way they would go in factory.
Using the Scratch awl tool locate the
screw holes and simply screw them
into place.
Step 6: Re-installing Rear view mirror, sunvisors and dome lights.
For the rear view mirror and sunvisors using the scratch awl tool
locate the screw holes and install them the same as factory.
For the dome lights locate the domlight location and cut a small
“X” at the vinyl. Using the scratch awl tool locate the screw holes
and t the dome light in and screw it in.
4
5
6
/
