Page is loading ...

Rear quarter panels for post cars
Chevy Bel Air 55-57
Page 1
PN 99-0152-000
QP 09-326 REV. 01
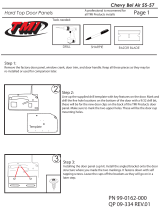
Step 2: Installing the two “L” brackets onto the inner quarter structure.
There are tabs in a recessed area next to the door jam. The “L” brackets
will hang over this recessed area. The rst “L” bracket goes 8 in from the
oor up . The second “L” bracket will go 16 in up from the oor.
seventh tab. They will be fastened with the supplied self tapping screws
make sure the open hole is facing the door jam.
PHILLIPS SCREWDRIVER
PHILLIPS SCREWDRIVER
RAZOR BLADE
DRILL
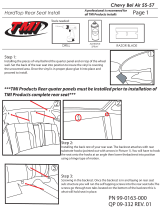
Step 1: Remove the quarter window trim piece on the inside of the
car. It removes with 5 screws and is re-used for the instalation.
Step 3A: Fit the panel onto the its mounting area. Take note of where
your new tabs are installed. Using a piece of masking tape run it from
your tab all the way around to the door jam so you have a marked
location for the tabs while they are underneath the quarter panel.
1
2
3A
Scratch and Awl
Modication to parts and car is
required, professional help may be needed

Rear quarter panels for post cars
Chevy Bel Air 55-57
Modication to parts and car is
required, professional help may be needed
Page 2
Step 4: Installing the window crank after the panel has been mounted.
There will be a bulge on the insert of the panel. You will cut a small “X” on
top of the bulge as that is your window crank shaft. Each slash of the X
will be no longer than a 1/2 in. Once cut you can push the vinyl back
over the crank shaft and install the window crank.
Step 5: The nal step of assembly is to Re-install the rear quarter
window trim piece. It is fastened down with the same ve screws
that were unfastened in the begging. once this piece is installed
you can install window crank onto the window crank shaft.
Step 7: repeat steps 1-6 for opposite side.
RAZOR BLADE
DRILL
Step 3B: Drilling holes into the vinyl. Run masking tape from your tab
locating tape on the door jam over the panel. using a 1/8th bit
drill a hole through the vinyl and and berglass. locate the tabs
mounting holes with a scratch and awl tool. once the holes are
located you can fasten the screws into the brackets behind the panel.
4
3B
Scratch and Awl
5
/
